XLR to iMac connections are a great way to get the most out of your microphone, and can be easily accomplished with the right setup. Whether you’re a podcaster, musician, or audio engineer, connecting an XLR microphone to your iMac is a great way to record high-quality audio directly into your computer.
To connect an XLR microphone to your iMac, you’ll need an audio interface—a device that allows you to connect external devices like microphones and instruments directly into your computer. There are many different options for audio interfaces, ranging from budget-friendly models to professional-grade units. It’s important to choose one that has the appropriate inputs for your microphone. Most iMac compatible audio interfaces have at last one XLR input for connecting a standard dynamic or condenser microphone.
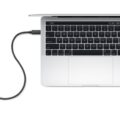
Once you have chosen an audio interface that fits your needs, it’s time to connect it to your iMac. Depending on the model you have chosen, there are several ways you can do this. Many modern interfaces use USB-C or Thunderbolt ports which can easily be connected directly into the back of your Mac with the included cables. If your interface doesn’t have one of these ports then it may require a USB A port connection which can be achieved using an adapter cable if necessary.
Once everything is connected and powered up, all you need to do is select the correct input inside whatever recording software you are using (GarageBand or Logic Pro X are popular choices). If everything has been set up correctly then you should see levels being registered as soon as you speak into the microphone. You should also hear sound coming through when monitoring back through headphones or speakers connected to the interface.
XLR microphones provide superior sound quality compared to USB microphones due their balanced cables and higher bitrate recording capabilities so they are well worth considering if you want professional quality recordings from home. Connecting them up might seem daunting but following these steps should get everything running in no time!
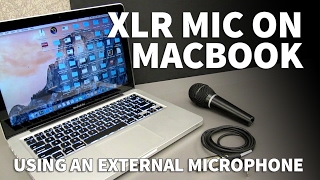
Can XLR Be Used on Mac Computers?
Yes, XLR microphones can work on a Mac, but they require an audio interface to connect them. An audio interface is a device that allows you to plug an XLR microphone into your Mac and route the signal from the microphone into your Mac’s audio system. Audio interfaces come in all shapes and sizes, so it’s important to research whch one best suits your needs before purchasing one. Once you have the proper audio interface for your XLR microphone, you’ll be able to use it with your Mac just like any other type of microphone.
Connecting a Microphone to an iMac
Yes, you can connect a microphone to your iMac. Depending on the type of microphone you have, you may be able to plug it directly into an audio input port or USB port on your computer. Alternatively, you can purchase an audio interface and connect the microphone to that, then connect the interface to your iMac. Additionally, many iMacs come with a built-in microphone that can be used for recording sound.
Can I Connect an XLR Microphone to My Computer?
Yes, you can plug your XLR mic to your computer using a USB Audio Interface. A USB Audio Interface is a device that connects to your computer via USB and allows you to connect an XLR microphone or other audio equipment such as headphones, speakers, and more. It usually features one or more preamps for microphone inputs as well as line-level inputs for connecting instruments, mixers, and other sources of audio. Most USB Audio Interfaces are very affordable and provie great sound quality. Many popular brands such as Focusrite, PreSonus, and Behringer make reliable models in the $100-250 price range that offer good value for money.
Comparing XLR and USB C Connections
Yes, XLR is generally considered to be better than USB C when it comes to audio quality. XLR connections are designed for high-fidelity professional audio and performance, while USB C connections are designed primarily for convenience and speed. XLR cables have a much wider bandwidth than USB C cables, which allows for higher frequencies and a clearer sound. Additionally, XLR cables are also more resistant to interference from other nearby electrical devices, which can cause noise and distortion on USB C connections. Ultimately, the decision between an XLR or USB C connection depends on your neds as an artist or producer. If you’re looking for professional-level sound quality, then you’ll want to go with an XLR connection.
Converting XLR to USB
Yes, you can convert XLR to USB. Using an XLR-to-USB signal adapter, you can connect any XLR microphone to a computer for recording with headphone monitoring. The adapter features USB connectivity, an integrated preamplifier with Microphone Gain Control, and Zero Latency Monitoring for real-time playback. This way, you can easily record audio directly from your microphone into your computer without any additional hardware or software.
Location of the Mic Input on an iMac
The microphone input on an iMac is located on the back of the base unit. It is a small hole that is next to the headphone port, just aboe the power cable. When using an external microphone with your iMac, simply plug it into this port and you will be ready to record or stream audio.
Does a Mac Computer Have a Microphone Input?
Yes, Mac does have mic input. Depending on the type of Mac you have, the available microphone inputs can vary. For instance, MacBook Pro models usually have a built-in microphone located near the top of the display. Other Macs might also have an audio port that you can use to connect an external microphone. Additionally, some Macs may also support wireless microphones, such as Bluetooth or USB microphones.
What Can Be Connected to an XLR Port?
XLR ports are typically used to connect a wide variety of audio and video equipment, such as microphones, mixers, amplifiers, and speakers. They can also be used for DC power connections for professional film and video cameras and reated equipment. Additionally, they are the standard connector for intercom headsets, such as systems made by Clear-Com and Telex.
Do XLR Mics Require an Interface?
Yes, an XLR microphone needs an audio interface to be used with a computer or smartphone. The audio interface acts as a bridge between the analog XLR microphone and the digital world of your computer or smartphone. Without it, you won’t be able to record with your XLR mic. The audio interface will take the signal from your XLR and convert it into something that can be read by your computer or smartphone, allowing you to make recordings.
Setting Up an XLR Microphone
For a basic XLR mic setup, you’ll need the following:
-At least one XLR microphone input. If you want to record in stereo, you’ll need two inputs.
-Phantom power (often labeled “P48” or “48V”). This will allow you to use condenser mics which require power.
-Additional inputs for line signals and instrument signals, in case you want to plug in other sound sources.
-One or two headphone outputs so that you can monitor your recordings while they’re being made.
-Monitor outs for your speakers and a volume knob on the front panel so that you can adjust the sound levels during playback.
You’ll also need a suitable audio interface that’s compatible with your computer and has all of these features as well as cables to connect eveything together.
Conclusion
In conclusion, connecting an XLR microphone to a Mac can be done in several ways. It is recommended to use an audio interface for the best sound quality and reliability. An audio interface will usually have an XLR input that you can plug your microphone into. For smaller budgets, there are several USB Audio Interfaces aailable on the market ranging from $100-250 that will provide adequate connections and sound quality. With the right setup, you’ll be able to record clear and high-quality audio with your Mac computer.


