The Xbox One Controller is a popular gaming controller designed and manufactured by Microsoft. The controller is widely used for gaming on varius platforms, including Windows 10. In order to use the Xbox One Controller on Windows 10, you need to install the necessary driver software. In this article, we will walk you through the steps to update Xbox One Controller drivers on Windows 10.
Firstly, you need to open the Device Manager on your Windows 10 computer. You can do this by pressing the Windows + X keys on your keyboard and selecting the Device Manager option from the menu. Once you have opened the Device Manager, look for the Microsoft Xbox One Controller category.
Next, double-click on the Microsoft Xbox One Controller category to expand it. You will then see the Xbox One Controller listed. Right-click on the Xbox One Controller and select Update Driver Software from the context menu.
In the Update Driver Software window, you will get two options. Select the option that says Search automatically for updated driver software. Windows 10 will then search for the latest driver software for your Xbox One Controller and install it automatically.
Alternatively, you can use the Xbox Accessories app to update the Xbox One Controller drivers on Windows 10. To do this, open the Xbox Accessories app and connect your Xbox Wireless Controller to your computer using a USB cable or the Xbox Wireless Adapter for Windows.
When the controller is connected, you will see the message Update Required if an update is mandatory. Click on the Update Required option to install the necessary driver software for your controller.
Updating Xbox One Controller drivers on Windows 10 is a simple process that can be done through the Device Manager or the Xbox Accessories app. By updating the driver software, you can ensure that your Xbox One Controller works smoothly and efficiently on your Windows 10 computer.
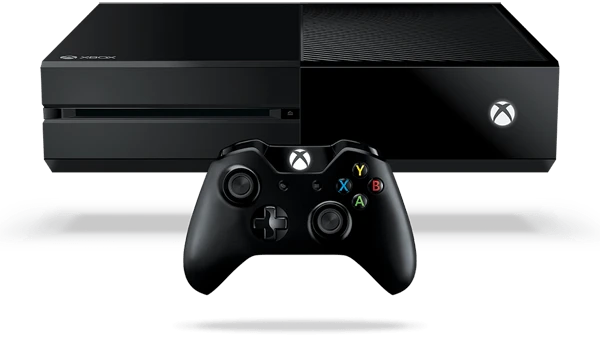
Downloading Xbox One Controller Drivers on Windows 10
To download Xbox One controller drivers on Windows 10, you can follow the steps mentioned below:
1. Connect your Xbox One controller to your Windows 10 PC using a USB cable or wireless adapter.
2. Press the Windows key + X on your keyboard to bring up the Quick Link menu.
3. From the menu, select the Device Manager option.
4. In the Device Manager, look for the Microsoft Xbox One Controller category and double-click it to expand it.
5. Right-click on the Xbox One controller and select the Update Driver option.
6. From the two options, select the Search automatically for updated driver software option.
7. Wait for Windows to look for the driver update and install it on your system.
Once the driver update is installed, your Xbox One controller shuld be ready to use on your Windows 10 PC.
Does Windows 10 Support Xbox Controllers?
Windows 10 has built-in Xbox controller drivers, whih means that you can easily connect your Xbox 360 controller to your PC and start playing games without having to download or install any additional software. When you plug your Xbox 360 controller into a USB 2.0 or 3.0 port on your computer, Windows 10 will automatically detect and install the necessary drivers for your controller. This means that you can start playing your favorite PC games with your Xbox 360 controller right away without any hassle. Additionally, Windows 10 will also automatically update your Xbox controller drivers as part of its regular updates, so you can be sure that your controller is always up-to-date and working properly.
Finding Drivers for Xbox One
To get drivers for Xbox One, follow the steps below:
1. Connect your Xbox One controller to your PC via USB cable or wireless adapter.
2. Go to your PC’s Start menu and type “Device Manager” in the search bar. Click on the Device Manager option that appears.
3. In the Device Manager window, locate and expand the “Microsoft Xbox One Controller” option.
4. Right-click the expanded “Microsoft Xbox One Controller” option and select “Update Driver Software.”
5. In the Update Driver Software window, select “Search automatically for updated software.”
6. Wait for your PC to search for and install the latest drivers for your Xbox One controller.
7. Once the drivers are installed, you should be able to use your Xbox One controller on your PC without any issues.
If you encounter any problems during the driver installation process, you can try downloading the latest drivers manually from the official Microsoft website or contacting Microsoft support for futher assistance.
Updating Xbox One Controller Driver on PC
To update your Xbox One controller driver on PC, follow the steps below:
1. Open the Xbox Accessories app on your PC.
2. Connect your Xbox Wireless Controller to your PC usig a USB cable or the Xbox Wireless Adapter for Windows.
3. Once the controller is connected, you will see a message that says “Update Required” if an update is mandatory.
4. Click on the “Update Required” message to begin the update process.
5. Follow the on-screen instructions to complete the update.
6. Once the update is complete, your Xbox One controller driver will be up-to-date and ready to use.
It is important to keep your controller driver up-to-date to ensure that you have the latest features and bug fixes, and to ensure compatibility with the latest games and software.
Conclusion
The Xbox One Controller is a powerful and versatile gaming accessory that offers gamers a high level of precision and control. With its ergonomic design, responsive buttons, and customizable features, the Xbox One Controller is a must-have for any serious gamer. To ensure that your controller is always up to date and performing at its best, it is important to update its drivers regularly. Whether you are usng a PC or an Xbox console, updating your controller’s drivers is a quick and easy process that can help you get the most out of your gaming experience. So, if you haven’t updated your Xbox One Controller’s drivers recently, now is the time to do so and take your gaming to the next level.


