Are you looking for a reliable, powerful laptop that can also serve as a Wi-Fi hotspot? Look no further than the MacBook Pro! The MacBook Pro is one of the most popular laptops on the market today and with good reason. Not only is it perfect for work and play, but it can also be used as a Wi-Fi hotspot.
The first step to using your MacBook Pro as a Wi-Fi hotspot is to make sure you have an active Internet connection. This can be either through a wired or wireless connection. Once you’ve confirmed that your internet connection is working, you’re ready to turn on the Wi-Fi hotspot feature.
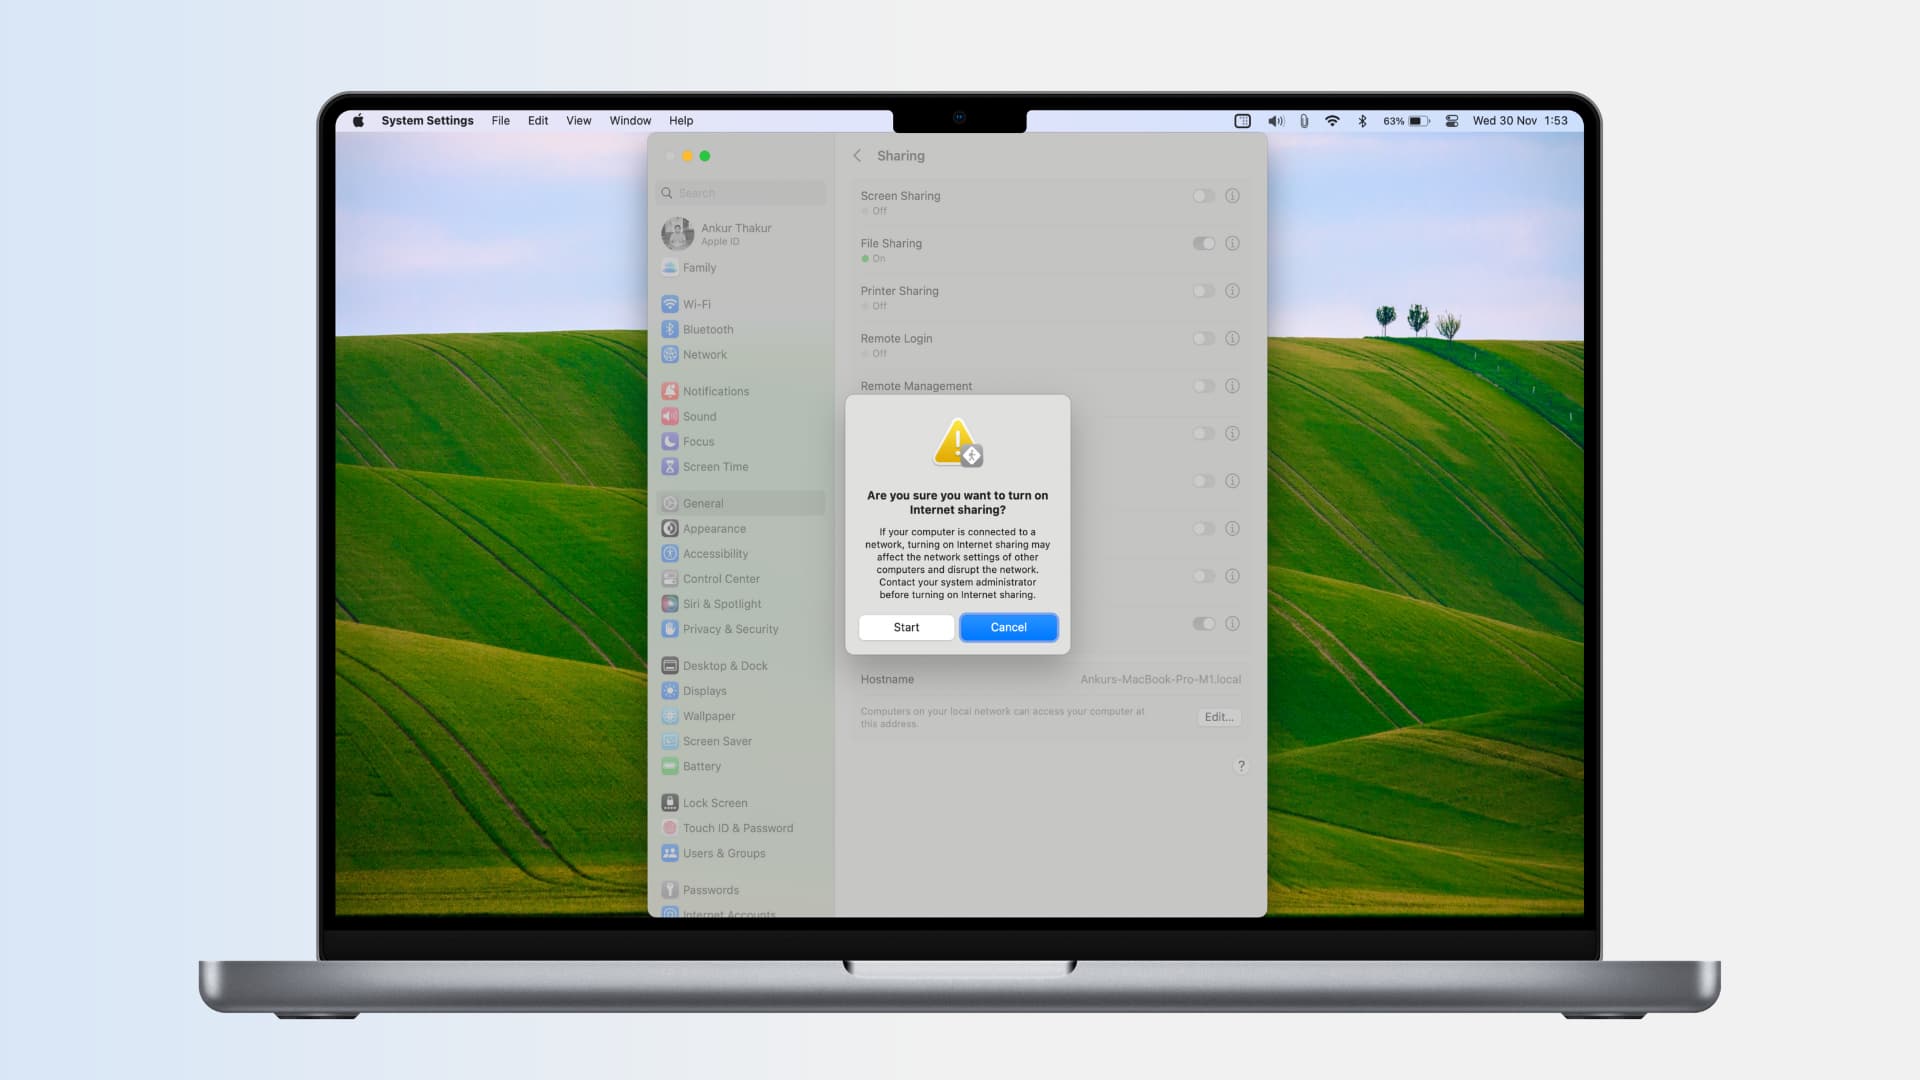
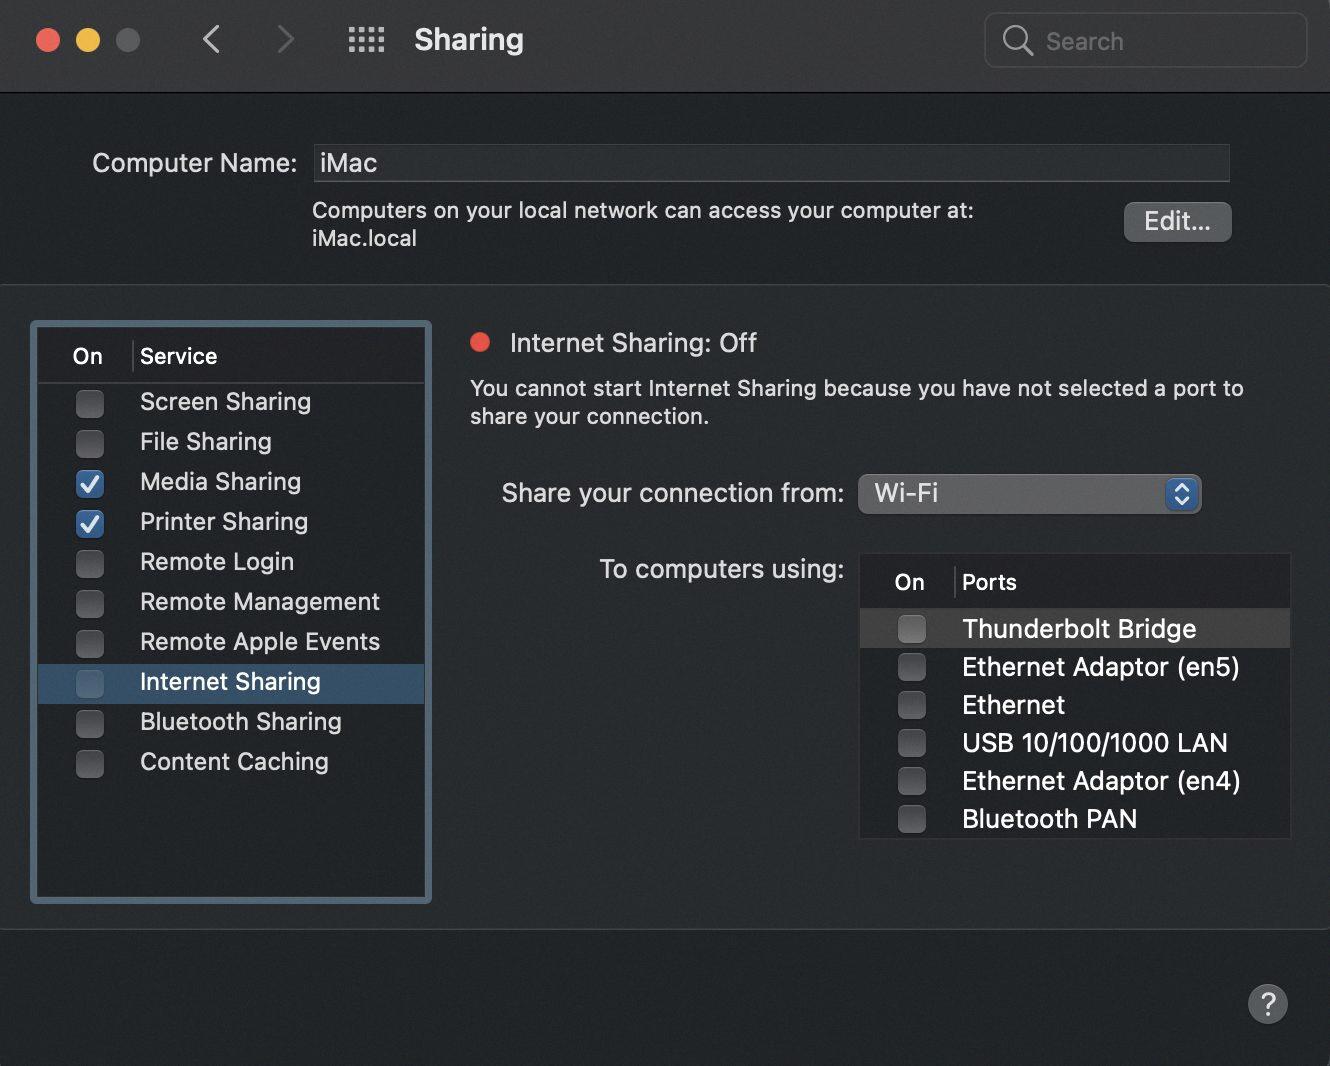
To enable Wi-Fi sharing on your Macbook Pro, open System Preferences and select Sharing. From there, select Internet Sharing from the list of services and tick off the box next to “Share Your Connection from”. Select Wi-Fi from the dropdown menu and then click “Computer Name” under To Computers Using. You may need to enter a password if you want to secure the connection.
Once you have enabled Wi-Fi sharing on your Macbook Pro, all that’s left is to connect your other devices! Simply open up the Settings app on your device and look for the “Wi-Fi” option. When you see it, select your Macbook Pro’s name from the list of available networks and enter your password if prompted. You should now be connected to your Macbook Pro’s Wi-Fi connection!
Using your Macbook Pro as a Wi-Fi hotspot is an incredibly useful feature that allows you to access the internet wherever you are – whether at home or abroad! With its powerful hardware and easy setup process, it makes for an ideal portable router for all of your devices!

Using a Macbook Pro as a WIFI Hotspot
To use your Macbook Pro as a WIFI hotspot, start by opening System Settings and clicking General in the sidebar. Then click Sharing on the right (you may need to scroll down). Click the Info button next to Internet Sharing. From there, you can select the type of internet connection you want to share. Select Wi-Fi from the “Share your connection from” pop-up menu. You will then be asked to create a name and password for your new WIFI hotspot. Once you have created the credentials, turn on Internet Sharing and your Macbook Pro will now be broadcasting its own Wi-Fi network that other devices can connect to.
Can Macbook Pro Be Used as a Hotspot?
Yes, a MacBook Pro can act as a hotspot! To do so, open the System Preferences menu by clicking the Apple logo in the top-left-hand corner of your display. Then select “Sharing” and choose “Internet Sharing” from the list of services. On the right side of the screen, you’ll be able to pick your source of internet connection. Once you’ve done this, your MacBook Pro will act as a hotspot for other devices to connect to it.
Connecting a Macbook Pro to an iPhone via Wi-Fi Hotspot
Yes, you can use your Macbook Pro to hotspot Wi-Fi to your iPhone. To do this, make sure that both devices are signed in with the same Apple ID. On your Macbook Pro, click the Wi-Fi status icon in the menu bar and then select your iPhone from the list of available devices. Your Mac will then create a personal hotspot for your iPhone to connect to.
Using a Macbook Pro as a Router
Yes, you can use your Macbook Pro as a router. All you need to do is enable Internet Sharing in System Preferences and then turn on Wi-Fi sharing. This will allow your Macbook Pro to act as a router and broadcast a Wi-Fi signal from its Ethernet connection. You can then connect any Wi-Fi device, like smartphones, tablets, or Apple TVs, to the new network created by your Macbook Pro. In order to maximize the speed of the connection, you may want to consider using an Ethernet splitter so that your router and Macbook Pro can both access the same network at the same time.
Creating a Free Hotspot on a Macbook Air
Creating a hotspot on your Macbook Air for free is a simple process. First, go to System Preferences and click the Sharing icon. Select the “Internet Sharing” option and choose the type of Internet connection you want to share with other devices. This could be a wired Ethernet connection or one of your Wi-Fi connections. If you are sharing a Wi-Fi connection, you will need to choose the name and password for your new hotspot. Once everything is configured, simply click the checkbox next to “Internet Sharing” to turn it on. Your Macbook Air is now acting as a wireless hotspot and providing Internet access to other devices in range.

Source: eshop.macsales.com
Using a Macbook as a Hotspot for an Android Device
To use your Macbook as a hotspot for your Android device, you will need to first enable Bluetooth Personal Area Network (PAN) on your Macbook. To do this, open System Preferences on your Macbook, click Network and select Bluetooth PAN from the list on the left. If Bluetooth PAN is not available in this list, click the Add button and select Bluetooth PAN from the Interface pop-up menu.
Next, click the Device pop-up menu and choose your Android phone. Then click Connect to enable the connection between your Macbook and your Android phone. Once you have enabled Bluetooth PAN, your Macbook will now act as a hotspot for your Android device.
Troubleshooting Mac Hotspot Connection Issues with a Phone
It’s possible that either your Mac or your phone’s Bluetooth isn’t turned on. To start, make sure both devices have Bluetooth enabled. On your Mac, go to System Preferences > Bluetooth and make sure it’s turned on. On your phone, go to Settings > Bluetooth and make sure it’s enabled. If both are already turned on, try turning them off and then back on again to reset the connection. It’s also possible that your phone isn’t compatible with your Mac for creating a hotspot connection; check with your phone’s manufacturer for more information.
Creating a WIFI Network From a Mac
Yes, you can create a Wi-Fi network from your Mac. To do so, first open System Preferences and select the Network pane. Choose Wi-Fi from the left-hand side menu, then click the “Create Network” button at the bottom of the window. Enter a name and choose a channel for your network, then click “Create”. Once your network is created, you can connect to it using any compatible device.
Turning a MacBook Into a Router
In order to turn your MacBook into a router, you’ll need to use third-party virtual router software such as Connectify or Virtual Router Manager. These programs allow you to create a virtual wireless network on your computer that other devices can connect to. To get started, simply download and install the software of your choice and follow the on-screen instructions to set up your virtual network. Once you have the network established, you can then configure it with the necessary settings such as assigning a password, setting up DHCP, and setting up port forwarding if needed. Once everything is configured correctly, your MacBook will act like a traditional wireless router and other devices will be able to connect to it just as they would any other Wi-Fi network.


