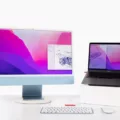
USB-C and Mini DisplayPort Target Display Mode are two important technologies that can give you an expanded experience with your Mac. USB-C is the new, versatile USB connection type that is quickly becoming the go-to for data and power connections. It’s a tiny reversible connector that can be used to connect a wide range of devices, from monitors to phones to hard drives. And it supports up to 100 watts of power delivery, so it’s great for powering larger displays and other devices.
Mini DisplayPort is another popular connection type, mainly used by Apple in its Macs and other devices, allowing you to send audio and video signals over a single cable. With the right adapters or cables, you can even use Mini DisplayPort to connect a Mac display to your laptop or desktop computer.
The combination of USB-C and Mini DisplayPort allows users to take advantage of Apple’s Target Display Mode (TDM). This is a feature that lets you use one Mac as an external monitor for another Mac, using only one cable. It’s incredibly useful if you want to use your laptop as an external monitor for your desktop computer, or if you want to mirror two displays. To do this, all you need is the right cable – a USB-C cable with Mini DisplayPort Connector – and two compatible Macs running macOS High Sierra 10.13 or earlier.
Using Target Display Mode is easy: First, press Command-F2 on the keyboard of the iMac (the host machine). You should now see the desktop of the other Mac (the target machine). To exit target display mode, press Command-F2 again.
Overall, USB-C and Mini DisplayPort make it easier than ever before to extend your workspace across multiple displays without having to buy expensive docking stations or adapters. With just one cable, you can easily turn any compatible Mac into an extended monitor – perfect for productivity tasks like coding or graphic design!
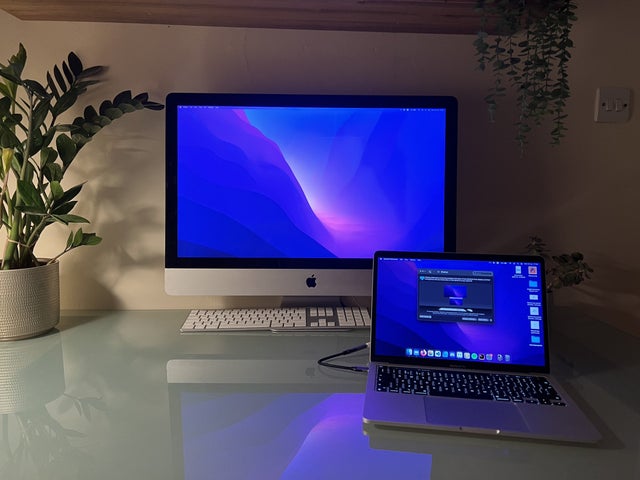
Connecting Mini DisplayPort to USB-C
Yes, you can connect a Mini DisplayPort to USB-C. You will need to use a special cable that has a Mini DisplayPort connector on one end, and a USB-C connector on the other end. Such cables are available from many manufacturers, including Mophie. Before purchasing a cable, check with the manufacturer to make sure that the cable is compatible with your Mac and display model.
Does My Mac Support Target Display Mode?
Target Display Mode is a feature that allows certain Mac models to be used as an external display for another Mac. It was first introduced with the iMac (Late 2009) and was available on the following models: iMac (2010-2017), Mac mini (2011), and Mac Pro (Late 2013). If you have one of these models, then your Mac has Target Display Mode. To use Target Display Mode, both Macs must be connected to the same network. Additionally, you must press Command-F2 on the keyboard of the iMac that is acting as the display in order to begin using Target Display Mode.
Does USB-C Support DisplayPort Alternate Mode?
Yes, USB-C does support DisplayPort alternate mode. With USB-C’s Alt-Mode capability, it is able to transmit a DisplayPort signal, allowing for the connection of a variety of displays. This allows for both audio and video signals to be transmitted over the same cable, making it more efficient than traditional connections. Additionally, USB-C can also support the Thunderbolt interface, providing users with even greater flexibility when connecting their devices.
Turning USB-C into a DisplayPort
To turn your USB-C port into a DisplayPort, you’ll need an adapter cable. This cable will have a USB-C connector on one end and a DisplayPort connector on the other. Plug the USB-C connector into your device and the DisplayPort connector into your external display. Once both ends are connected, you should be able to view your device’s display on the external monitor.
Forcing an iMac into Target Display Mode
In order to force your iMac into Target Display Mode, you need to press and hold Command-F2 on the keyboard of the iMac. This will cause the iMac to enter Target Display Mode, where it will display the desktop of the other Mac connected to it. To exit Target Display Mode, simply press Command-F2 again.
Troubleshooting Mac Display Detection Issues
Your Mac might not be detecting the display because of a few potential issues. The display may not be compatible with your Mac, it could have a faulty cable or adapter, or the resolution and refresh rate settings on the display may not match those of your Mac. To check if the issue is with the compatibility, consult your device’s manual to see if it is compatible with your particular model of Mac. If the cable is an issue, disconnect and reconnect it to ensure a proper connection. If you are using an adapter, try another one to see if that works better. Lastly, make sure that the resolution and refresh rate settings on both devices are set correctly and match each other.
Troubleshooting Issues with IMac Not Entering Target Display Mode
If your iMac won’t go into Target Display Mode, there are a few things you should try first.
1. Make sure that your iMac is turned on and that the monitor you want to use as the target display is connected and powered up.
2. On your iMac, go to System Preferences > Keyboard and check to see if “Use all F1, F2, etc. keys as standard function keys” is checked. If it is, press Command-Fn-F2 instead of Command-F2 to enter Target Display Mode.
3. Check to make sure the cables used to connect the two devices are securely connected and functioning properly, including any adapters needed for connection.
4. If you’re using an Apple Mini DisplayPort or Thunderbolt cable between the two devices, make sure it’s securely seated in both ports and that it’s rated for Target Display Mode (TDM).
5. Restart both devices with the cables still connected and try entering Target Display Mode again after they have restarted.
6. Make sure that AirPlay Mirroring isn’t enabled on your iMac by going to System Preferences > Displays > AirPlay Display – if it is enabled, disable it by pressing the X button next to the AirPlay display name in this window.
If these steps don’t work, resetting both devices may be necessary before trying again – however, this should be a last resort since it will delete any unsaved data from either device during the process.
Using an iMac 5K as a Monitor for a PC
Begin by turning off both your PC and iMac. Next, locate the Thunderbolt port or Mini DisplayPort on the back of your iMac. Plug one end of a cable into this port and then connect the other end to the Thunderbolt or Display port on your PC. If your PC does not have either of these ports, you will need an adapter to connect it with an HDMI cable instead. Once the connection is established, turn on both your iMac and PC. You should now be able to use your iMac 5K as a monitor for your PC.
Using USB C for Display on Windows
Yes, you can use USB-C to display Windows on an external display or TV. To do so, you’ll need a USB-C adapter that supports the type of video connection your display uses—DisplayPort, HDMI, or VGA. Simply plug the USB-C end of the adapter into the USB-C port on your Surface and then plug the video cable from your external display or TV into the other end of the adapter. This will allow you to mirror or extend your Windows screen on the external display.
Troubleshooting Windows Not Detecting a Display
Windows may not detect your display for a variety of reasons. The most common cause is an incorrect cable or connection. Make sure the cable connecting your PC to your external monitor is securely connected. Additionally, try changing the cable connecting the external monitor to see if that helps. If using a different cable doesn’t solve the issue, it could be a result of outdated drivers or an incorrect setting on the display itself. To troubleshoot this, try using the external monitor with a different system. If it works on another machine, then it is likely that your computer’s drivers are out of date and need to be updated. You can also check your display settings to ensure that they match what is expected by Windows.
Detecting Displays on Windows
To get Windows to detect displays, you first need to open the Settings window by clicking the Start button. Then, navigate to the System menu and click on the Display tab. Under the heading Multiple Displays, you should see a Detect button. Click this button and Windows 10 should automatically detect any additional monitors or displays that are connected to your device.
Conclusion
In conclusion, USB-C is a versatile and powerful connection standard that can be used for a variety of applications. It is capable of transferring data up to 10 Gbps and supports charging video output, and other functions. Furthermore, USB-C is backward compatible with USB A and B ports, making it an ideal solution for those who need to use multiple connection types in their setup. USB-C is increasingly becoming the go-to connection standard for modern devices, thanks to its speed, reliability, and versatility.

