In today’s digital age, security and privacy are of paramount importance. With the increasing prevalence of cyber threats and online scams, it is crucial to ensure that your personal information and online accounts are well protected. One way to enhance the security of your iPhone is by adding trusted phone numbers.
A trusted phone number serves as an additional layer of security for your Apple ID and helps verify your identity when signing in to a new device or browser. By adding trusted phone numbers to your iPhone, you can have peace of mind knowing that unauthorized access to your account is significantly less likely.
To add or remove trusted phone numbers on your iPhone, follow these simple steps:
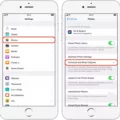
1. Open the Settings app on your iPhone.
2. Scroll down and tap on your Apple ID, located at the top of the screen.
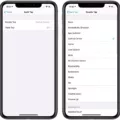
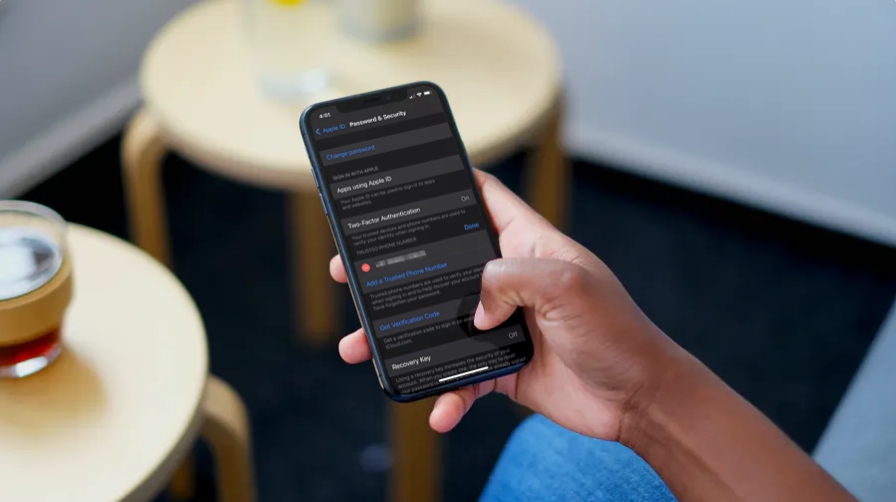
3. In the Apple ID settings, select “Password & Security.”
4. You will see your current trusted phone number listed under the “Trusted Phone Numbers” section.
5. To add a new trusted phone number, tap on “Add a Trusted Phone Number” and follow the on-screen instructions to verify the number.
6. To remove a trusted phone number, tap on the number you wish to remove, and then select “Remove Phone Number” from the options provided.
It is important to note that you should only add phone numbers that you trust and have access to. These numbers should be actively in use and easily accessible to receive verification codes when needed.
In the event that you cannot access a trusted device or did not receive a verification code, there are still options available to regain access to your account. If your device is offline, you can go to the Settings app, tap on your name, select “Password & Security,” and then choose “Get Verification Code.” This will allow you to obtain a verification code even without an internet connection.
If you use security questions with your Apple ID or do not have access to a trusted device or phone number, you can visit the iforgot.apple.com website. Here, you can unlock your account using your existing password or reset your password to regain access to your Apple ID.
By taking the necessary steps to add trusted phone numbers to your iPhone, you can enhance the security and protect your personal information from unauthorized access. It is always recommended to regularly review and update your trusted phone numbers to ensure the utmost security for your Apple ID and device.
Remember, safeguarding your digital life starts with strong security measures, and adding trusted phone numbers is one way to fortify your defenses against potential threats. Stay vigilant, stay secure!
What Does Trusted Number Mean On iPhone?
A trusted phone number on an iPhone refers to a phone number that is associated with your Apple ID and is used to verify your identity when signing in to your device. This feature is part of the two-factor authentication process, which adds an extra layer of security to your account.
When setting up two-factor authentication on your iPhone, you can designate certain phone numbers as trusted. These trusted numbers can receive verification codes that are used to confirm your identity when signing in to a new device or browser. By designating a phone number as trusted, you are essentially stating that you have access to that number and can receive the verification codes sent to it.
Here are some key points to understand about trusted phone numbers on iPhone:
1. Two-factor authentication: It is a security feature that requires you to provide two forms of identification before accessing your account. One of these forms is typically a password, and the other is a verification code sent to a trusted device or phone number.
2. Trusted device vs. trusted phone number: A trusted device refers to a device, such as an iPhone, iPad, or Mac, that is linked to your Apple ID and can receive verification codes. On the other hand, a trusted phone number is a phone number that is associated with your Apple ID and can receive verification codes.
3. Adding trusted phone numbers: You can add one or more trusted phone numbers to your Apple ID by going to the “Settings” app on your iPhone, selecting your Apple ID, and navigating to the “Password & Security” section. From there, you can manage your trusted phone numbers and add new ones if needed.
4. Verifying identity: When signing in to a new device or browser with your Apple ID, you may be prompted to enter a verification code. This code is sent to your trusted phone number, and you need to enter it correctly to verify your identity and gain access to your account.
5. Security considerations: It is important to ensure that the trusted phone numbers associated with your Apple ID are up to date and accessible to you. If you no longer have access to a trusted phone number, you may have difficulty signing in to your account or recovering it in case of any issues.
By understanding and managing trusted phone numbers on your iPhone, you can enhance the security of your Apple ID and protect your personal information.
How Do You Find Your Trusted Phone Number?
To find your trusted phone number on an iPhone or iPad, follow these steps:
1. Open the “Settings” app on your device.
2. Scroll down and tap on your Apple ID, which is located at the top of the settings menu.
3. In the Apple ID settings, select “Password & Security.”
4. Look for the section labeled “Trusted Phone Numbers” or “Phone Numbers.”
5. Your current trusted phone number(s) will be listed here.
If you have multiple trusted phone numbers, they will all be displayed in this section. You can add or remove trusted phone numbers by tapping on the “Edit” or “Add Trusted Phone Number” option. Follow the on-screen instructions to complete the process.
Remember, trusted phone numbers are used for security purposes, such as two-factor authentication. It is important to keep your trusted phone numbers up to date to ensure the security of your Apple ID and personal information.
What Do You Do If You Don’t Have Access to the Trusted Number On Your Apple ID?
If you don’t have access to the trusted phone number associated with your Apple ID, there are a few steps you can take to regain access to your account. Here’s what you can do:
1. Visit iforgot.apple.com: Go to the Apple ID account page and click on “Forgot Apple ID or password.” This will take you to the account recovery page.
2. Enter your Apple ID: Provide your Apple ID, which is usually your email address associated with your account.
3. Choose the option to reset your password: On the account recovery page, select the option to reset your password. You may be asked to answer security questions or provide additional account information.
4. Request account recovery: If you can’t remember the answers to your security questions or don’t have access to a trusted device, you can choose the option to request account recovery. Apple will guide you through the steps to complete this process.
5. Contact Apple Support: If you’re still unable to regain access to your account, you can contact Apple Support for further assistance. They will be able to guide you through the account recovery process and help you regain access to your Apple ID.
Remember to have as much information about your account as possible when contacting Apple Support, as this will help expedite the process.
By following these steps, you should be able to regain access to your Apple ID even if you don’t have access to the trusted phone number associated with your account.
How Do You Find Your Apple ID Verification Code If Your Phone is Broken?
To find your Apple ID verification code when your phone is broken, you can follow these steps:
1. Make sure that your device is connected to the internet. If it is not, try connecting to a Wi-Fi network or using cellular data.
2. On a different device, such as a computer or another mobile device, open a web browser.
3. Go to the Apple ID account page by typing “appleid.apple.com” in the address bar of your web browser.
4. Click on the “Forgot Apple ID or password?” link on the page.
5. Enter your Apple ID email address and click continue.
6. On the next page, select the option to get a verification code via text message or phone call. Choose the option that works best for you.
7. If you select the text message option, a code will be sent to the phone number associated with your Apple ID. If you choose the phone call option, you will receive a phone call with the verification code.
8. Retrieve the verification code from the text message or phone call and enter it on the Apple ID account page.
9. Once you have entered the verification code, you will be able to reset your password or access your account.
It’s important to note that if your phone is broken and you don’t have access to another device, you may need to contact Apple Support for further assistance in recovering your Apple ID.
Conclusion
Having a trusted phone number on your iPhone is an essential security measure. It helps to verify your identity and adds an extra layer of protection when signing in to a new device or browser. By adding a trusted phone number, you can ensure that only you have access to your Apple ID and personal information.
To add a trusted phone number, simply go to the Settings app on your iPhone or iPad. Tap on your Apple ID name and select Password & Security. From there, you can view and manage your current trusted number. It is recommended to keep this information up to date and remove any outdated or unused phone numbers.
In the event that you can’t access a trusted device or didn’t receive a verification code, there are still options available. You can visit iforgot.apple.com and use your existing password to unlock your account or reset your password. This ensures that even if you don’t have access to a trusted device, you can still regain access to your Apple ID.
Having a trusted phone number on your iPhone is crucial for maintaining the security and privacy of your personal information. It provides peace of mind knowing that only you can access your Apple ID and helps prevent unauthorized access to your device and data.


