Are you looking for an effective, secure, and easy-to-use solution for your home or small business network? Look no further than pfSense! It is a powerful open-source firewall that is capable of providing your network with superior protection and performance. In this blog post, we will show you how to set up a pfSense router step by step.
First, you will need to download the pfSense installation file from the official website. After downloading the image, reboot your machine and press 1 for a default installation of pfSense. During the installation process, accept all the settings under Configure Console. You can also select your preferred keyboard map from the available options. Additionally, choose Z File System as your preferred file system.
Once the installation is complete, it’s time to connect your new pfSense router to the network. Unpack the box and take out the router then connect all necessary cables including the power adapter and network cables. Once connected, the APU board is ready for booting up. You can then access the web interface by connecting to its IP address in a web browser on any device from within your network.
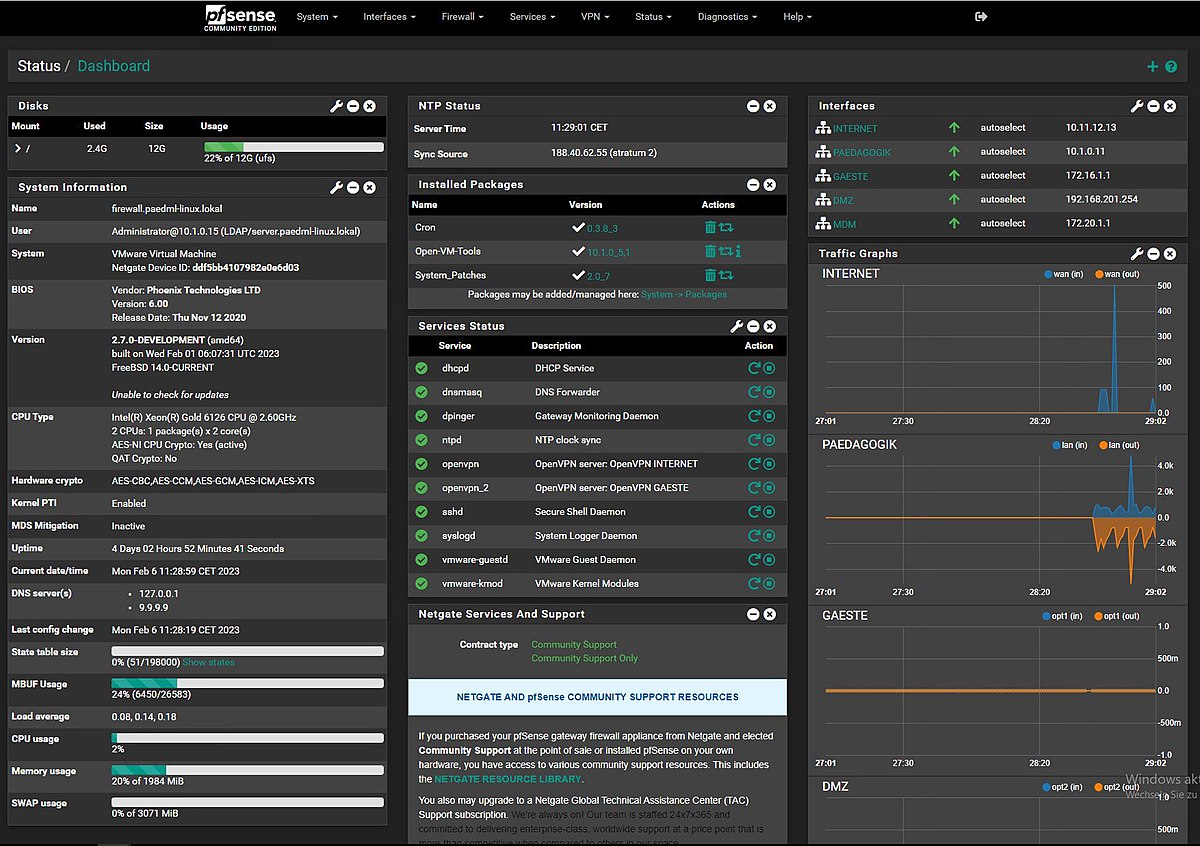
When you first log into the PfSense software GUI, it presents you with a Setup Wizard which guides you through setting up various functions such as WAN/LAN interfaces, firewall rules, and more. If you don’t want to use this wizard then it’s not mandatory; you can configure all these settings manually using either terminal or edit config files instead.
Finally, if you want additional protection for your network then we suggest using NordVPN as well – this is especially useful if you are dealing with sensitive data or accessing public networks regularly as it encrypts all traffic coming in and out of your network so that hackers cannot intercept it easily. To get started connect to a different NordVPN server after setting up the PfSense router in order to secure your internet connection further.
We hope this blog post has been helpful in giving you an overview of how to set up the PfSense router easily and quickly! With its powerful security features and user-friendly interface, it’s no wonder why PfSense is one of the most popular choices when it comes to home or small business networks today!

Step-by-Step Guide to Setting Up PfSense
1. Download the PfSense installation file from the official website and save it to your computer.
2. Reboot the PfSense machine after adding the image.
3. Press 1 for the default installation of PfSense when prompted.
4. Accept the settings under Configure Console and select a default keyboard map.
5. Choose the Z file system when prompted by the installer window and configure it according to your requirements.
6. Set up a user account and password so you can access your firewall after the installation process is completed.
7. Select a network interface for your WAN connection by choosing one of the available options in the dropdown menu and enter your ISP information accordingly if necessary.
8. Configure additional network interfaces for LAN connections if needed, then choose an IP range and netmask appropriate for each interface you add, as well as any VLANs associated with them or other options that are applicable to your setup configuration requirements.
9. Once all of these steps are completed, you will be asked to confirm whether or not you want to apply changes made during this process; if yes, press Y on your keyboard, otherwise press N to exit without saving changes made so far before rebooting or restarting the firewall again in order to finish setting up PfSense properly on your machine.
Setting Up PfSense for the First Time
Setting up pfSense for the first time is a simple and straightforward process. After the initial installation, you’ll be presented with the Setup Wizard, which will walk you through the basic configuration of your firewall.
The first step is to choose an interface for your WAN connection. This is usually done if you have multiple internet connections that you want to use. You can then configure your settings such as IP address, DNS servers, and gateway information.
Next, you’ll set up your LAN interface with settings such as IP address range and DHCP pool size. You can also set up VLANs and other advanced network configurations from this page.
Once that’s done, you can configure your firewall rules. This is where you can allow or deny certain types of traffic inbound or outbound from your network. You can also create custom rules for specific situations if needed.
Finally, if you’d like to take advantage of some of the extra features available in pfSense, such as VPN access or traffic shaping, you can set those up from the wizard or later on in the web-based GUI using the tabs located at the top of the page.
Once all of these steps are complete, your firewall should be ready to go!
Setting Up a PfSense Router
Setting up your pfSense router is a straightforward process. First, unpack the box and remove the router. Then, connect the network cables to the WAN port on the router. Next, plug in the power adapter to provide power to the router. The APU board will then begin booting up. Once it’s finished, you can connect to the web interface via a computer or mobile device. Finally, use a NordVPN server for extra security and privacy protection on your network. That’s all there is to set up your pfSense router!
Setting Up PfSense: How Easy Is It?
Yes, pfSense is easy to set up. The web interface makes it simple to configure your router without requiring any knowledge of networking or terminal commands. All you need to do is connect the device to your network and access the web interface using a browser. From there, you can quickly configure settings such as firewall rules, IP addresses, and other security features. Additionally, many popular applications are available as pre-configured packages that you can install with just a few clicks. With pfSense, setting up your own secure network has never been easier!
Is PfSense a Router or Firewall?
PfSense is both a router and a firewall. As a router, it provides IP routing, meaning it can direct traffic from one network to another in order to reach its destination. As a firewall, it provides security by controlling what traffic can pass through the router and which traffic should be blocked. The firewall feature is highly configurable and allows you to set up rules for specific applications or services, such as blocking web traffic or allowing only specific ports to be open for specific network services. Additionally, pfSense provides many features for enterprise-level networks such as high availability, load balancing, and failover.
The Benefits of Using PfSense as a Home Router
Yes, pfSense is an excellent choice for a home router. It has a number of features that make it ideal for home use. It comes with a secure default configuration, giving you peace of mind that your network is protected from the start. Furthermore, it provides advanced networking tools such as port forwarding and traffic shaping, allowing you to customize your network to suit your needs. Additionally, its open-source nature allows users to customize and extend its features as needed. Finally, its intuitive web-based user interface makes it easy to configure and manage the router without needing technical knowledge or experience. All these features make pfSense an excellent choice for a home router.
Using PfSense as a Wireless Router
To use pfSense as a wireless router, you will need to complete the following steps:
1. First, add a wireless interface to your pfSense system. This can either be a physical device or a virtual one.
2. Next, assign an IP address to the newly created interface.
3. After that, configure the interface with settings such as encryption type, SSID name, and password.
4. Next, configure DHCP for the interface so that it can serve clients on the network with IP addresses.
5. Then, bridge the LAN and WIFI interfaces so that traffic from each interface can be routed through to the other side of the bridge.
6. Finally, allow Wifi interface traffic through your firewall rules so that they can access resources on your network securely and reliably.
7. Once all of these steps are completed, verify that everything is working properly by testing out connections from different devices on your network and ensuring they are able to access resources correctly.
Conclusion
In conclusion, setting up pfSense is a straightforward process that requires minimal technical knowledge. With the setup wizard, users can easily configure their router with just a few clicks. Additionally, the web interface makes administration easy for even inexperienced users. Furthermore, NordVPN servers can be used to further secure your network. All in all, setting up pfSense is a simple task that anyone can do with minimal effort.


