Before you set out to use your external hard drive to restore your iPhone, there’s some groundwork that needs to be laid to make the whole process run as smoothly as possible. First of all, verify that the external hard drive has the requisite emergency backup files. This step is absolutely vital in order to ensure there are no hiccups when restoration begins.
You’ll also need a Mac computer with Finder. You should also have your Apple ID credentials at hand, just in case you need them to access certain features or data.
Connecting the External Hard Drive
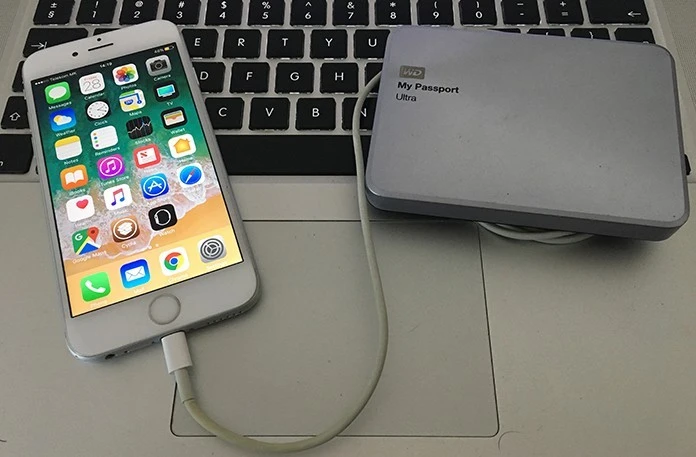
1. Connect the External Hard Drive to Your Mac: Use a compatible cable—such as USB-C, Thunderbolt, or USB-A, depending on your Mac’s available ports—to connect your external hard drive. If your Mac lacks the necessary port, an appropriate adapter can bridge the connection.
2. Ensure the Drive is Properly Detected: Once connected, your external hard drive should appear on your desktop or within Finder under the “Locations” section. If it doesn’t, you might need to adjust your Finder preferences:
- Open Finder.
- Click on “Finder” in the top menu bar and select “Preferences.”
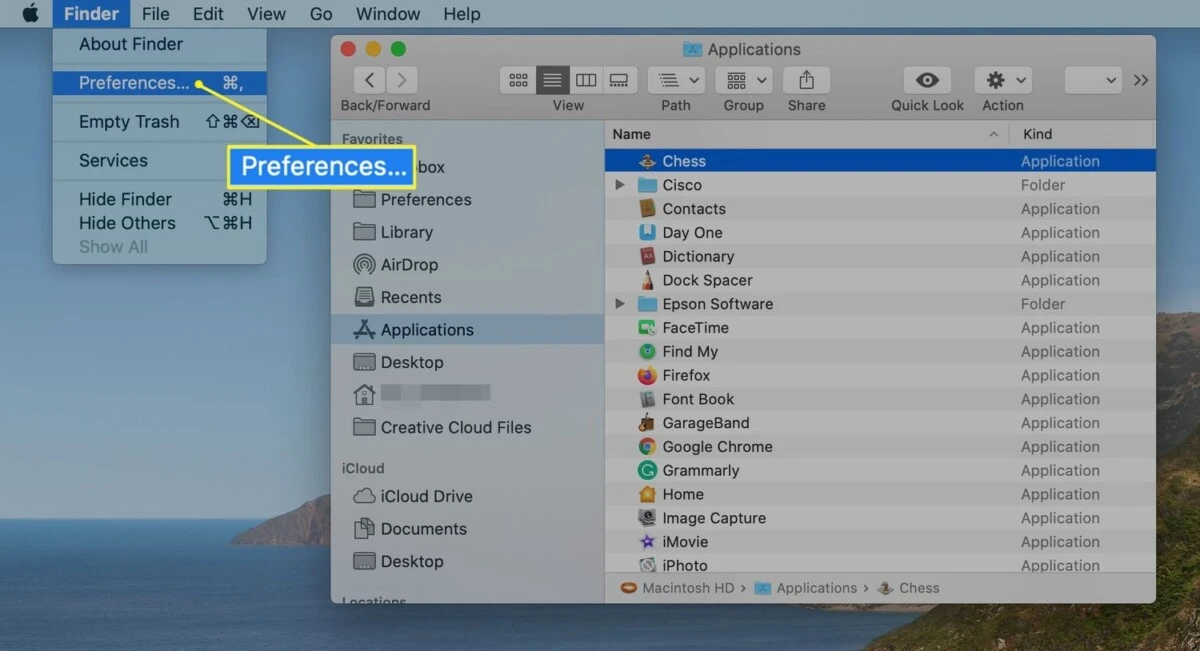
- Go to the “Sidebar” tab.
- Ensure that “External disks” is checked under the “Locations” section.
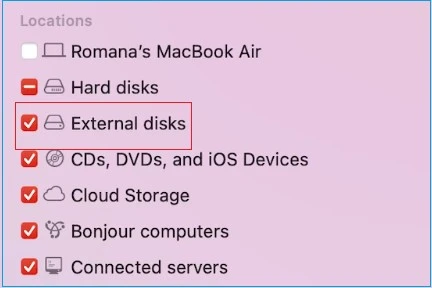
3. Accessing the External Hard Drive Through Finder: With the drive properly connected and detected, open a new Finder window. In the sidebar under “Locations,” you should see your external hard drive listed. Click on its name to view and manage its contents.
Troubleshooting Connection Issues:
- Check the Cable and Ports: Ensure that both the cable and the ports are functioning correctly. Try using a different cable or port to rule out hardware issues.
- Verify Disk Utility: If the drive isn’t appearing in Finder, open “Disk Utility” (found in Applications > Utilities) to see if the drive is recognized there. If it appears but isn’t mounted, select the drive and click “Mount.”
- Format Compatibility: Some external hard drives come pre-formatted in NTFS, which macOS can read but not write to. If you need full access, consider reformatting the drive to a Mac-compatible format like exFAT or APFS. Be aware that reformatting will erase all data on the drive, so ensure you have backups of any important files.
Accessing the Backup Files
Now, if you want to access your iPhone backups from your external hard drive, start by attaching it to your Mac. Go to Finder and choose your iPhone under “Locations.” Look for the “General” tab and click on “Manage Backups”, and you will be able to view a list of your backups. Right-click the backup you want to see and select ‘Show in Finder’.
Preparing Backup Files for Restoration
Arranging your iPhone backup files properly is vital to making the restoration of your iPhone from an external hard drive backup smooth. Firstly, you’d connect your external hard drive to your Mac. Find the backup folder on the external drive, typically somewhere in the “MobileSync” directory.
Then you can copy this backup folder and paste it to a suitable location on your Mac (e.g. Desktop). The process of restoring the backup becomes simpler after this step. It’s crucial to not tamper with this process so that you don’t corrupt or lose any data on the backup files that you need in order to get your iPhone back to the way it was.
Restoring via iCloud
Restoring your iPhone from an iCloud backup is a straightforward process that ensures your data, settings, and apps are seamlessly transferred to your device. Here’s how to do it:
1. Turn on your iPhone: You’ll see the “Hello” screen. If you’ve already set up your device, you’ll need to erase all its content before proceeding.
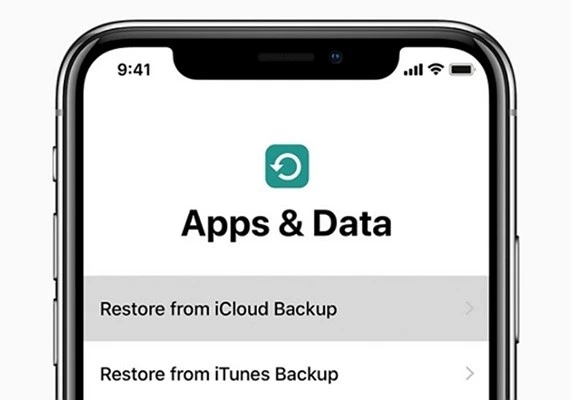
2. Follow the setup steps: Continue through the on-screen instructions until you reach the “Apps & Data” screen.
3. Select “Restore from iCloud Backup”: On the “Apps & Data” screen, tap “Restore from iCloud Backup”.
4. Sign in with your Apple ID: Enter your Apple ID and password to access your iCloud backups.
5. Choose a backup: Review the list of available backups, considering the date and size, and select the most relevant one.
6. Stay connected and wait: Keep your iPhone connected to Wi-Fi and a power source during the restoration. The time required depends on the backup size and your network speed; it might take from a few minutes to an hour.
Restoring via Finder or iTunes
Restoring your iPhone from a backup stored on an external hard drive using Finder or iTunes is quite easy. Here’s how you can go about it:
1. Connect Devices: Use a USB cable to connect your iPhone to the Mac that has access to your external hard drive.
2. Access Finder or iTunes:
- On macOS Catalina or later, open Finder.
- On macOS Mojave or earlier, or on a Windows PC, open iTunes.
3. Locate Your iPhone:
- In Finder, select your iPhone from the sidebar.
- In iTunes, click the iPhone icon near the top-left corner.
4. Trust the Computer: If prompted, tap “Trust” on your iPhone and enter your passcode to establish a secure connection.
5. Initiate Restoration:
- In Finder, click the “General” tab, then select “Restore Backup.”
- In iTunes, go to the “Summary” tab and click “Restore Backup.”
6. Select the Backup File:
- Go to the backup file located on your external hard drive.
- Choose the appropriate backup based on the date and size to ensure it’s the correct one.
7. Start the Restoration: Click “Restore” to begin transferring the backup to your iPhone. Keep your iPhone connected throughout the process to prevent any interruptions.
Syncing and Completing the Setup
Once you’ve restored your iPhone to external hard drive backup, you’re supposed to sign in with your Apple ID to sync your purchased apps, music, and other data. With this, you make sure that all your previous purchases and settings are restored on your device.
This can be done by heading to Settings and tapping your name at the top, then signing into your Apple ID. When signed in, your purchased content will automatically start syncing on your device. To check that your files and settings have been restored correctly, check your apps, photos, contacts and other personal data to make sure they’re there and working exactly as you’d expect them to.
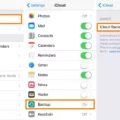
If you notice any data missing, just make sure iCloud services are enabled by going to Settings > [your name] > iCloud, then turn on the services you want to sync iCloud with. Staying connected to Wi-Fi during this process will speed up the restoration.
Learn how to connect your iPhone to a server for seamless file sharing.
Conclusion
Backing up and restoring your iPhone data from an external hard drive is a practical and reliable method to preserve your files. If an unexpected situation like device failure or loss occurs, then you can use this iPhone backup guide to restore your iPhone data safely.
Regular backups are essential for protecting your photos, documents, and app data, making external hard drive backup tips a valuable part of your digital routine. It’s never been easier to safeguard your data with the right tools and a consistent approach.

