Spotlight is a powerful search tool on Mac that allows users to quickly find files, folders, and applications on their computer. However, there may be times when Spotlight doesn’t provide accurate search results or doesn’t include certain files in its index. In such cases, reindexing Spotlight can help resolve these issues and improve the overall search experience.
Reindexing Spotlight essentially means rebuilding its index from scratch. This process can be done easily using the Terminal on your Mac. Here’s a step-by-step guide on how to reindex Spotlight using the Terminal:
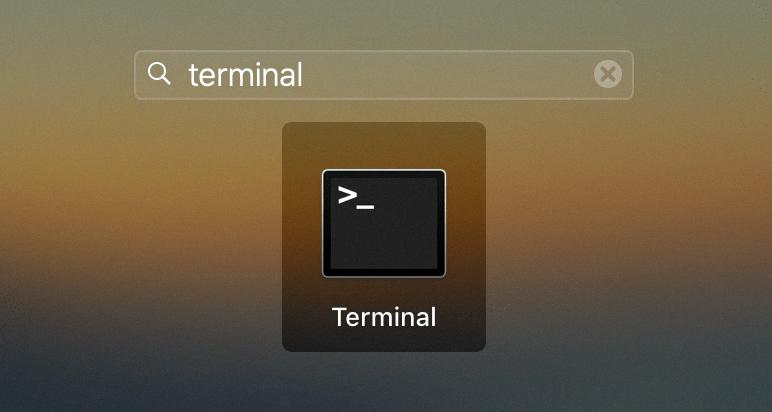
1. Open the Terminal: You can access the Terminal by navigating to Applications > Utilities > Terminal.
2. Enter the command: In the Terminal window, type “sudo mdutil -E /” and press Enter. You may be prompted to enter your password. This command instructs Spotlight to erase the existing index and begin creating a new one for the entire drive.
3. Wait for the indexing process: Once you enter the command, Spotlight will start creating a new index in the background. The time it takes to complete the indexing process depends on the amount of data on your drive. However, it usually doesn’t take more than a few minutes, even for large drives.
4. Monitor the progress: To check the progress of the indexing process, you can use the Activity Monitor. Open the Activity Monitor by navigating to Applications > Utilities > Activity Monitor. In the Activity Monitor window, click on the CPU tab and look for the “mdworker” process in the list. As soon as the “mdworker” process starts using CPU resources, it indicates that Spotlight is actively indexing your drive.
5. Verify completion: Once the indexing process is complete, you can verify it by performing a search in Spotlight. Try searching for a file or folder that was previously not showing up in the search results. If the file or folder now appears in the search results, it indicates that Spotlight has successfully reindexed the drive.
It’s worth noting that reindexing Spotlight may temporarily impact system performance, as it consumes CPU resources during the indexing process. However, this impact is usually minimal and should not cause any significant issues.
In addition to using the Terminal, there is an alternative method to reindex Spotlight by enabling Developer Mode in the System Preferences. However, this option may not be available on all devices and versions of macOS.
Reindexing Spotlight can help resolve search-related issues and ensure that it includes all the necessary files and folders in its index. If you ever encounter any search problems on your Mac, reindexing Spotlight using the Terminal is a simple and effective solution to consider.
What Sudo Command Causes Spotlight Re-Indexing?
The sudo command that causes Spotlight to re-index is “sudo mdutil -E /”. This command is used in the Terminal on a Mac system to initiate the re-indexing process for the entire drive. It is important to note that the sudo command requires administrative privileges, so you may be prompted to enter your password.
Here is a breakdown of the command:
1. “sudo” is a command that allows a user with administrative privileges to execute a command as a superuser or root user. It ensures that the subsequent command has the necessary permissions to perform the task.
2. “mdutil” is a utility command used for managing Spotlight, the search feature on Mac systems. It allows users to enable or disable indexing, as well as control various aspects of the indexing process.
3. “-E” is an option used with the mdutil command to erase the existing Spotlight index. By specifying this option, the command instructs Spotlight to delete the current index.
4. “/” is the path argument that specifies the root directory of the drive. By providing this argument, the command indicates that the re-indexing process should encompass the entire drive.
Once you enter the command and provide your password if prompted, the existing Spotlight index will be deleted, and Spotlight will commence creating a new index in the background. This process may take some time, depending on the size of your drive and the amount of data it contains.

How Long Does It Take to Reindex Spotlight?
The time it takes to reindex Spotlight can vary depending on the amount of data that needs to be indexed. However, typically, the process should not take very long. In my experience, I have observed that it only takes a few minutes to index around 100 GB of data.
Reindexing Spotlight involves updating the index that keeps track of the files and their content on your computer. This process allows for faster and more accurate search results when using the Spotlight search feature. The indexing process involves scanning the files on your system and creating a database of their content.
During the reindexing process, Spotlight will go through all the files and folders on your computer and analyze their content. This includes documents, emails, applications, and other types of files. It will then update the index with the new information.
The duration of the reindexing process can depend on various factors, such as the speed of your computer, the size of your storage, and the complexity of the data being indexed. If you have a large amount of data or a slower computer, it may take a bit longer to complete the reindexing process.
To give you a clearer understanding, here is a breakdown of the estimated time it may take to reindex different amounts of data:
– For smaller amounts of data, such as a few gigabytes, the reindexing process can be completed within a few minutes or less.
– If you have around 100 GB of data, which is a substantial amount, it typically takes only a few minutes to reindex.
– For larger data sizes, such as several terabytes, the process may take longer, potentially up to an hour or more.
It’s important to note that reindexing Spotlight may temporarily impact the performance of your computer, as it requires system resources to scan and analyze the files. Therefore, it is advisable to initiate the reindexing process when you don’t need to use your computer intensively.
The time it takes to reindex Spotlight depends on the amount of data to be indexed. However, even for significant amounts of data, it generally shouldn’t take more than a few minutes to complete the process.
How Do You Know If Spotlight is Indexing Mac?
To determine if Spotlight is indexing your Mac, you can follow these steps:
1. Open the Activity Monitor on your Mac. You can find it in the Utilities folder within the Applications folder, or you can use the Spotlight search (Command + Space) to quickly locate it.
2. In the Activity Monitor window, you will see a list of processes running on your Mac. Look for a process named “mdworker” in the Process Name column. This process is responsible for indexing files for Spotlight.
3. Check the CPU usage column (%CPU) for the mdworker process. If the CPU usage is above 0%, it indicates that Spotlight is actively indexing your Mac. Even if the CPU usage is at 0%, it doesn’t necessarily mean that indexing is not happening, as mdworker may still be working in the background.
4. When the mdworker CPU usage is higher, typically 50% or more, it suggests that Spotlight is indexing your files more intensively. This can happen when you add new files or make significant changes to existing files on your Mac.
Once you have confirmed that Spotlight is indexing your Mac, you can be assured that it is working to update its search index. This index helps improve the speed and accuracy of searches performed using Spotlight.
It is important to note that indexing can take some time, especially if you have a large number of files or if you have recently made significant changes to your files. During this process, you may notice a temporary decrease in system performance, as Spotlight utilizes system resources to complete the indexing task.
By keeping an eye on the mdworker process in Activity Monitor, you can stay informed about the status of Spotlight’s indexing on your Mac.
Conclusion
Reindexing Spotlight in Mac Terminal is a straightforward process that can greatly improve the performance and accuracy of the search feature on your Mac. By using the sudo mdutil -E / command, you can delete the existing Spotlight index and initiate the creation of a new index. This process typically takes only a few minutes, depending on the amount of data on your drive.
Reindexing Spotlight is particularly useful when you notice that the search results are not as relevant as they should be, or if you have recently made significant changes to your files and folders. It allows Spotlight to rebuild its index from scratch, ensuring that all the latest data is included and accurately searchable.
Additionally, enabling Developer Mode can provide you with more control and customization options for Spotlight. This feature allows you to fine-tune the indexing process and optimize it according to your specific needs.
Reindexing Spotlight and utilizing Developer Mode can greatly enhance the search functionality on your Mac, making it easier and more efficient to find the files and information you need. By taking advantage of these features, you can ensure that Spotlight is working at its best, providing you with accurate and relevant search results.


