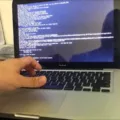
Are you facing the issue of a black screen with lines on your Macbook? This issue is common among Macbook users and can be caused by a variety of factors. In today’s blog post, we will discuss what could be causing your Macbook to have a black screen with lines and how to potentially fix it.
One of the first things that you should do when attempting to troubleshoot a black screen with lines is to reset your SMC. Resetting your SMC (System Management Controller) can help resolve many temporary issues that could be causing the black screen with lines. To reset your SMC, make sure your Macbook is turned off and unplugged for at least 15 seconds before plugging it back in again. Then while the power is still off, hold down the Shift + Option + Control + Power buttons together until you see the Apple logo appear on your screen.
In some cases, the issue may be caused by an incorrect cable connection or incompatible display settings. Therefore, make sure that all of your cable connections are secure, and double-check that you have set up the correct resolution on your display settings. Additionally, if you are using an external display connected through HDMI or VGA port then make sure to enable Clamshell mode by closing the lid in order to get video onto the external display.
If none of these steps have worked for you so far then try a forced power off by holding down the power button or performing an SMC reset. If this resolves your issue then great news! However, if there are still no changes to your black screen with lines then it may be a sign that something is wrong with either your graphic card or logic board, requiring maintenance or repair from an authorized service center.
We hope this blog post was informative and helpful in understanding what could be causing a black screen with lines on Macbooks and how to potentially resolve it!

Fixing a Black Screen with Lines on a MacBook Pro
If you are seeing lines on your MacBook Pro’s black screen, the most likely cause is a hardware issue. You should first try resetting the SMC (System Management Controller) to see if that resolves the issue. To do this, turn off your MacBook and unplug it for at least 15 seconds before plugging it in again. Then, with the power still, off, hold down Shift + Option + Control + Power all together until you see an Apple logo appear on the screen. If this doesn’t work, it’s possible that you have a faulty graphics card or RAM module, or a display cable that needs to be replaced. In this case, you should take your laptop to an authorized Apple repair center for further diagnosis and repair.
Fixing Vertical Black Lines on a Mac Screen
If you are seeing vertical black lines on your Mac screen, there are several steps you can take to troubleshoot and fix the issue.
1. Reboot your Mac: A simple restart can help with many temporary issues and system glitches. To restart your Mac, click the Apple icon in the top left corner of your screen, select “Restart”, then confirm that you want to restart by clicking “Restart” again.
2. Check Cable Connection: Make sure all cables connected to your Mac are securely plugged in at both ends. If any cables appear worn or damaged, replace them with new ones.
3. Connect Another Display: If possible, connect a second display to your Mac and check if the lines appear on both screens or just one. If they appear on only one screen, then the problem is likely with the display itself and not with your computer.
4. Reset SMC (System Management Controller): Resetting the SMC will reset certain low-level settings related to power management and energy-saving features on your computer. To do this, first shut down your computer, then press and hold down the Shift+Control+Option keys while pressing the power button at the same time for approximately 5 seconds. Then release all four keys at once before turning on your computer again as normal.
5. Reset NVRAM (Non-Volatile Random Access Memory): Resetting NVRAM will help resolve some types of startup problems like incorrect resolution settings or incorrect time zone information being set for your location. To reset NVRAM on most Macs made after 2011 press and hold down Command+Option+P+R when starting up until you hear two startup sounds or see an Apple logo with a progress bar appear beneath it twice before releasing the keys from step 1 above. For other models please refer to Apple’s support website for instructions specific to your model of Macbook/iMac/Mac Pro etc..
6. Install Graphic Card Updates: Outdated graphic card drivers can sometimes cause display problems like vertical black lines appearing onscreen so make sure that you have installed all available updates for your installed graphics card(s). You can check if any updates are available by opening System Preferences > Software Update > Graphics Driver Updates tab (if available).
7. Reinstall current macOS: Reinstalling macOS may help fix certain software-related issues that could be causing vertical black lines to appear onscreen so make sure that you backup all important data before reinstalling a fresh copy of macOS from scratch using Internet Recovery mode (if available) or from USB drive created using another computer running the same version of macOS as what is currently installed in yours (if Internet Recovery mode is not available).
Diagnosing a MacBook Air Screen with Black Lines
The most likely cause of a black screen with lines on your MacBook Air is a faulty logic board. It could be caused by a hardware failure or damage to the internal components, such as a faulty graphics chip, damaged ribbon cable, or loose connection. A forced power off (by holding down the power button) or an SMC reset may help. If that doesn’t work, it’s likely that you will need to have the logic board replaced.


