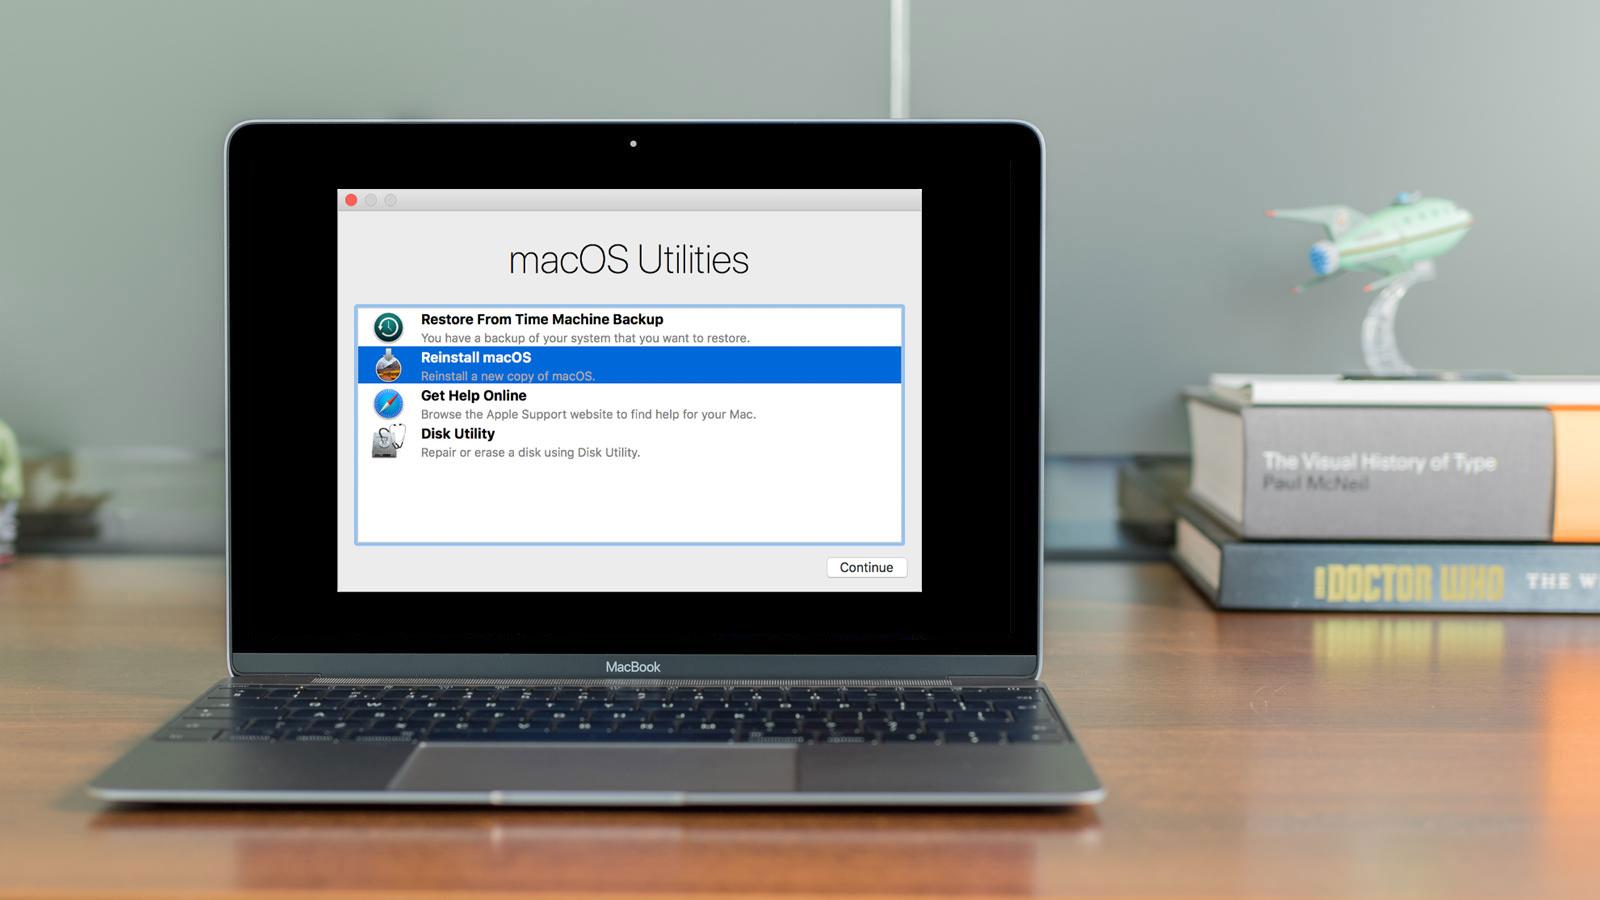
If you own a MacBook Air 2011, then you may be familiar with the Recovery Mode feature. Recovery Mode is a helpful tool that enables you to restore your Mac to its factory settings and reinstall macOS. In this blog post, we’ll go over how to access and use this powerful feature on your MacBook Air 2011.
The first step in using the Recovery Mode feature on your MacBook Air from 2011 is to access it. To do so, start by shutting down your Mac completely. Once it’s off, press the power button and hold down the Command (?) + R keys while it boots up. Keep holding these keys until you see the Apple logo appear on the screen. You will then be taken to the macOS Utilities window where you can access various tools including Disk Utility and Terminal as well as Recovery Mode.
Once in Recovery Mode, you can begin restoring your Mac to its factory settings. Start by selecting Reinstall macOS from the macOS Utilities window and click Continue when prompted. You will then need to select your startup disk (usually called “Macintosh HD”). After selecting your startup disk, click Install and follow any further instructions that appear on the screen.
It’s important to note that this process will wipe out all of the data stored on your Mac so make sure that you have backed up all of your important files before proceeding with this process! Once completed, however, your Mac should be restored back to its original state as if it were brand new.
Recovery Mode is a great way of restoring a MacBook Air 2011 back to its factory settings without losing any data in the process. If you ever find yourself in need of resetting or restoring your laptop back to its original state, simply follow these steps and you should have no problem getting it back up and running again!

Performing a Factory Reset on a MacBook Air 2011
To do a factory reset on your MacBook Air 2011, you will need to begin by backing up all of your data. To do this, open Finder and select the Backup Now option from the File menu. Once your data is backed up, restart the computer and press and hold down the Command + R keys until you see the Apple logo appear on your screen. This will open the macOS Recovery window.
Once in the macOS Recovery window, click on Disk Utility and select Continue. On the left side of the window, select your hard drive and then click on Erase in the top right corner. Select Mac OS Extended (Journaled) as your format type, enter a name for your disk if you wish, and then click Erase. This will erase all data from your hard drive and prepare it for a fresh installation of macOS.
Once this process is complete, click on Reinstall macOS from the Utilities menu in the top bar of the macOS Recovery window. Follow any instructions that appear until you see a Welcome screen where you can choose between setting up as a new Mac or transferring information from another Mac or Windows PC. Finally, hit Reset All Content and Settings to complete your factory reset.

Source: macworld.com
Forcing a MacBook Air to Restore
If you want to force your MacBook Air to restore, you can do so by following these steps:
1. From the Apple menu, select Shut Down.
2. Press and hold the power button until “Loading startup options” appears.
3. Select Options and click Continue.
4. Follow the onscreen instructions to open the Recovery app window.
5. Select Reinstall for your macOS release and click Continue.
6. Follow the onscreen instructions to complete the re-installation process of your macOS system software and restore your MacBook Air back to its factory settings.
Troubleshooting MacBook Air Recovery Mode Issues
The most common reasons your MacBook Air won’t boot into recovery mode are due to corrupted software, a damaged hard drive, or outdated macOS. If you have an older version of macOS that doesn’t include a recovery partition on your MacBook Air, it will be difficult to access the recovery mode. It’s also possible that a defective keyboard could prevent your Mac from entering recovery mode. To diagnose and fix the issue, it may be necessary to run diagnostics on your machine and repair any hardware issues. You may also need to reinstall the operating system if the software is corrupt or out of date.
Restoring an IMAC 2011 to Factory Settings
Restoring your iMac 2011 to factory settings is a relatively straightforward process. First, you should back up your Mac so you don’t lose any important data before the reset. You can use Apple’s Time Machine software for this purpose. Once you’ve backed up all of your files, deauthorize the Mac from your Apple account and unpair Bluetooth devices that are connected to it. Then, you’ll need to reset your NVRAM and put your Mac into Recovery mode. To do this, shut down the computer and then press and hold Command-R while turning it on again. When the recovery screen appears, select Disk Utility from the list of options and choose Erase in order to wipe your startup disk. Finally, reinstall macOS by selecting Reinstall macOS from the Utilities menu on the recovery screen. Once you have finished this step, your iMac 2011 will be restored to its factory settings!
Reinstalling macOS on a MacBook Pro 2011
To wipe your MacBook Pro 2011 and reinstall, first, open the Apple menu and select System Settings. Then click General in the sidebar (you may need to scroll down). On the right side, click Transfer or Reset and then click Erase All Contents and Settings. You will be prompted to enter your administrator password and confirm the action. After this is done, you can proceed with reinstalling macOS by inserting a bootable USB drive or DVD into your Mac’s optical drive. Follow the onscreen instructions to finish reinstalling macOS on your machine.
Restoring an Old Mac to Recovery Mode
Restoring your Mac to recovery mode is easy! First, make sure the computer is powered off. Then, press and hold one of the following key combinations until you see the startup screen: Command-R to start up from the built-in macOS Recovery System, Option-Command-R to start up from macOS Recovery over the internet, or Option-Shift-Command-R to start up from macOS Recovery over the internet. Once in recovery mode, you will be able to access tools such as Disk Utility, reinstall macOS, and restore from a Time Machine backup.
Restoring a Mac When Recovery Is Not Working
If the standard Recovery Mode isn’t working on your Mac, you may need to try resetting your PRAM (Parameter RAM) or NVRAM (Non-Volatile RAM). To do this, shut down your Mac and turn it back on again while holding down the “Command + Option + P + R” keys for about 20 seconds. This will reset both the PRAM and NVRAM, which may help restore access to Recovery Mode. If that doesn’t work, you may need to boot from an external drive or reinstall macOS from the internet.
Restoring a Macbook Air to Factory Settings Without a Disk
To restore your Macbook Air to factory settings without a disk, you can use the built-in Erase All Content and Settings option. To access this option, open the Apple menu. in the corner of your screen, choose System Preferences, then click General in the sidebar. On the right side of the window, click Transfer or Reset and then select Erase All Content and Settings. This will erase all data from your Macbook Air and restore it to its original factory settings.
Starting Mac in Recovery Mode From Command Prompt
To start your Mac in recovery mode from the command prompt, you will need to restart your Mac and hold down the Command + R keys until you see the Apple logo on the screen. Once you see the logo, release the keys and your Mac will boot into macOS Recovery mode. In recovery mode, you will be able to access a variety of tools such as Disk Utility, Terminal, Restore from Time Machine Backup, and more. You can use any of these tools to help troubleshoot and repair your Mac.
Rebooting Into Recovery Mode
Rebooting your device into recovery mode is a useful way to access certain advanced troubleshooting options on your Android phone or tablet. To do this, you’ll need to press and hold the Volume Down button, then press and hold the Power button as well for a few seconds. When you see the Android mascot on its back on the screen, use the Volume Down button to cycle through the options until you find Recovery mode and press the Power button to load it. This should bring up a menu with various options; from there, you can use the Volume buttons to navigate and select an option.
Resetting a Mac to Factory Settings Without System Preferences
To reset your Mac to factory settings without System Preferences, you will need to boot into macOS Recovery. To do this, power down your Mac if it’s on and press and hold the power button until you see the startup options. Choose macOS Recovery and select Reinstall macOS. Follow the prompts to complete the process. This will erase all of your data on the computer, so make sure that you have backed up any important information before doing this.
Conclusion
In conclusion, the MacBook Air 2011 is capable of entering recovery mode in order to reset or repair the operating system. This can be done by either using the Recovery app window or by pressing and holding the power button until “Loading startup options” appears. Before attempting to enter recovery mode, it is important to back up any data that is stored on the device as all data will be wiped during the reset process. By understanding how to enter recovery mode, users can easily reset their Macbook Air 2011 and get it back up and running.


