If you’re a Mac user, you’ll be familiar with the local disk. This is where all of your important files and documents are stored. It also serves as the main database for your system, allowing your computer to run smoothly and efficiently. But do you know exactly what the local disk is and how it works?
The local disk is a part of your Mac’s hard drive that contains all of your system’s data. This includes applications, files, settings, and other information that allows your computer to function properly. The local disk is also referred to as the “root directory” or “Macintosh HD.” It can be accessed either through the Finder app or through the Terminal app on your Mac.
When you open up the local disk folder in Finder, you will see several folders inside of it. These folders contain all of the information that is stored on your Mac’s hard drive such as applications, files, settings, and more. You can also use this folder to store new files and documents that you create on your computer.
The local disk also serves as an important tool when it comes to troubleshooting problems with your Mac. By accessing this folder in Finder or Terminal, you can view error logs and files that can help pinpoint any issues with your computer. You can also access caches that store temporary data from websites which helps improve performance when using certain websites or applications.
In addition to all of these features, you can also use the local disk to partition a part of your hard drive for extra storage space or backup purposes. This means that if something happens to one portion of your hard drive, another section remains untouched so that you don’t lose any important files or data.
Overall, understanding what the local disk is on Mac computers and how it works is extremely beneficial for any user who wants to keep their system running smoothly and securely at all times!
Accessing the Local Disk on a Mac
The local disk on a Mac is located inside the Finder. The easiest way to access it is to open the Finder window, then click on the Devices tab at the top of the Finder window. You should then be able to see the local disk listed as an item in the sidebar. You can also find it by clicking on Go in the Menu bar and selecting Computer. If you want to make sure that your local disk is always visible on your desktop, you can go to Finder > Preferences, select General, and then check the box next to “Hard disks” under “Show these items on the desktop”.
Accessing Local Hard Drive on Mac
To open your local hard drive on a Mac, first launch Finder and click on the Finder option from the menu bar. In the Finder Preferences window, click on the ‘Sidebar’ tab. Under ‘Show these items in the sidebar’, make sure to check the box next to ‘Hard disks’. This will ensure that your local hard drive is visible in the sidebar. You can then simply double-click on it to open it and explore its contents.
The equivalent of C Drive on Mac
The equivalent of the C:/ drive found in Windows on a Mac is the “Macintosh HD” volume. This is the main hard drive that contains the Mac Operating System (macOS) as well as any applications, user data, and other system-related files. It’s important to note that if you change the name of this drive, it could be something other than “Macintosh HD.”
Creating a Local Disk on a Mac
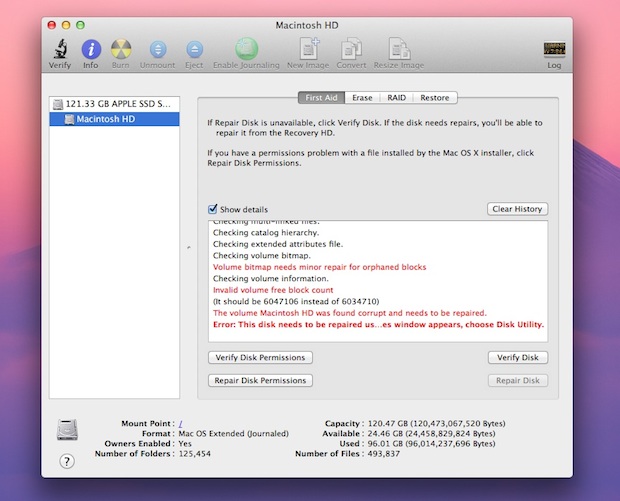
Creating a local disk on your Mac is relatively straightforward. To begin, open the Disk Utility app on your Mac, which can be found in Applications > Utilities. Once you have the app open, select the hard drive you would like to partition from the sidebar. Once you have selected your hard drive, click the Partition button in the toolbar. This will bring up a pie chart showing how much of the disk is allocated for what purposes. From here, click the Add button below the chart to create a new partition for your local disk. You will then be asked to name this new partition in the Name field; once named, click Add Partition one final time and it will appear in your Disk Utility window. Your new local disk should now be ready for use!
Troubleshooting Issues with Locating a Hard Drive on a Mac
If you can’t find your hard drive on your Mac, the first thing to check is your Finder preferences. Go to Finder and click on the Finder button in the menu bar at the top of the screen. Then follow Preferences? General? Show these items on the desktop. Make sure you tick the boxes next to External disks and Hard disks. Then go to Sidebar and check Hard disks and External disks there as well.
If this doesn’t help, then it’s possible that your hard drive is not connected properly or that it has malfunctioned. Try connecting it directly to your computer with a USB cable, if applicable, or try disconnecting and reconnecting it again. If this doesn’t work, then you may need to replace your hard drive or contact a professional for help.
Unable to Access Hard Drive on Mac
There are a few possible reasons why you can’t open your hard drive on Mac. The most common issue is the format of your external hard drive; in this case, you’ll need to change the format of your drive using Disk Utility. Other possible causes could be an issue with the power supply, a faulty cable, or your drive being corrupted or broken. To troubleshoot any of these issues, we recommend starting with checking the power connection first. If that doesn’t work, then try to reformat the external hard drive using Disk Utility. Finally, if this still doesn’t solve the issue, it’s possible that your external hard drive is damaged and needs to be replaced.
Creating a Local Disk Partition
Creating a local disk partition can be done in a few simple steps. First, right-click on This PC and select Manage. This will open the Disk Management window, allowing you to view all available disks. Select the disk from which you want to make a partition. In the bottom pane of the window, locate the Unpartitioned space and right-click it. From the menu that appears, select New Simple Volume. This will open a wizard where you can enter the size of your new partition. Once you have entered your desired size, click on Next to finish creating your partition. You have now successfully created a local disk partition!
Conclusion
In conclusion, the Mac local disk is an essential part of a Mac computer, as it is where all the data and applications are stored. It can be accessed through Finder, where users can configure their preferences to show the hard disks on their desktops. Additionally, users can add partitions to the Mac’s local disk in order to divide it into different sections. This makes it easier for users to organize their files and access them quickly. With the help of these features, Mac local disk allows users to get the most out of their Macs.

