Are you looking for a quick and easy way to install Java 8 JDK on your Mac? Look no further! In this blog post, we’ll walk you through the entire process of downloading and installing Java 8 JDK on your Mac.
Step 1: Download the Java 8 JDK from Oracle
The first step is to download the Java 8 JDK from Oracle’s website. Head over to http://www.oracle.com/technetwork/java/javase/downloads/jdk8-downloads-2133151.html and click the “Download” button next to the latest version of Java 8 JDK. Once it’s finished downloading, open up the downloaded file and run the installer.
Step 2: Accept the License Agreement
After running the installer, you will be prompted with a license agreement that must be accepted before the installation can continue. Read through it carefully, then accept it by clicking “Agree and Continue”.
Step 3: Install Java 8 JDK
Once you have accepted the license agreement, you will be taken to an installation screen where you can choose where to install your Java 8 JDK files. By default, they will be installed in /Library/Java/JavaVirtualMachines/. You can also specify a different location if you prefer. Once you have chosen your installation location, click “Install” and wait for the installation to complete.
Step 4: Verify Installation Successful
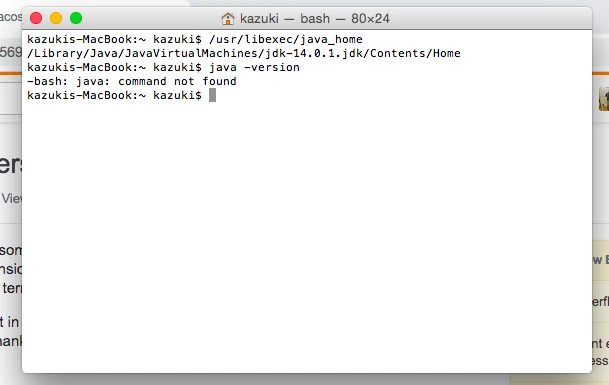
Once the installation has been completed successfully, open up a terminal window and type in “java -version” to verify that your system is now using Java 8 JDK as its default version of Java. If everything looks good, then congratulations! You have just installed Java 8 on your Mac!
Installing Java JDK 8
Installing Java JDK 8 on Debian or Ubuntu Systems is a fairly straightforward process and can be done in just a few steps.
First, check which version of the JDK your system is using by running the command: java -version. This will let you know if you already have an installed version of Java JDK 8.
Next, update the repositories by running the command: sudo apt-get update. This will download any available updates from the repositories.
After that, install OpenJDK 8 by running the command: sudo apt-get install openjdk-8-jdk. This will install the latest version of Java JDK 8 on your system.
Once it has been installed, verify the version of the JDK by running: java -version again to make sure that it is now using Java JDK 8.
If it is not using the correct version, use the alternatives command to switch it: sudo update-alternatives –config java. This will allow you to select which version of Java should be used as a default on your system.
Finally, verify once more that your system is now using Java JDK 8 by running: java -version again to make sure that it has been successfully switched over to the desired version of Java.
And there you have it! You have now successfully installed and switched over to Java JDK 8 on your Debian or Ubuntu system!
Installing JDK 8 on Mac
JDK 8 is no longer supported on macOS, so it cannot be installed. However, for users who still need access to JDK 8, the legacy version of Java 8 can be found at /Library/Java/JavaVirtualMachines/1.8.0_191-b12/Contents/Home. This directory contains the Java Runtime Environment (JRE) and the Java Development Kit (JDK). Please note that this version is no longer supported and may have security vulnerabilities or other issues. It is highly recommended to use a more recent version of the JDK for development purposes.
Installing Java JDK on Mac
Installing the Java JDK on macOS is a simple process. First, download the JDK .dmg file from the Oracle website. Once you have the file, double-click it to start it up and follow the on-screen instructions. On the next screen, double-click the JDK 15 icon and click continue. Then click Install and enter your administrator username and password to begin the installation. Once completed, you will have successfully installed Java JDK on your Mac.
Installing Java 8 on Mac M1
Installing Java 8 on Mac M1 is a straightforward process. First, you will need to download the most recent JDK 8 version from the official Oracle website. Once you have done that, you will need to open the downloaded .dmg file and then double-click on the .pkg file within it. This will bring up an installer window where you can select which components of Java 8 to install. Once everything is selected and you’ve read and accepted the license agreement, click “Install” and authenticate with your password. The installation should take only a few minutes to complete before you are ready to use Java 8 on your Mac M1 computer.
Changing Java Version from 11 to 8
To change the Java version from 11 to 8, you need to first install the openJDK-8-jre package using apt-get. To do this, open up a terminal window and type in the following command: sudo apt-get install openjdk-8-jre. Once it is finished installing, you need to switch to the jre-8 version by typing in the following command: sudo update-alternatives –config java. This will display a list of options for you to choose from. Select the one that corresponds with OpenJDK 8 and press enter.
Next, you need to add the JAVA_HOME variable for your environment by typing in this command: export JAVA_HOME=/usr/lib/jvm/java-8-openjdk-amd64. Finally, run the following command to make sure that everything is set up correctly and that you’re using Java 8: java -version. If all has gone according to plan, it should display that you’re now using Java 8.
Checking if Java 8 is Installed on a Mac
If you would like to know if Java 8 is installed on your Mac, you can open the Terminal application and run the command “java -version”. This will display the version of Java installed on your Mac. If Java 8 is installed, the output should look something like this: “java version “1.8.0_xx””. If Java 8 is not installed, then the output will indicate an earlier version or that no version is installed. You can then download and install the correct version from java.com.
Installing OpenJDK 8 on Mac
Installing OpenJDK 8 on a Mac is easy and straightforward. First, open the macOS Terminal (Applications->Utilities->Terminal), then run the following command: sudo port install openjdk8. This will install OpenJDK 8 on your Mac. Once the installation is complete, you can use the command “port contents openjdk8” to view all of the files that were installed. To upgrade OpenJDK 8 in the future, you can run “sudo port selfupdate && sudo port upgrade openjdk8”. That’s all there is to it!
Changing JDK Version on Mac
Changing the JDK version on a Mac is easy! First, open the Terminal. You can check if you have the JDK installed by typing “which java”. Then, type “java -version” to check that you have the correct version of Java installed. If you don’t, you can download it from Oracle’s website. Once you’ve downloaded it, set JAVA_HOME with this command: export JAVA_HOME=/Library/Java/Home. Finally, restart your computer and the new JDK version should be in effect.
Downloading Java Version 8
To download Java version 8, go to the Oracle website (https://www.oracle.com/java/technologies/javase-downloads.html). Select the version of Java you would like to download – in this case, Java 8. Click the download button and then accept the license agreement by clicking the “Accept License Agreement” button. Depending on your operating system, you can either select a Windows x64 or x86 installer or a Mac OS X Installer (.dmg file) and then click on the corresponding link to begin downloading the file. Once downloaded, run the installer and follow through with any instructions that appear on the screen to complete the installation process.
Does Mac Come With JDK Installed?
No, Macs do not come with the Java Development Kit (JDK) installed. The JDK is a set of tools and libraries that allow developers to create and run Java applications. To use the JDK on a Mac, you must first download and install it from the official Oracle website.
Can Java JDK Be Used on M1 Macs?
Yes, Java JDK works for M1 Mac. The OpenJDK brew formula can be used to install a compatible Apple M1 JDK build. Additionally, tools such as sdkman and jEnv can be used to manage different Java versions on an M1 Mac. Furthermore, the GraalVM has also been updated with support for Apple M1 Macs. Therefore, developers are able to use the GraalVM on their M1 Macs as well.
Conclusion
In conclusion, installing Java 8 JDK on Mac is relatively simple and straightforward. All you need to do is download the appropriate JDK from the official website, open the DMG file, double-click the file inside, select install, and authenticate to start the installation process. Once installed, you should be able to use Java for developing applications and running programs. With the help of this guide, you can now easily install Java 8 JDK on your Mac without any issues.

