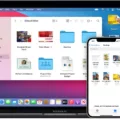
When it comes to managing your photos, there are various methods to transfer them from your iPhone to your Mac using Wi-Fi. In this article, we will discuss two popular options: iCloud and iTunes.
Using iCloud, you can easily sync your photos between your iPhone and Mac. To begin, go to the Settings app on your iPhone and enable iCloud. Then, under iCloud settings, enable the option for Photos. On your Mac, download the iCloud app and sign in with your Apple ID. Open the app and select the Gallery option to download your images to your computer. Additionally, you can set up Wi-Fi syncing by connecting your iPhone to your Mac using a USB or USB-C cable. From there, turn on Wi-Fi syncing and choose your preferred settings. Once your device is connected to your Mac over Wi-Fi, you can select it in the sidebar and sync it. If desired, you can opt for automatic syncing.
Alternatively, iTunes can also be used for wireless file transfer from your iPhone to your Mac. To begin, ensure that you have the latest version of iTunes installed on your PC. Connect your devices and set up Wi-Fi syncing. Next, click on the iPhone button in the iTunes app on your PC. From there, you can easily transfer your photos and manage your files.
Another option to transfer your photos is to directly import them to your Mac using a USB cable. Connect your iPhone or iPad to your Mac using a USB cable and open the Photos app. The app will display an Import screen that shows all the photos and videos on your connected device. If the Import screen does not appear automatically, simply click on your device’s name in the Photos sidebar.
Remember, these methods offer convenient ways to transfer your photos from your iPhone to your Mac using Wi-Fi. Choose the option that suits your preferences and enjoy hassle-free photo management.

How Do You Transfer Photos From iPhone to Computer Via WiFi?
To transfer photos from your iPhone to your computer using Wi-Fi, you can utilize the iCloud service provided by Apple. Here are the steps to follow:
On your iPhone:
1. Open the Settings app on your iPhone.
2. Scroll down and tap on “iCloud”.
3. If you haven’t already, sign in to your Apple ID.
4. In the iCloud settings, locate and enable the “Photos” option. This will sync your iPhone’s photos with iCloud.
On your computer:
1. Ensure that you have the iCloud app installed. If not, you can download it from the Microsoft Store for Windows computers.
2. Open the iCloud app and sign in with your Apple ID.
3. Once signed in, you’ll see various options for syncing. Make sure the “Photos” option is checked.
To download the photos from iCloud to your computer:
1. Open the iCloud app on your computer.
2. Click on the “Gallery” option.
3. Here, you’ll find all the photos synced with your iCloud account.
4. Select the photos you want to transfer to your computer. You can use Ctrl + click to select multiple photos.
5. Right-click on the selected photos and choose “Download” from the context menu.
6. The photos will be downloaded to your computer’s default download location or the folder you specified.
Alternatively, you can also access iCloud photos through a web browser:
1. Open your preferred web browser and go to www.icloud.com.
2. Sign in with your Apple ID.
3. Click on the “Photos” icon.
4. Browse through your photos and select the ones you want to download.
5. Click on the download icon (a cloud with an arrow pointing downward) to save the selected photos to your computer.
By following these steps, you can easily transfer your photos from your iPhone to your computer using Wi-Fi and iCloud synchronization.

How Do You Transfer Files From iPhone to Mac Wirelessly?
To transfer files from your iPhone to your Mac wirelessly, you can follow these steps:
1. Connect your iPhone to your Mac using a USB or USB-C cable.
2. Open the Finder app on your Mac.
3. In the sidebar of the Finder window, you should see your iPhone listed under the Locations section. Click on it to select your device.
4. On the right side of the Finder window, you will see various options for your iPhone. Look for the “General” tab and click on it.
5. In the General tab, you will find an option called “Show this iPhone when on Wi-Fi”. Check the box next to it to enable Wi-Fi syncing.
6. Once you have enabled Wi-Fi syncing, you can choose the settings you want for syncing your iPhone with your Mac. You can select what content you want to sync, such as music, videos, photos, and more.
7. If you want your iPhone to automatically sync with your Mac whenever it is connected to the same Wi-Fi network, you can check the “Automatically sync when this iPhone is connected” option.
8. After setting up the desired options, you can disconnect the USB cable from your iPhone and your Mac.
9. Your iPhone will now be available for wireless syncing with your Mac whenever both devices are connected to the same Wi-Fi network.
10. To initiate a wireless sync, simply open the Finder app on your Mac, select your iPhone from the sidebar, and click on the “Sync” button.
Alternatively, you can also use third-party apps like AirDrop or cloud storage services like iCloud Drive or Dropbox to transfer files wirelessly between your iPhone and Mac. These methods allow you to transfer files without the need for a USB cable or Wi-Fi syncing setup.
How Do You Transfer Photos From iPhone to Mac Directly?
To transfer photos from your iPhone to your Mac directly, follow these steps:
1. Connect your iPhone to your Mac using a USB cable.
2. Open the Photos app on your Mac. If it doesn’t open automatically, you can find it in your Applications folder or by searching in Spotlight.
3. Once the Photos app is open, it should automatically detect your iPhone and display it in the sidebar under the “Devices” section. Click on your iPhone’s name to access its contents.
4. On the main screen, you’ll see all the photos and videos stored on your iPhone. You can select specific photos or videos by clicking on them, or you can choose to import all of them by clicking the “Import All New Photos” button.
5. If you only want to import selected photos or videos, hold down the Command key on your keyboard and click on the ones you want to transfer. Once you’ve made your selection, click the “Import Selected” button.
6. The Photos app will start importing the selected photos or videos from your iPhone to your Mac. You can monitor the progress in the upper-left corner of the Photos app.
7. Once the import is complete, you can choose to delete the photos from your iPhone by selecting the “Delete Items” option. If you prefer to keep them on your iPhone, simply click the “Keep Items” option.
8. After the import process, the imported photos and videos will be available in the “Imports” album in the Photos app. You can organize them into albums or edit them as desired.
That’s it! Your photos and videos have been successfully transferred from your iPhone to your Mac directly using the Photos app.
How Do You Transfer Files From iPhone to Computer Wirelessly?
To transfer files wirelessly from your iPhone to your computer using iTunes, follow these steps:
1. Ensure that you have the latest version of iTunes installed on your computer. If not, you can download and install it from the Apple website.
2. Connect your iPhone to your computer using a USB cable.
3. Open iTunes on your computer. If it doesn’t open automatically, you can manually launch it.
4. In iTunes, click on the device icon located in the upper left corner of the window. This will open the Summary page for your iPhone.
5. In the left-hand sidebar, under the “Settings” section, click on “Summary” if it’s not already selected.
6. Scroll down to the “Options” section and check the box that says “Sync with this iPhone over Wi-Fi.” This will enable wireless syncing between your iPhone and computer.
7. Click on the “Apply” button at the bottom right corner of the iTunes window to save the changes.
8. Disconnect your iPhone from the computer by safely ejecting it.
9. Make sure your iPhone and computer are connected to the same Wi-Fi network.
10. On your iPhone, go to the “Settings” app and tap on “Wi-Fi.” Connect to your Wi-Fi network if you’re not already connected.
11. Open the “Files” app on your iPhone. This app allows you to manage and access files stored on your device.
12. Select the file or files you want to transfer to your computer. You can do this by tapping on the “Select” button in the top right corner of the screen and then choosing the files you want to transfer.
13. Once you’ve selected the files, tap on the “Share” button. This can be found at the bottom of the screen and is represented by a square with an arrow pointing upwards.
14. From the list of sharing options, choose “AirDrop” or “iTunes.” If you choose “AirDrop,” make sure your computer is discoverable and select it from the list of available devices. If you choose “iTunes,” your iPhone will automatically sync with your computer over Wi-Fi.
15. If you selected “AirDrop,” your computer will receive the files and prompt you to save them to a location on your hard drive. Choose a destination folder and click “Save” to complete the transfer.
16. If you selected “iTunes,” the files will be transferred to your computer and will be accessible in the iTunes app.
Note: It’s important to keep in mind that certain file types may not be supported for wireless transfer using iTunes. Additionally, make sure you have enough free space on your computer to accommodate the files you want to transfer.
Conclusion
To conclude, there are several ways to transfer photos from your iPhone to your computer, whether you have an iPhone or Windows device. For iPhone users, enabling iCloud and iCloud Photos allows for seamless syncing between your phone and computer. By downloading the iCloud app on your computer and signing in with your Apple ID, you can easily access and download your photos from your iCloud gallery.
Alternatively, you can also set up Wi-Fi syncing between your iPhone and Mac. Simply connect your device to your Mac using a USB cable, turn on Wi-Fi syncing, and choose the settings you prefer. Once connected, you can select your device in the sidebar of your Mac and sync it whenever it connects to your computer over Wi-Fi.
For Windows users, using iTunes for wireless file transfer is an option. Make sure you have the latest version of iTunes on your PC and connect your iPhone to it. Set up Wi-Fi syncing and click on the iPhone button in the iTunes app. From there, you can easily transfer your photos wirelessly to your PC.
In addition, if you prefer a more traditional method, you can connect your iPhone or iPad to your computer using a USB cable and use the Photos app to import your photos and videos. The Photos app will display an Import screen with all the media on your connected device, making it easy to select and transfer the files to your computer.
Whether you choose to use iCloud, Wi-Fi syncing, iTunes, or the Photos app, there are multiple ways to transfer your photos from your iPhone to your computer. Find the method that works best for you and enjoy easy access to your precious memories on both your phone and computer.


