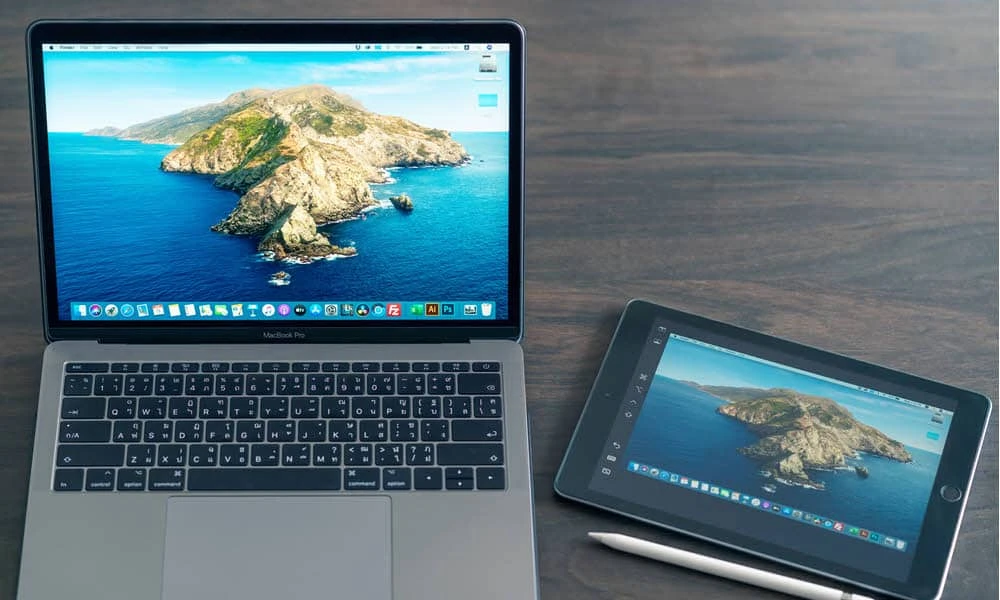
The iPad has become a popular device for capturing and storing photos. With its high-quality camera and ample storage space, it’s no wonder that many users rely on their iPads as their primary photo-taking device. However, if you want to transfer your photos from your iPad to your Mac for editing, sharing, or simply freeing up storage space, you may be wondering how to go about it. In this article, we will guide you through the process of transferring photos from your iPad to your Mac.
There are several methods you can use to transfer photos from your iPad to your Mac. One of the easiest and most convenient methods is to use the built-in Photos app on your Mac. Here’s how you can do it:
1. Connect your iPad to your Mac using a USB cable. Make sure your iPad is unlocked and the Photos app is open on your device.
2. On your Mac, open the Photos app. If the Import screen doesn’t automatically appear, click on your iPad’s name in the Photos sidebar.
3. The Import screen will display all the photos and videos that are on your connected iPad. You can choose to import all the photos or select specific ones by clicking on them. You can also choose to delete the photos from your iPad after importing them by selecting the “Delete items after import” option.
4. Once you’ve selected the photos you want to import, click on the “Import Selected” button to start the transfer process. You can also click on the “Import All New Items” button to import all the photos that haven’t been imported before.
5. The Photos app will now begin transferring the selected photos from your iPad to your Mac. You can monitor the progress of the transfer in the Photos app.
6. Once the transfer is complete, you can find your imported photos in the Photos app on your Mac. They will be organized into albums based on the date they were taken.
Alternatively, if you prefer to wirelessly transfer your photos from your iPad to your Mac, you can use iCloud Photos. Here’s how:
1. On your iPad, go to Settings and tap on your Apple ID.
2. Tap on “iCloud” and then toggle the “Photos” option to green to enable iCloud Photos syncing.
3. On your Mac, open the Photos app and go to Preferences. Click on the “iCloud” tab and make sure the “Photos” option is checked.
4. Your photos should now start syncing across all your Apple devices, including your Mac. If you have a large number of photos, it may take some time for them to fully sync.
5. Once the syncing is complete, you can access your iPad photos on your Mac through the Photos app. They will be organized into albums based on the date they were taken, just like with the USB transfer method.
In addition to the Photos app and iCloud Photos, there are also third-party apps available that can help you transfer photos from your iPad to your Mac. These apps often offer additional features and flexibility, but may require a paid subscription or have limitations compared to the built-in options.
Transferring photos from your iPad to your Mac is a straightforward process that can be done using the Photos app or iCloud Photos. Whether you prefer a wired or wireless method, both options allow you to easily transfer and access your iPad photos on your Mac. So go ahead and start transferring your precious memories from your iPad to your Mac today!

Can You Transfer Photos From Your iPad to Your Mac?
You can transfer photos from your iPad to your Mac. To do this, follow these steps:
1. Connect your iPad to your Mac using a USB cable.
2. On your Mac, open the Photos app. This app is usually located in the Applications folder.
3. Once the Photos app is open, you should see an Import screen. This screen will display all the photos and videos that are on your connected iPad.
4. If the Import screen doesn’t automatically appear, don’t worry. Simply click on the name of your iPad in the Photos sidebar, and the Import screen should show up.
5. On the Import screen, you can select the photos and videos that you want to transfer to your Mac. To do this, click on each photo or video that you want to transfer. Selected items will have a blue checkmark on them.
6. If you want to import all the photos and videos from your iPad, you can click on the “Import All New Photos” button at the top right corner of the screen.
7. Once you have selected the photos and videos you want to transfer, click on the “Import Selected” button at the top right corner of the screen. This will start the transfer process.
8. After the transfer is complete, the imported photos and videos will be available in the Photos app on your Mac. You can organize them into albums, edit them, or share them as you wish.
Transferring photos from your iPad to your Mac is a straightforward process using the Photos app. Simply connect your iPad to your Mac, open the Photos app, select the photos and videos you want to transfer, and click the import button.
How Do You Transfer Files From iPad to Mac?
To transfer files from your iPad to your Mac, you can follow these steps:
1. Connect your iPad to your Mac using a USB cable. Make sure your iPad is unlocked and on the home screen.
2. On your Mac, click the Finder icon in the Dock to open a Finder window. You can also press Command + N to open a new Finder window.
3. In the Finder window, you should see your iPad listed under Locations in the sidebar. Click on your iPad’s name to access its contents.
4. Navigate through the folders on your iPad to find the files you want to transfer. You can click on folders to open them and view their contents.
5. Once you’ve found the files you want to transfer, you can simply drag and drop them onto your Mac’s desktop or into a specific folder. Alternatively, you can right-click on the files and select “Copy,” then navigate to the desired location on your Mac and right-click again and select “Paste.”
6. The files will then begin transferring from your iPad to your Mac. The transfer speed will depend on the size of the files and the speed of your USB connection.
7. Once the transfer is complete, you can safely disconnect your iPad from your Mac by unplugging the USB cable.
It’s important to note that not all file types can be directly transferred from iPad to Mac. For example, certain apps may store files in their own proprietary formats that cannot be accessed directly. In these cases, you may need to use specialized software or cloud services to transfer the files.
Why Don’t All Photos Transfer From iPad to Mac?
There can be several reasons why not all photos transfer from an iPad to a Mac. Here are some possible explanations:
1. Connectivity issues: Check if both your iPad and Mac are connected to the same Wi-Fi network or if they are connected via a USB cable. An unstable or weak connection can interrupt the photo transfer process.
2. Software compatibility: Ensure that both your iPad and Mac are running on the latest operating systems. Sometimes, older software versions may not be fully compatible, leading to transfer problems.
3. Privacy settings: On your iPad, go to Settings > Privacy > Photos and make sure that the app you are using to transfer the photos has permission to access your photos. If the app is not listed or does not have permission, enable it.
4. Location settings: On your iPad, go to Settings > Privacy > Location Services and check if the app you are using to transfer photos has access to your location. Some apps require location access to function properly.
5. Storage space: Verify that your iPad has sufficient storage space to accommodate the photos you want to transfer. If your device is running low on storage, it could prevent the transfer process.
6. Corrupted files: If some of the photos on your iPad are corrupted or damaged, they may not transfer successfully. Try opening the photos on your iPad to ensure they are not corrupted before attempting to transfer them.
7. Third-party apps: If you are using a third-party app to transfer photos, ensure that it is up to date and compatible with both your iPad and Mac. Consider trying a different app if the current one is not working properly.
8. iCloud settings: If you have enabled iCloud Photo Library on your iPad, check if your Mac is set up to receive photos from iCloud. Open the Photos app on your Mac, go to Preferences > iCloud, and ensure that the iCloud Photo Library option is selected.
If you have gone through these steps and are still experiencing issues, it might be helpful to consult Apple Support or visit an Apple Store for further assistance.
How Do You Transfer Photos from iPad to Mac Without USB?
To transfer photos from your iPad to your Mac without using a USB cable, you can use iCloud Photos or AirDrop. Here’s how:
Option 1: iCloud Photos
1. On your iPad, go to Settings and tap on your Apple ID.
2. Tap on “iCloud” and make sure the “Photos” option is turned on.
3. Open the Photos app on your iPad.
4. Select the photos you want to transfer by tapping on “Select” at the top right corner.
5. Once you’ve selected the photos, tap on the share icon (a square with an arrow pointing up) at the bottom left corner.
6. Choose the “Options” button next to “AirDrop” and select your Mac from the list of available devices.
7. On your Mac, a pop-up will appear asking if you want to accept the photos. Click “Accept” to start the transfer. The photos will be saved to your Mac’s Downloads folder by default.
Option 2: AirDrop
1. Make sure both your iPad and Mac have Wi-Fi and Bluetooth turned on.
2. On your iPad, open the Photos app and select the photos you want to transfer.
3. Tap on the share icon at the bottom left corner.
4. From the list of sharing options, select your Mac under the AirDrop section.
5. On your Mac, a notification will appear asking if you want to accept the photos. Click “Accept” to start the transfer. The photos will be saved to your Mac’s Downloads folder by default.
Note: Both iCloud Photos and AirDrop require an active internet connection and that both devices are signed in with the same Apple ID. Additionally, ensure that you have enough storage space on iCloud and your Mac to accommodate the transferred photos.
By following these steps, you can easily transfer photos from your iPad to your Mac without using a USB cable.


