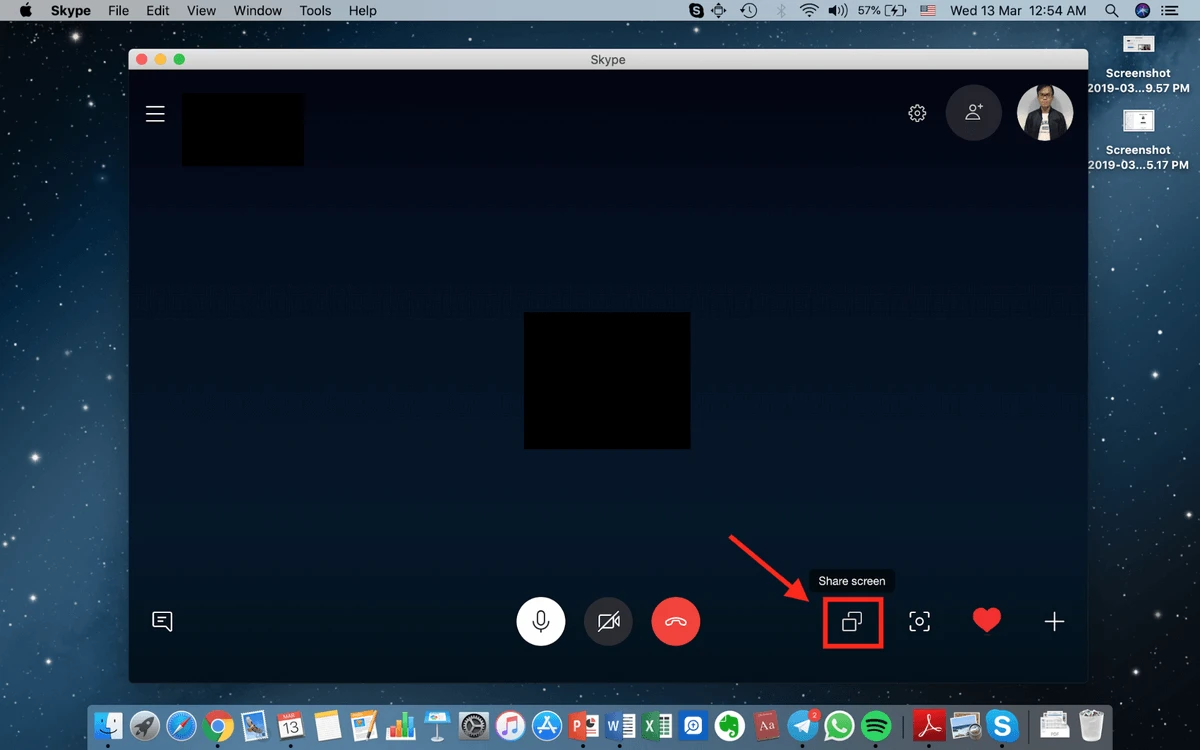
Are you a Mac user who is using Skype to communicate with your friends, colleagues, or family? If so, you may have noticed that Skype Mac doesn’t have an easy option for audio sharing. Fortunately, it is possible to share system sound on Skype Mac with just a few steps.
When you’re in the middle of a call on Skype Mac, click the Share Screen button. From here, you can choose which screen to share and whether or not you want to share the system sound.
If you’re using macOS 10.15 (Catalina), then Skype requires access to Screen Recording in the Mac System Preferences before it will allow audio sharing. To enable this feature:
1. Go to System Preferences
2. Select Security and Privacy
3. Under Privacy, click Screen Recording
4. Provide permission for your browser or app
5. A pop-up will appear asking you to quit the app or browser and log in again with the new setting
6. Once this is done, go back into Skype and select “Share Screen” during a call
7. You can now choose if you want to “share system sound” as well as view your screen
With these steps completed, everyone on the call should be able to hear any audio coming from your computer when you are sharing your screen! This makes it much easier for remote teams or social groups who need to come together online for meetings or other conversations when everyone cannot be in the same physical location at the same time.

Sharing Screen and Audio on Skype for Mac
Yes, you can share your screen and audio on Skype for Mac. To do this, during a call simply click the ‘screen sharing’ button to choose which screen you want to share. If you’re using Windows, you’ll also have the option to share sound from your computer. However, if you’re using Skype for Mac on macOS 10.15 (Catalina), Skype requires access to Screen recording in the Mac System Preferences in order to share your screen during a call.
Screen Sharing on a Mac with Sound
To screen share on a Mac with sound, you will need to make sure your Mac has an audio output device connected to it. Once that is done, you can go to the System Preferences and select Sharing. Then, select Screen Sharing from the sidebar and check the box to enable it. Finally, click on the Options button and select a microphone from the drop-down menu, and then click OK. Now when you are in a video call or conference with someone else, they will be able to hear your audio as well as see your screen.
Sharing Audio on Skype
To share audio on Skype, you will need to start a call with the person or people you wish to share audio with. Once the call has started, click on the button for sharing a screen or go to “Call” on the menu and choose “share screen”. In this menu, you will be able to select the option to “share system sound”. This will allow you to share your device’s audio with those on your call. You can then end the call when you are finished sharing the audio.
Does Mac Screen Sharing Support Audio?
Yes, Mac screen sharing does support audio. To use audio when screen sharing from your Mac, you can use AirPlay to stream what’s on your Mac to an HDTV or other Apple device. Once connected, you can listen to audio and play video from another device on your Mac.
Does Mac Screen Sharing Include Audio?
Yes, Mac screen sharing has audio! To enable audio when sharing your screen on macOS 10.13 or higher, simply head over to the ‘Voice & Video’ settings (within the User Settings) and find the ‘Screen Share’ section. Once there, you’ll see an option to toggle on or off the audio when sharing your screen. Make sure it is enabled for audio sharing to work.
Enabling Audio While Sharing Screen
To enable audio while sharing your screen, you can follow these steps:
1. Open the sharing settings by clicking on the “Share” tab in your web browser.
2. Select the option to share your entire screen or just a specific tab.
3. If you are sharing your entire screen, select the checkbox labeled “Share system audio” to enable audio sharing.
4. If you are only sharing a single tab, select the checkbox labeled “Share Tab audio” to enable audio sharing from that particular tab.
5. Click the “Start Sharing” button to begin sharing your screen with audio enabled.
Enabling Audio Screen Sharing
To enable audio screen sharing, first click the “Share Screen” icon on the meeting toolbar. Next, select the program or desktop you wish to share. Finally, check the box for “Share Sound” in the bottom-left corner of the share selection window. Once you have enabled audio sharing, you can begin presenting with sound.
Enabling Sound on Screen Sharing
To enable sound on screen sharing, first make sure you are logged in as the Host. Then, click the green “Share Screen” icon. You will see a pop-up window where you can select your desktop or application. Finally, check the box in the lower left corner that says “Share computer sound.” This should enable audio on your screen-sharing session.
Conclusion
In conclusion, Skype for Mac is an easy-to-use, convenient way to stay connected with friends and family. It allows you to share your screen and system sound with anyone you are talking to during a call. With just a few clicks, you can quickly share your screen and audio with the people on the other side of the call. It is also important to note that you need to grant access to Screen Recording in your Mac System Preferences for Skype for Mac on macOS 10.15 (Catalina) in order to share your screen during a call.


