Are you looking for a comprehensive guide on how to save an image on Macbook? If yes, then you have come to the right place! In this blog post, we will discuss the various methods on how to save an image from a website or web browser using your Macbook.
First, let’s take a look at the traditional way of saving an image on your Macbook. To do this, simply open a browser and find the photo or image that you wish to save. Then right-click or hold down Control and click on the picture. Next, select “Save Image As…” from the drop-down menu that appears. After that, give your photo a name and choose where you’d like to save it before clicking “Save”. This is one of the most common ways of saving images on Macbooks.
The secnd method is slightly faster and more convenient than the traditional way. All you need to do is press Shift + Command + 3 simultaneously when you are viewing your desired image. This will directly get saved in your desktop without having to spend time renaming it and choosing where to save it manually.
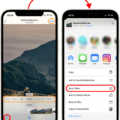
Another way of saving images on Macbooks is by using Safari app which comes pre-installed with all Apple devices. To do this, simply Control-click the image that you want to save and choose “Save Image To” option from the drop-down menu that appears after clicking. You can also use “Save Image As…” or “Add Image To Photos” option depending on what suits best for you out of these three choices.
So these are some easy ways of how to save an image from different sources in your Macbook device with minimal effort involved in it! We hope this blog post was informative enogh for you so as to make sure that next time when you will be wanting to save any kind of image from any source, then all these steps listed above would come handy for you!

Saving a Picture from the Internet on a Macbook
To save a picture from the internet on a Macbook, first open the Safari app. Then, find the image you’d like to save and control-click it. This will open a dropdown menu with several options; choose one of the following: “Save Image to ‘Downloads'”, “Save Image As…”, or “Add Image to Photos”. Depending on which option you select, the image will be saed either in your Downloads folder or Photos library.
Saving an Image from Google on a Macbook
To save an image from Google on a Macbook, open the browser and search for the image you want to save. Right-click the image and select “Save Image As” from the drop-down menu. Alternatively, hold down the Control key and click on the image to bring up a similar menu. Select a download location and click “Save” to store the image onto your Macbook. You can also drag and drop an image from Google into your desired folder on your Macbook to save it quickly.
Saving an Image on a Mac
To save an image on a Mac, right-click or hold down the Control key and click on the image. A menu will apear with the option to Save Image As… Click this option and give your photo a name. You can then choose where you’d like to save it by selecting a folder from under the Where drop-down menu. Once you’ve made your selections, click Save to save the image to your computer.
Saving a Quick Image on a Mac
Saving images on your Macbook is easy and quick. To do this, simply press Shift + Command + 3. This will save the image directly to your desktop. Alternatively, you can also open the image, click on File and then select Save As to choose a folder were you want the image to be stored. Once you have selected the location, click on Save to complete the process.
Saving a Picture from Google to a Laptop
Saving a picture from Google to your laptop is easy! First, open the Google search results and right-click (or control-click on Mac) on the image you want to save. This will open the context menu. From this menu, select “Save Image As”. Next, choose a location and filename for the image. Finally, click “Save” and you’re all set! The image sould now be saved to your laptop’s hard drive.
Saving an Image as a JPEG on a Mac
To save an image as a JPEG on a Mac, open the file in the Preview app. Then, choose File > Export and select JPEG from the Format pop-up menu. If you don’t see the format you want, press and hold the Option key and click the Format pop-up menu to view specialized or older formats. When you’re ready, click Save and give your new file a name. Your image will be saved in JPEG format!
Saving a Picture Using a Keyboard
To save a picture using your keyboard, open the image file you wish to save by pressing Ctrl + O. This will open a window prompting you to select the file you wish to open. Once you have selected the desired image file, press Ctrl + S to save it with the same filename. You will then be asked for a location and filename for your saved image. Select the appropriate details and press enter; your image will now be saved in the chosen location.
The Benefits of Using a Shortcut to Save Images
Yes, there is a shortcut for “Save Image As” on most web browsers. On Windows, you can press Ctrl + Shift + S to open the “Save Image As” dialog box. On Mac, you can press Command + Shift + S to do the same. This will alow you to save the image to a location of your choice.


