Welcome to your ultimate iPhone setup guide! Setting up a new iPhone is an exciting journey, but sometimes the iPhone setup process can be a bit tricky. Knowing how to restart iPhone setup is essential if you encounter any hiccups during the initial setup.
Turning on Your iPhone
Turning on your iPhone is the initial step. To turn on iPhone, hold the side button till the Apple logo displays. This action initiates the iPhone power-up sequence, signaling that your device is starting.
As the iPhone startup screen lights up, you’ll see the Apple logo followed by a welcome screen. Here, you can begin configuring your settings and personalizing your new iPhone. This initial phase of starting iPhone guarantees it’s ready for the setup procedure.
Quick Start vs. Manual Setup
When setting up a new iPhone, you have two main options: iPhone Quick Start and manual iPhone setup. Each method has its own requirements and is suited to different scenarios, so let’s break down what you need to know about both.
1. iPhone Quick Start
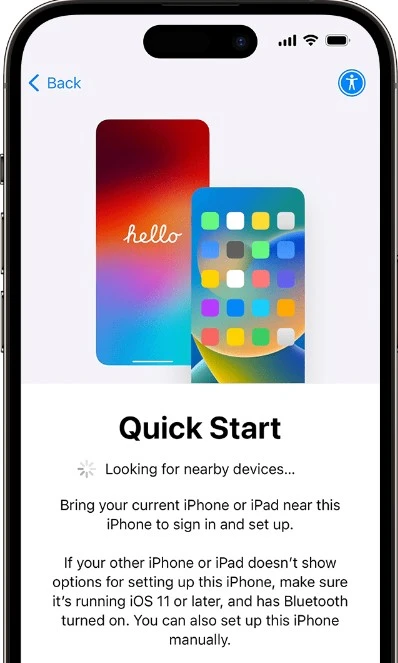
With this method, you simply place your new iPhone next to your current one, and they will connect automatically. This process requires both devices to be running iOS 11 or later. Once connected, you’ll see an animation on your new iPhone; scan this with your old device’s camera to start the transfer.
Quick Start requirements include having Bluetooth enabled on both iPhones and ensuring they have sufficient battery life to complete the setup. This method is particularly useful if you want to quickly transfer data such as settings, apps, and photos from your old iPhone to the new one without manually downloading everything again.
2. Manual iPhone Setup
On the other hand, manual iPhone setup is a more traditional approach. This involves setting up your new iPhone from scratch. Connect to Wi-Fi, enter your Apple ID, and choose your preferences.
Manual setup steps are straightforward: after powering on your new iPhone, adhere to the prompts displayed to choose your language, connect to Wi-Fi, and configure features like Face ID or Touch ID. This method is ideal if you prefer a clean start with your device, without bringing over data from an old iPhone, or if your previous phone isn’t an iPhone.
Activating Your iPhone
To get your new iPhone up and running, start by ensuring a strong iPhone network connection. This step involves either connecting to a cellular network setup or Wi-Fi activation.
During iPhone activation, having a stable network is crucial as it links your device to Apple’s servers, enabling essential features and services. Without a proper activate iPhone process, you won’t be able to use many of your phone’s capabilities. Make sure you choose a reliable network, be it cellular or Wi-Fi, to complete the iPhone activation smoothly.
Setting Up Face ID or Touch ID
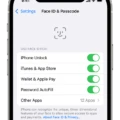
To set up Face ID, go to Settings > Face ID & Passcode, and follow the prompts for biometric setup by positioning your face within the frame.
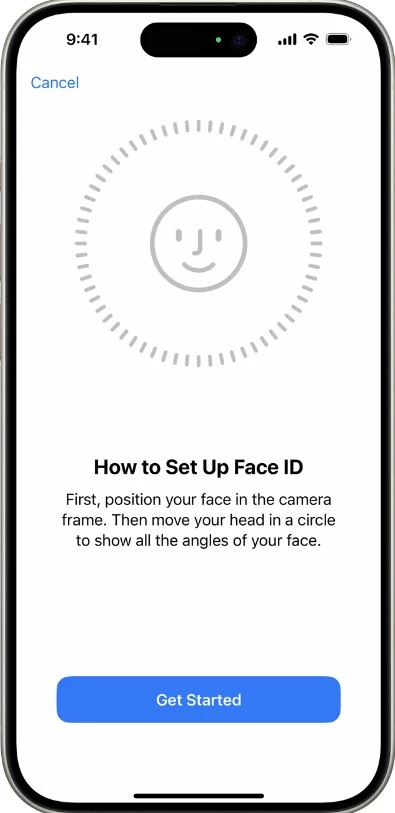
For Touch ID, go to Settings > Touch ID & Passcode, and follow the steps to register your fingerprint.
Using Face ID or Touch ID offers numerous benefits, such as quicker access to your device and enhanced protection against unauthorized access. These iPhone security features are crucial for safeguarding your personal information.
Creating a Passcode
Setting up a passcode on your iPhone is crucial for protecting your personal information from unauthorized access.
To create passcode, enter Settings, select Face ID & Passcode or Touch ID & Passcode according to your specific device. Next, select Turn Passcode On and enter a six-digit code.
For added passcode security, consider creating your unique alphanumeric code. This iPhone passcode setup ensures that your device is locked and only accessible with your chosen passcode, making it a simple yet effective way to secure iPhone and keep your data safe.
Restoring Data from Backup
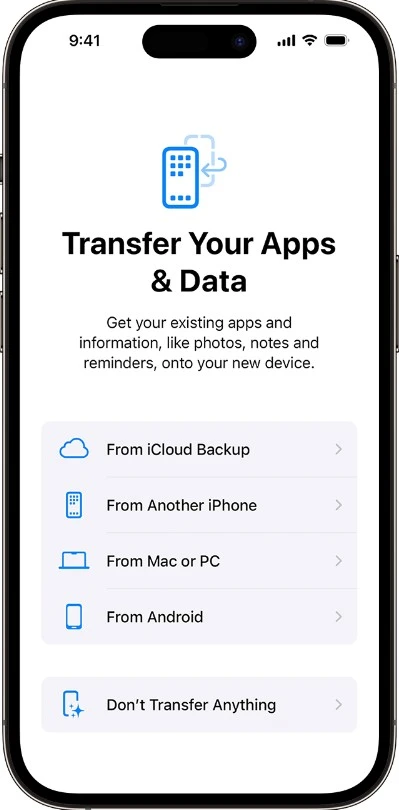
To restore data from iCloud, go to Settings, select your name, then iCloud, and choose “iCloud Backup.” Ensure your backup is up-to-date, then during the setup of your new iPhone, select “Restore from iCloud Backup” and sign in with your Apple ID.
This will start the iPhone backup restore process, and you can expect your data to appear as it was on your previous device. Alternatively, you can transfer data using iTunes by connecting your iPhone to your computer, opening iTunes, and selecting “Restore Backup.”
Adhere to the displayed steps to complete the data transfer process. These iCloud backup steps ensure your data is securely moved.
Signing in with Apple ID
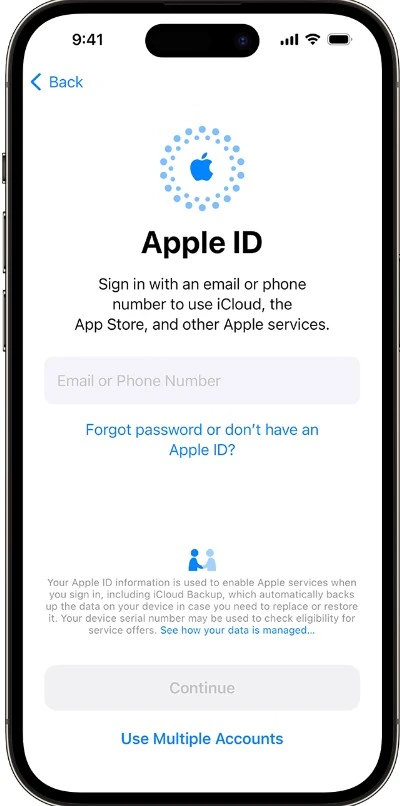
To complete your iPhone feature setup, it’s crucial to sign in Apple ID. This step ensures full Apple services access. During the initial setup, you’ll be prompted for your Apple ID login, which connects you to all Apple services and syncs your data across devices.
Without signing in, you miss out on key features like Find My iPhone and automatic backups, making this step essential for a smooth and secure experience on your new device.
Restarting the Setup Process on iPhone
For iPhone 8 or later models, you can perform a hard reset if you encounter issues during the initial setup. Briefly press the volume up button, then the volume down button, and hold the side button until you see the Apple logo.
This action will reboot your iPhone, taking you to the starting point of the setup. Remember, you’ll need to erase all content and settings to proceed. For iPhone 7 users, there isn’t a direct way to relaunch Setup Assistant during the initial setup process.
However, if you’re encountering issues and want to start fresh, you can force restart the iPhone by holding the volume down and side buttons simultaneously until the Apple logo appears.
If problems persist or you want to set up the iPhone for a new user after initial setup, you can erase all content and settings through Settings > General > Reset. Ensure you back up your data beforehand. These iPhone reset instructions can help you successfully restart iPhone setup and get back on track.
Restarting iPhone Setup Assistant
To restart iPhone Setup Assistant, you’ll need to erase iPhone settings and reset your device to factory settings. This action removes all data and settings, including any prior setup assistant restart configurations. Unfortunately, there’s no direct option to restart the Setup Assistant from the Settings menu.
However, you can go to Settings > General > Reset > Erase All Content and Settings. This will wipe your iPhone clean, and when it restarts, the Setup Assistant will appear, guiding you through the initial setup process.
Troubleshooting iPhone Setup Issues
Experiencing issues during your iPhone setup? Here’s a quick guide to troubleshooting iPhone setup problems.
First, confirm your internet connection is reliable. Poor connectivity is a common cause of setup issues. Check your Wi-Fi or cellular network and make sure it’s working properly.
Another effective solution is to perform a network settings reset. Go to Settings > General > Reset > Reset Network Settings. This action will clear your current network configurations, which might resolve the setup problems.
Find out how to access shared folders on a server using your iPhone.
Conclusion
Restarting your iPhone setup can seem daunting, but with this guide, we’ve broken down the setup process into simple steps. By following the instructions, you’ll have a smooth setup experience without the usual hassle. This iPhone restart setup wrap-up ensures you’re ready to enjoy your device with minimal fuss.

