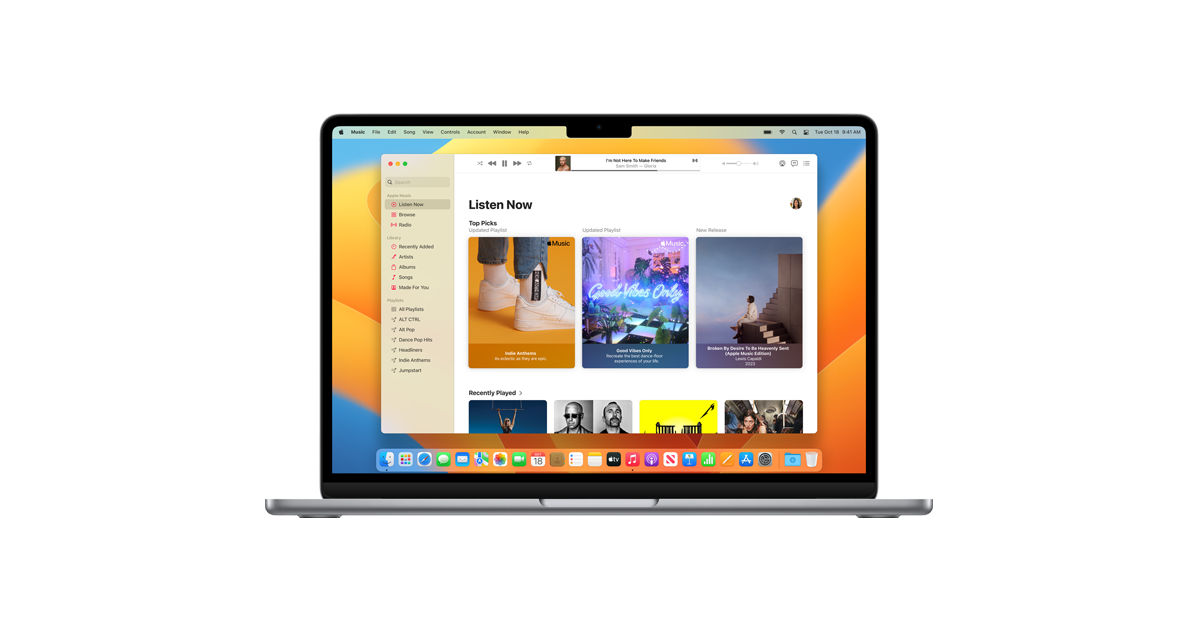
If you’re an Apple user, chances are you’ve used iTunes on your Mac to manage your music library and create playlists. Playlists are a great way to organize your favorite songs and create personalized collections for different moods or occasions. However, sometimes you might want to change the name of a playlist to better reflect its content or simply give it a fresh new title. In this article, we’ll guide you through the process of renaming playlists in iTunes on your Mac.
Step 1: Open the Apple Music app or iTunes
To begin, open the Apple Music app or iTunes on your Mac. You can find the app in your Applications folder or by searching for it in Spotlight (press Command + Space and type “Apple Music” or “iTunes”).
Step 2: Create a new playlist
If you don’t already have a playlist you want to rename, you can skip this step. However, if you have a specific playlist in mind, follow these instructions to create a new one:
1. In the menu bar, choose File > New > Playlist.
2. Give your playlist a name that you’ll be able to easily identify later.
Step 3: Locate the playlist in the sidebar
In the sidebar of the Apple Music app or iTunes, you’ll find a list of your playlists. Look for the playlist you want to rename and click on its name to select it.
Step 4: Rename the playlist
Now that you have selected the playlist, it’s time to give it a new name. Here’s how:
1. Right-click (or Control-click) on the playlist name in the sidebar.
2. From the menu that appears, choose Rename.
3. Type in the new name for your playlist, making sure to choose a descriptive title that accurately represents its content.
4. Press Return or Enter on your keyboard to save the new name.
Step 5: Enjoy your renamed playlist
Congratulations! You have successfully renamed your playlist in iTunes on your Mac. You can now enjoy your personalized collection of songs with its fresh new title.
It’s worth noting that renaming a playlist in iTunes on your Mac will also change its name across all your devices if you have iCloud Music Library enabled. This means that if you have an iPhone or iPad connected to the same Apple ID, the updated playlist name will be reflected there as well.
Renaming playlists in iTunes on your Mac is a simple yet useful feature that allows you to customize your music library to your liking. Whether you want to give your playlist a more fitting name or simply want to keep things organized, following these steps will help you achieve that with ease. So go ahead, get creative, and have fun personalizing your music collection!

How Do You Make a Playlist On iTunes For Mac?
To create a playlist on iTunes for Mac, follow these step-by-step instructions:
1. Open the Apple Music app or iTunes on your Mac.
2. In the menu bar at the top of the screen, click on “File.”
3. From the drop-down menu, select “New” and then click on “Playlist.” Alternatively, you can use the keyboard shortcut Command + N.
4. A new playlist will appear in the sidebar on the left side of the iTunes window.
5. Give your playlist a name by clicking on the “Untitled Playlist” text and typing in your desired name. Press Enter or Return to save the name.
6. To add music to your playlist, you have a few options:
– Drag and drop songs or albums from your iTunes library, Apple Music, or any other location on your Mac directly onto the playlist in the sidebar.
– You can also use the search function within iTunes to find specific songs or albums. Once you find what you want to add, simply drag and drop it onto the playlist.
– If you have a large music library and want to browse and add songs more easily, click on the “Music” tab at the top of the iTunes window. From there, you can browse through your library and right-click on songs or albums to add them to your playlist.
7. As you add songs to your playlist, they will appear in the playlist’s contents in the sidebar. You can rearrange the order of the songs by clicking and dragging them up or down within the playlist.
8. To remove a song from the playlist, simply right-click on it and select “Remove from Playlist.”
9. To play your playlist, click on its name in the sidebar, and the songs will start playing in the main iTunes window.
10. You can sync this playlist with your other Apple devices by connecting them to your Mac and enabling the sync option in iTunes.
Creating a playlist on iTunes for Mac is a straightforward process that allows you to curate your own personalized collection of songs or albums. Whether you’re organizing your favorite tracks or creating a playlist for a specific mood or occasion, iTunes offers a convenient way to compile and enjoy your music.
How Do You Rename a Music File On a Mac?
To rename a music file on a Mac, you can follow these steps:
1. Open the Music app on your Mac.
2. In the sidebar, click on “Songs” to view all your songs.
3. Locate the song that you want to rename and select it.
4. Next, go to the top menu and click on “Song” and then select “Info” from the drop-down list.
5. A window will appear with the song’s information. Here, you can change the name of the song, artist, or album.
6. Click on the field that you want to edit, such as the song name, and type in the new information.
7. Once you have entered the new name or any other changes, press the “Return” key on your keyboard.
8. The changes will be saved, and the music file will be renamed according to the new information you provided.
It’s worth noting that renaming a music file in the Music app will only change the metadata of the file within the app. It won’t affect the actual file name on your computer’s storage.
How Do You Rename a Smart Playlist in iTunes?
To rename a Smart Playlist in the iTunes app on your PC, follow these steps:
1. Open the iTunes app on your PC.
2. In the sidebar on the left, locate and select the Smart Playlist that you want to rename. The Smart Playlist’s content will be displayed in the main window.
3. At the top of the iTunes window, you will see the current name of the Smart Playlist. Click on the Smart Playlist name to select it.
4. Once the Smart Playlist name is selected, you can edit it by typing in the new name you desire. Make sure to enter a descriptive and memorable name for the Smart Playlist.
5. After entering the new name, press the Enter key on your keyboard or click anywhere outside the name field to save the changes.
By following these steps, you will successfully rename the Smart Playlist in iTunes.
Conclusion
ITunes on Mac offers a seamless and user-friendly experience for managing and organizing your music collection. With its intuitive interface and powerful features, you can easily create playlists, rename songs or albums, and even customize smart playlists to suit your preferences. Whether you’re a music enthusiast or just looking for a convenient way to manage your digital music library, iTunes on Mac is an essential tool. So go ahead and take advantage of its capabilities to enjoy your favorite songs and discover new music.


