Recording harmonies can be a great way to enhance your music and make it sound more professional. It’s an art form that requires practice and patience, but once you have the basics down you can create a beautiful mix of voices and instruments. Here’s an overview of the steps you need to follow to record harmonies with yourself.
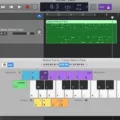
1. Start by gathering the necessary equipment: You’ll need a digital audio workstation (DAW) such as GarageBand, ProTools, or Logic Pro X, a digital audio interface, headphones, and a microphone.
2. Set up your equipment: Plug in all your necessary cords and turn on your DAW software. Make sure to set up your audio interface properly, as this will ensure that your recordings are of high quality.
3. Record your lead vocal part: Sing through the song at least two times while recording in order to get the best possible take.
4. Generate backing tracks: Use software such as Band in a Box or Melodyne to generate backing tracks for all parts of the song including rhythm, bass, and melody lines.
5. Record each harmony part one at a time: Begin with low harmonies first (which should be within one octave of your lead vocal). Sing each part until you achieve good intonation and clarity, then move on to higher harmonies (which should be within two octaves of your lead vocal).
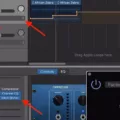
6. Pan and process each track separately: Using panning settings in the DAW software, pan each track so that they are spread across the stereo field evenly when playing back simultaneously. Then add any desired effects such as EQing or compression to give each part its own unique sound within the mix.
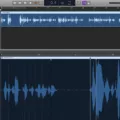
7. Cut and splice if needed: If any parts require editing for timing or pitch accuracy, use tools such as “cut” or “splice” functions in order to make precise adjustments without damaging the original recording’s integrity.
8. Shape the track: Finally, use master channel settings such as EQ or reverb in order to bring out certain elements of each harmony part and give them their own space in the mix before combining them all together into one cohesive track!
Recording harmonies is an art form that takes practice but can be done quite easily with just yourself! With some patience, dedication, and following these steps you’ll be able to create beautiful harmony parts for any song you want!

Source: nypl.org
Recording Harmonies
1. Start by recording the lead vocals. This is the main track that all of your harmonies will be based off of, so make sure to get a good performance and a strong vocal take.
2. Generate harmonies for the lead track. You can do this by using Band in a Box or other music programs that specialize in generating harmonies from an existing vocal track.
3. Record two low and two high harmony tracks with different singers, if available, to give the vocals more depth and dimension.
4. Pan the low and high harmony tracks left and right in the mix to give them a stereo effect and add some processing if desired to make them fit better with the lead vocals.
5. Cut and splice parts of each harmony track where necessary to make sure they line up perfectly with the lead vocals, paying attention to any timing issues or other discrepancies between the tracks.
6. Once you have all of your harmonies recorded, shape them together into one cohesive vocal track by adding reverb, compression, EQ, or other effects as needed so that all of your harmonies blend together nicely in the mix.
The Best App for Recording Singing
Voloco is the best app to record yourself singing. It is top-rated for vocal recordings and provides a simple way to capture high-quality audio with no need for a studio, microphone, or complicated software. With Voloco you can record your own tracks, demos, voice-overs, and even video performances with just a few taps. The app also includes an intelligent audio editor that will help you tune and process your recordings with ease. Voloco’s powerful interface makes it easy to record yourself singing in no time at all – just open the app and start recording!
Harmonizing Vocals for Beginners
For beginners looking to harmonize vocals, it’s important to start by understanding the basics of music theory. Chords are the foundation of harmony, so learning basic chord progressions is a great way to start. Once you have a handle on chords and progressions, you can practice singing two or more notes at the same time – this is what we call vocal harmony. To get comfortable with harmonies, try singing along with your favorite recordings and seeing if you can follow along with the harmonies. You may also want to join a choir or vocal group in order to practice and hone your skills. Finally, don’t be afraid to experiment with different kinds of harmony techniques such as octaves, thirds, fifths, and so on. With enough practice and dedication, anyone can learn to harmonize vocals!
Creating Harmonies: A Step-by-Step Guide
Creating your own harmonies involves having a good understanding of music theory and the ability to recognize chord progressions. To start, you should become familiar with the different types of chords and how they are used in popular music. From there, experiment with different combinations of chords to create interesting progressions. Once you have a chord progression that you like, think about how you want to layer multiple voices and apply different techniques such as parallel harmony, contrary motion, or oblique motion to create interesting textures. Finally, practice singing or playing the harmonies together until you get them sounding just right.
Conclusion
In conclusion, recording harmonies can be a fun and rewarding experience for any singer. With the right tools and techniques, anyone can learn to record harmonies with beautiful and unique sounds. Whether you’re just starting out or are a more experienced singer, recording harmonies can help you develop your skills and create music that stands out. With the right guidance, patience, and practice, even beginners can learn to record great-sounding harmonies in no time.


