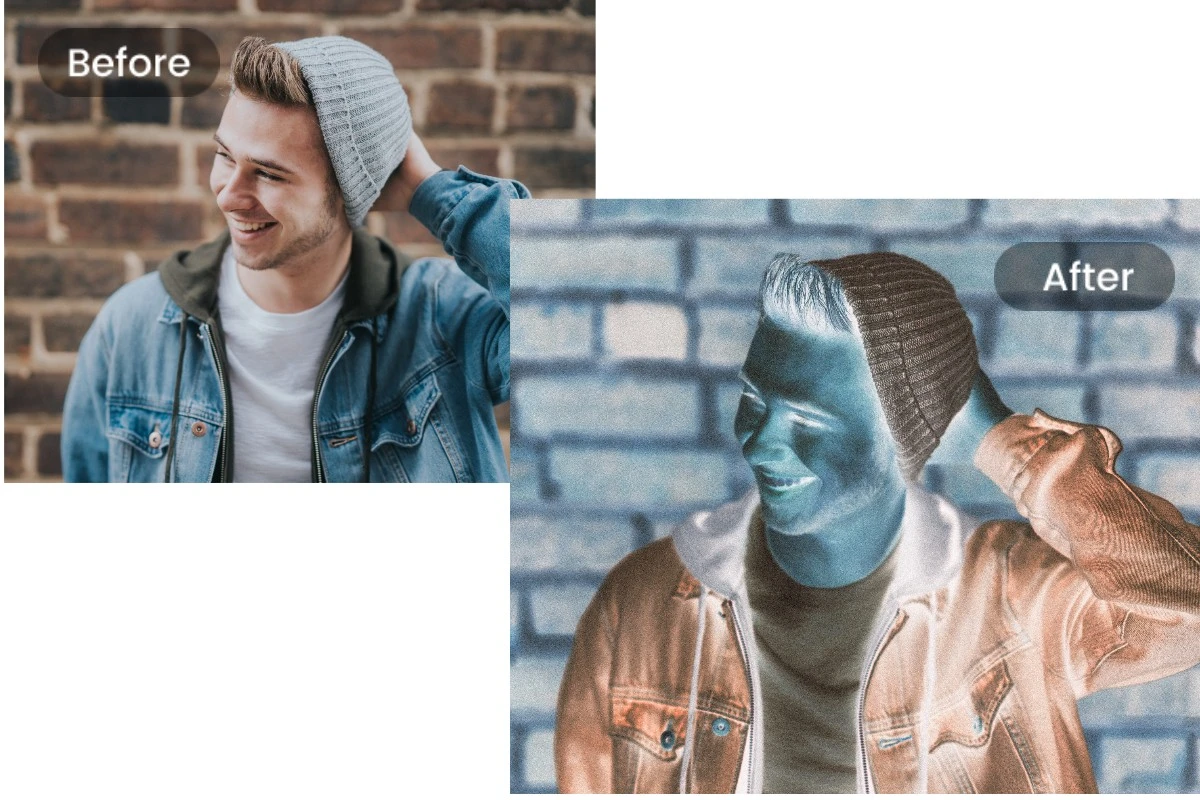
Have you ever played around with your iPhone photos and wondered, “What if I could flip these colors for a cool, artsy effect?” Well, you can! Inverting colors on iPhone photos swaps all the hues in the images to the opposite, turning your photos into cool-looking negatives.
But this isn’t just for fun; it’s a nifty trick for creative photo editing. A lot of times it is used by artists and photographers to highlight any hidden details, create unique visuals, or simply make images more easily viewable for the visually impaired. The next time you have the chance to edit a picture, give color inversion a shot—you just might discover a whole new perspective!
Using Accessibility Settings to Invert Colors
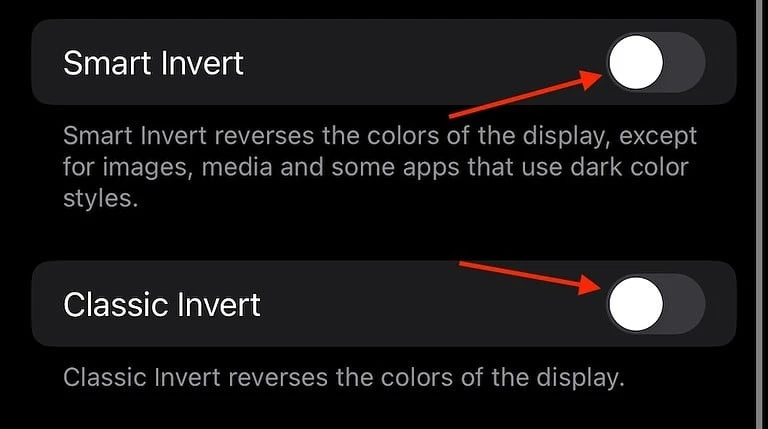
To invert colors on your iPhone, head to Settings > Accessibility > Display & Text Size, then toggle on Classic Invert or Smart Invert.

Classic Invert reverses all display colors, while Smart Invert preserves the original appearance of images and media. This feature is particularly useful for viewing photos with inverted colors, such as converting black-and-white images to their negative versions.
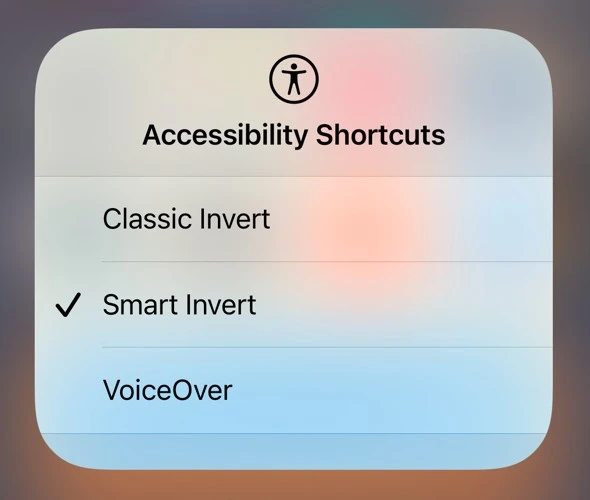
For quick access, you can set up an Accessibility Shortcut by going to Settings > Accessibility > Accessibility Shortcut, and selecting Smart Invert.

This allows you to triple-click the side button to enable or disable the color inversion feature.
Keep in mind that inverting colors affects the entire display, not just individual photos. If you wish to invert the colors of a specific photo permanently, consider using a photo editing app like Adobe Photoshop Express or Lightroom, which offer features to invert colors within the app.
Alternative Apps for Inverting Colors
Trying out some of the best apps for color inversion on iPhone can make a big difference to your photo editing experience. A free app from Google named Snapseed gives you powerful colour editing tools which let you add more precision to your images. Its intuitive interface makes it popular with both beginners and pros.
Another great app is Negative Image, which specializes in inverting colors on your photos to create negative effects. Its straightforward design allows you to get the desired effect without a lot of effort.
For those seeking more advanced features, PhotoDirector stands out with its comprehensive suite of editing tools, including color inversion. It allows for selective color adjustments, enabling you to isolate and invert specific colors within your image. These applications provide a range of functionalities to suit different editing needs, making color inversion and photo enhancement both accessible and efficient.
Creating Negative Effects on iPhone Photos
Achieving a negative filter for photos on your iPhone can be both fun and simple. Since iOS doesn’t come with a negative filter included in the Photos app, there is still a way to get the negative effect on iPhone with the use of third-party apps.
If you’re using apps like Snapseed, you should know that they provide a negative filter feature which allows you to invert colors and get the classic negative effect. It’s worth pointing out that color inversion flips each hue to its opposite, which results in a unique visual transformation.
However, traditional negative effects don’t just invert colors, but also set brightness and contrast to emulate old film negatives.
Advanced Techniques: Editing with Professional Tools
Inverting the colors of a photo on your iPhone can give it a unique, eye-catching effect. While the built-in Photos app doesn’t offer a direct way to invert colors, you can use third-party apps like Photoshop Express or Lightroom to achieve this effect.
Using Photoshop Express:
1. Download and Install: If you haven’t already, download Photoshop Express from the App Store and install it on your iPhone.
2. Open the App: Launch Photoshop Express and grant it access to your photos when prompted.
3. Select a Photo: Browse through your photo library within the app and tap on the image you wish to edit.
4. Apply the Invert Filter:
- At the bottom of the screen, tap on the “Looks” tab.
- Go to the “Basic” category.
- Scroll through the available filters and select “Invert” to apply the color inversion effect.
5. Adjust Intensity (Optional): Use the slider to fine-tune the intensity of the inversion to your liking.
6. Save the Edited Photo: Once satisfied with the effect, tap the Share icon at the top of the screen and choose “Save” to store the edited image back to your photo library.
Using Lightroom:
1. Download and Install: Install Lightroom from the App Store if it’s not already on your device.
2. Open the App: Launch Lightroom and allow it to access your photos.
3. Import the Photo: Tap the photo icon at the bottom right corner and select “From Camera Roll” to import the desired image.
4. Access the Tone Curve:
- With the photo open, tap on the “Light” panel at the bottom.
- Select “Curve” to open the tone curve editor.
5. Invert the Colors:
- In the tone curve graph, drag the bottom-left point (representing shadows) to the top-left corner.
- Next, drag the top-right point (representing highlights) to the bottom-right corner.
- This manipulation flips the tone curve, effectively inverting the colors of the image.
6. Save the Edited Photo: After adjusting the tone curve, tap “Done”, then tap the Share icon and choose “Export to Camera Roll” to save the inverted image.
Conclusion
There’s a whole world of creative expression you can open up by inverting colors on a photo using an iPhone. So, whether you use the built in accessibility features or third-party apps, these iPhone photo editing tips will help you turn simple pictures into stunning photos with ease.
Trying out techniques for inverting photo colors will allow you to achieve interesting effects in enhancing your artistic projects or social media content. Not only do these tools take the hassle out of editing ᅳ they create irresistible creative iPhone photo ideas for users at all skill levels.


