Shared albums are a great way to share your photos and videos with friends and family. But sometimes you may want to keep certain albums private so that only you can view them. Here’s how to hide a shared album on your iPhone.
First, open the Photos app and select the album you would like to hide. Then tap on the “Share” icon in the top right corner of the screen. You will be presented with a list of people who have access to this album. Tap on each person’s name and then tap “Remove Access” at the bottom of the screen. This will remove all access to the album for these people.
Next, turn off link sharing by tapping on the “Link Sharing” switch at the bottom of the screen (it should turn from green to gray). This will disable anyone from accessing this album via a link, even if you give them one directly.
Finally, if you don’t want Shared Albums appearing in your Photos app at all, here is how to disable them: Open Settings on your iPhone and tap on Photos. Toggle off Shared Albums, then tap ‘OK’
If you still want access to your shared albums but don’t want them appearing in your Photos app, there is an alternative option: Secure Folder. To hide photos within this folder, simply open up Gallery app on your phone’s home screen or app drawer menu (represented by a flower icon). Select multiple images and tap on More at the bottom; select Move to Secure Folder and your photos will vanish from the Gallery app viewable only by yourself!
Hopefully, this guide has helped you understand how to hide shared albums and keep certain content private!
Hiding a Shared Album
In order to make a shared album hidden, you will need to take the following steps:
1. Navigate to the shared album in question and click on the ‘Options’ button.
2. Select ‘Remove collaborators’, which will remove all collaborators from the album.
3. Once all collaborators have been removed, click on the ‘Share’ button again and select ‘Turn off link sharing’. This will ensure that only you can view the album.
4. Lastly, click on the ‘Done’ button at the bottom right of your screen to save your changes.
By following these steps, you should be able to successfully make a shared album hidden from others so that only you can view it.
Hiding a Shared Album on an iPhone
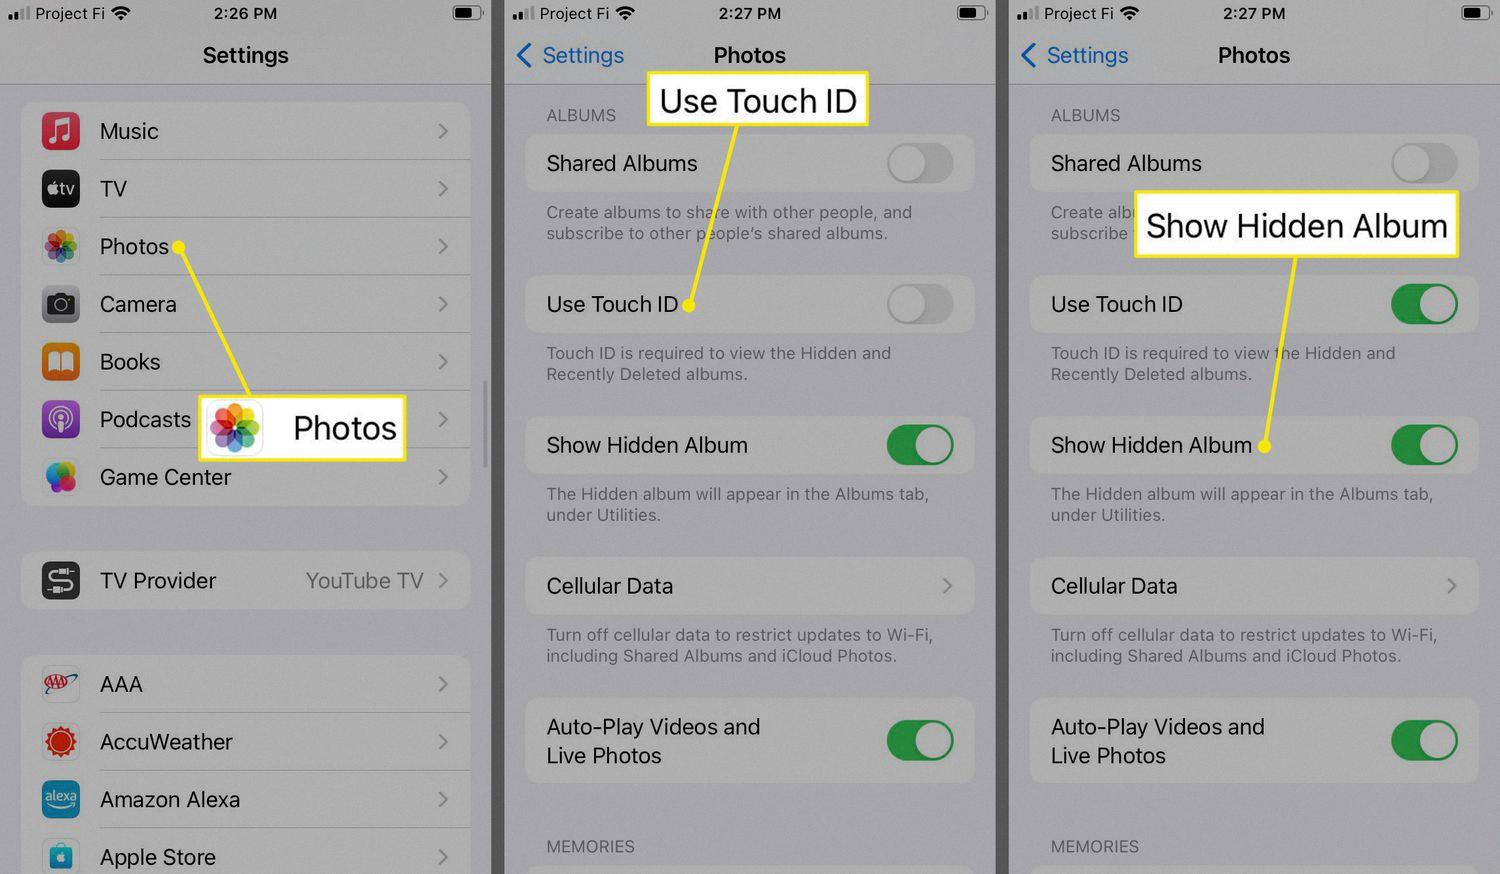
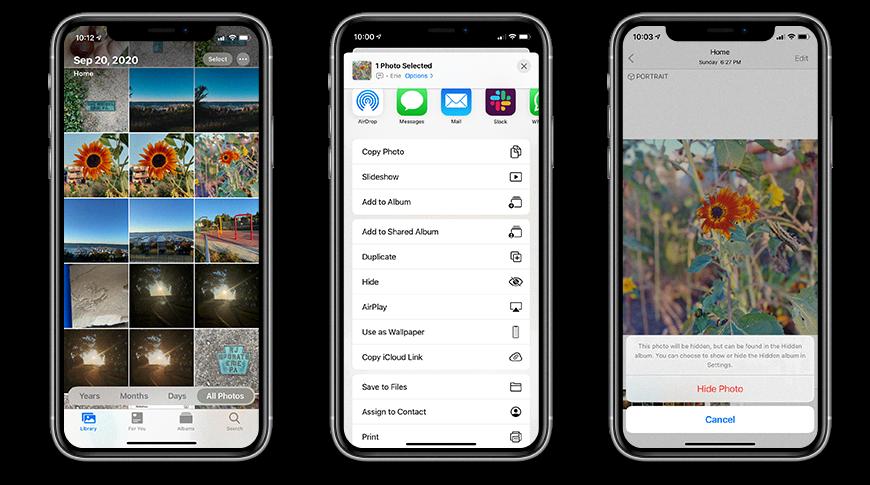
To hide a Shared Album on your iPhone, go to Settings > Photos. Then turn off the toggle for Shared Albums. This will prevent any of the Shared Albums from appearing in your Photos app. If you’d like to make sure a particular Shared Album is hidden, you can open it and tap the three dots in the top right corner, then select Hide from My Photos.
Ensuring Privacy of a Hidden Album on Apple
To make sure no one can see your hidden album on Apple, you can disable the feature in the Photos app. First, open the Settings app and scroll down until you see the “Photos” app listed. Select it to open the Photos page. Scroll down and swipe the “Hidden Album” switch to the left, turning it from green to grey. This will disable the hidden album from appearing in the “Utilities” section of the Photos app, ensuring that no one will be able to access it.
Source: lifewire.com
Does Turning Off Shared Albums Delete Them?
No, turning off shared albums does not delete them. When you turn off shared albums, any photos or videos in the album will still be stored on the original creator’s iCloud account. However, you will no longer be able to view them in your own iCloud account. If you have made copies of any of the photos or videos in the shared album, those copies will remain in your Camera Roll or iCloud Photo Library.
Source: appleinsider.com
Can Albums Be Made Private?
Yes, you can make an album private. To do this, tap on the album you’d like to change the privacy settings for. You can tap More Albums to find it. Once you’ve selected the correct album, tap Edit and then Audience. From here, you’ll be able to select who can see your album. Depending on the platform you’re using, you should be able to choose from options such as Public, Friends Only, Family Only, or Custom. Selecting one of these options will make your album private and only visible to those who are allowed access.
Conclusion
In conclusion, Shared Albums provide a great way to store and share pictures with others. They are easy to use and can be made either public or private. By making the album private, you can control who has access to the photos and information shared in the album. It is important to be aware of the security settings associated with sharing albums to ensure that your photos are kept safe. With Shared Albums, you can easily share your memories with family and friends without having to worry about privacy issues.

