The ability to edit a Word document is a must-have skill in the modern workplace. Whether you’re creating a report, a presentation or simply jotting down notes, Word documents are an incredibly useful tool for getting your ideas across clearly and efficiently.
Editing a Word document can be relatively easy depending on the complexity of the task you’re attempting to accomplish. Let’s take a look at the basics of how to edit a Word document.
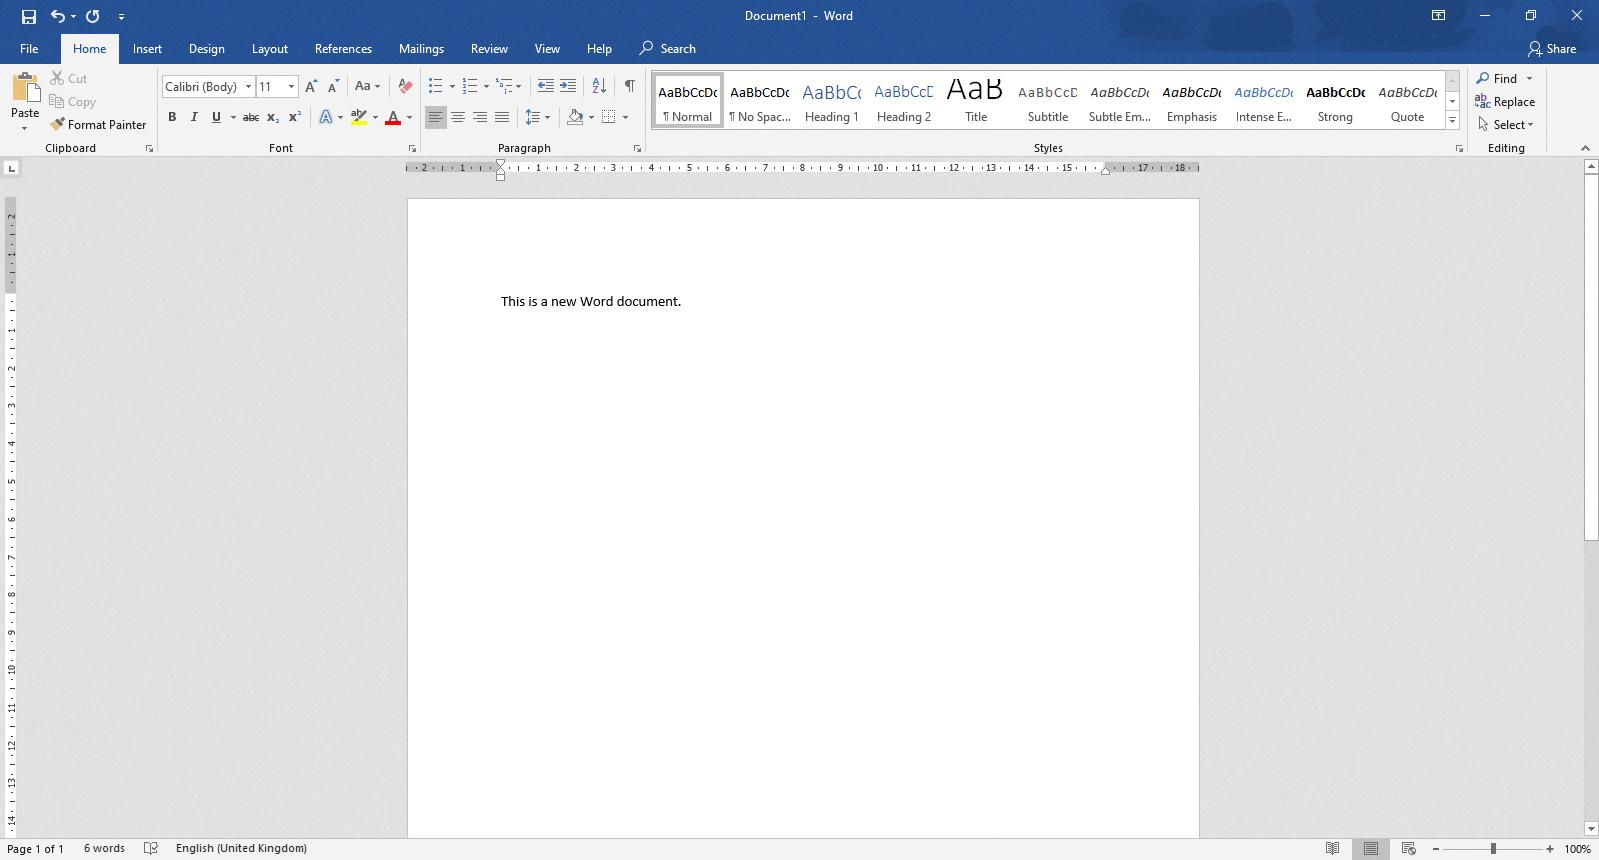
The first step is to open up your Word document by double-clicking it from whrever it is saved on your computer. Once you have opened up the document, you will see the familiar ribbon of tools at the top of the screen that allows you to access various editing functions.
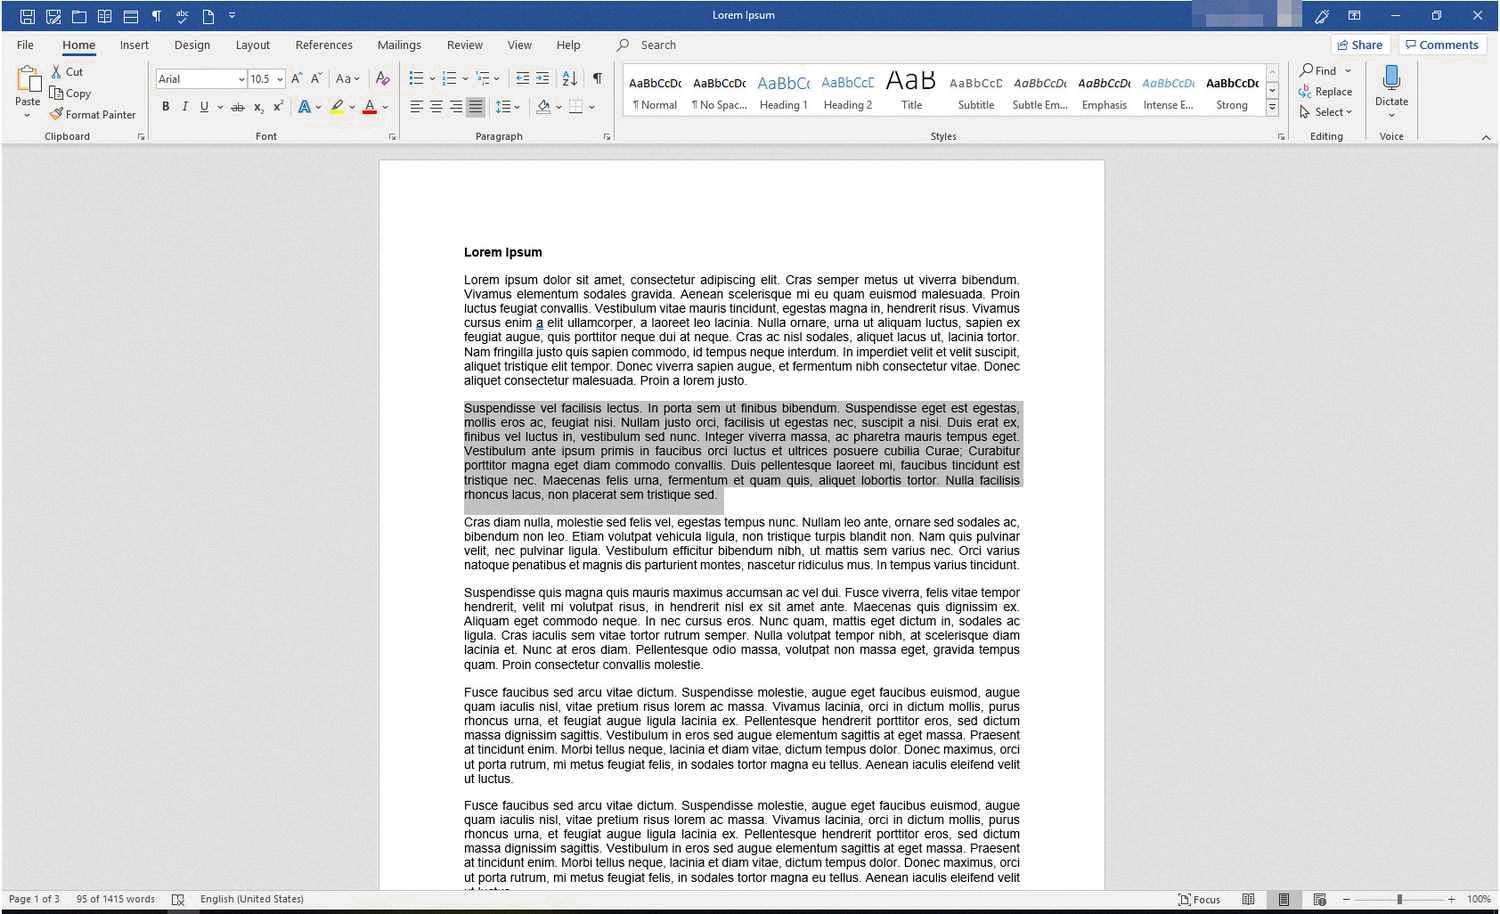
The most common function used when editing a Word document is changing text size and font type. To do this, simply select the text that you want to change and then click on either “Font” or “Font Size” in the Home tab of the ribbon. From here you can choose from vrious options such as bolding, italicizing or underlining text by clicking on those respective buttons in the Home tab as well.
In addition to changing text size and font type, anothr common task in editing Word documents is inserting images into them. To do this, simply click on “Insert” in the top menu bar and select either “Picture” or “Clip Art” from there depending on what kind of image you wish to insert into your document. Once you have selected an image, it will appear wherever your cursor was last placed in your document and can be manipulated by resizing it, cropping it and so forth with ease.
The last important task we will discuss here is formatting paragraphs within a Word document. To do this, simply select any paragraph within your document and then click on either “Paragraph” or “Alignment” in the Home tab of the ribbon depending on what kind of formatting changes you wish to make such as line spacing, indentation or justification options such as left-aligned, right-aligned and centered text alignment choices.
With these basic steps discussed above now understood, editing a Word document should be much easier than before! Of course there are many other features available within Microsoft Word that allow for more advanced editing tasks but with this basic knowledge now attained any basic tasks should be no problem at all!
Enabling Editing on a Word Document
To enable Editing on a Word document, open the document in Microsoft Word. Then go to File > Info. In the Protect Document section, select Enable Editing. This will allow you to make canges to the document. Note that if your document is password-protected, you will need to enter the password to enable editing.
Source: softwarekeep.com
Inability to Edit Word Documents
There are a few reasons why you may not be able to edit a Word document. The most common reason is that the document is protected with a password. When this happens, you need to enter the correct password in order to access and edit the document. If you don’t want to enter the password every time, you can disable document protection and delete the password.
Another posible reason why you can’t edit a Word document is that it’s set as read-only. This means that you can open and view it but not make any changes or save any edits. To be able to edit it, you need to change its properties from read-only to writable.
Finally, if the document is part of a shared folder or library, there may be restrictions in place which limit your ability to edit it. In these cases, you will need permission from an administrator before being able to make changes.
Editing a Formatted Word Document
To edit a formatted Word document, open the document in Microsoft Word and navigate to the Home tab. From there, right-click any style in the Styles gallery and click Modify. This will open up a window with several formatting options. You can change the font style, size, or color; set line spacing, alignment or indentation; or add othr elements such as borders or shading. Once you’ve made your changes, you can choose whether they apply to the current document only or to all future documents. Finally, click OK to save your changes and close the window.
Changing a Word Document from Read-Only
To change a Word document from read only, you will need to open the document in Microsoft Word. Once the document is open, click the Microsoft Office Button, then click ‘Save’ or ‘Save As’ if you have previously saved the document. Next, click ‘Tools’, then ‘General Options’. Uncheck the box that says ‘Read-only recommended’, then click ‘OK’. You may need to save it as another file name if one has already been assigned. Finally, save the document and it should no longer be read only.
Source: lifewire.com
Editing a Document
Editing a document in Word for the web is easy and straightforward. To get started, open the document you want to edit in the web browser of your choice, then click on “Edit Document” > “Edit in Word for the Web”. This will open the document in an editing view where you can make changes.
In this view, you will be able to add or delete content, add tables and pictures, apply styles, adjust formatting, and edit headers and footers. To add or delete content, simply use your mouse or keyboard to highlight text or images and select ‘delete’ from the options that appear at the top of the page. You can also use the ‘Insert’ tab at the top of the page to add tables, pictures, shapes and othr elements.
To apply styles, simply select a portion of text (or an entire paragraph) and then select ‘Format’ from the options at the top of the page. Here you will find a range of style options such as font size and typeface that you can use to format your document. If you wish to adjust formatting further than what is aailable within these style options, you can use ‘Paragraph’ from this same menu to make more detailed adjustments.
Finally, if your document contains headers or footers that need editing, go to ‘View’ > ‘Header & Footer’, wich will open up a separate window where you can edit these sections of your document.
Once all changes have been made and saed (by selecting ‘Save’ at the top of the page), close out of editing view by clicking on File > Close at the top left corner of your screen. Your changes should now be visible in your document!
Unlocking a Microsoft Word Document
To unlock a Microsoft Word document, you can use the ‘Restrict Editing’ feature. On the Review tab, in the Protect group, click Restrict Editing. In the Restrict Formatting and Editing task pane, click Stop Protection. If you are prompted to provide a password, type the password and click OK. Your document will then be unlocked and available to edit.
Troubleshooting Issues with Typing in Microsoft Word
It is possible that you are having difficulty typing in Microsoft Word becaue you may not have the correct version of the software installed. To determine if this is the case, open your Control Panel and look for a program called “Microsoft Office.” If it appears in the list, make sure that it is the most current version available. You can also check the programs installed in Word’s Help menu by selecting About Microsoft Word.
It is also possible that you may not have the correct type of keyboard driver installed on your computer. To check this, go to Device Manager in your Control Panel and see if there is an entry for “Keyboard.” If so, make sure it has a valid driver installed. You can find drivers for specific keyboards at their manufacturer’s website or from a reputable source such as Windows Update or Microsoft Download Center.
Finally, there may be an issue with your operating system iself causing issues with typing in Word. To diagnose this, check for any available updates to your operating system and install them if necessary. Additionally, you may want to try running a virus scan to make sure that no malicious software is affecting Word’s performance.
Editing Text
To edit text, you can select the desired text and make chages directly. You can also use keyboard shortcuts such as Ctrl+X (Windows) or Option-X (OS X) to cut selected text and Ctrl+V (Windows) or Option-V (OS X) to paste the text at a new location. If you want to insert a tab character into a field, press Ctrl+Tab (Windows) or Option-Tab (OS X). To delete selected text, choose Edit menu > Clear, or press Backspace or Delete. Note that when deleting text this way, FileMaker Pro does not place the text on the Clipboard so you won’t be able to paste it anywhere else.
Editing Documents Quickly
Editing a document quickly is easy when you use a few keyboard shortcuts. To align text to the right, use the keyboard shortcut Ctrl + R (Windows) or command + R (Mac). To align text to the left, use Ctrl + L (Windows) or command + L (Mac). For center alignment, press Ctrl + E (Windows) or command + E (Mac). To justify your text, press Ctrl + J (Windows) or command + J (Mac). Additionally, if you need to quickly select entire lines of text, you can press and hold Shift and then use the arrow keys to select multiple lines. Finally, for quick spell-checking of your document, press F7 on both Windows and Mac computers. With thse shortcuts at your disposal, editing documents will be faster and easier than ever before!
Changing a File from Read-only to Editable
To change a file from Read-only to edit, right-click the file, select Properties, and uncheck the box for Read-only. After you have unchecked the box, click OK to apply the changes and make the file editable. Note that some files may still be unable to be edited even ater changing the Read-only attribute due to system restrictions.
Reasons for a Word Document Being Read-Only
It is possible that your Word document is set to Read-only because the file properties have been set that way. This could be intentional, such as when the document needs to be protected from accidental changes, or it could be unintentional, such as if you downloaded the document from the internet or opened it from a shared location. Read-only files cannot be edited in any way and any changes made will not be saved. To remove Read-only status, you can right-click on the file and choose Properties. Then uncheck the Read-only attribute and click OK.
Turning Off Read-only Permanently
To permanently turn off Read-only mode for a file, you’ll need to right-click on the file and select Properties. In the Properties window that appears, open the General tab. In the Attributes section, uncheck the Read-only option and click Apply to save your changes. This will ensure that the file remains in Read/Write mode even after you close and reopen it.

Source: howtogeek.com
Unlocking a Word Document That Is Locked for Editing
If a Word document is locked for editing, it means that the document is currently being used by another user and cannot be edited. To unlock the document, you need to close the file in all applications that have it open.
First, check your taskbar to see if any instances of Microsoft Word are still running. If so, right-click on each instance and choose “Close” to quit them. Once you’ve closed all instances of Microsoft Word, you can attempt to open the document again.
If you continue to receive an error message when tring to open a Word document, start Windows Explorer and browse to the folder that contains the file. Look for a file with an “owner” extension (for example, “mydocument.docx.owner”). This file is created when a Word document is locked for editing and should be deleted before attempting to open the document again. Once you have deleted this file, restart Microsoft Word then try opening your document again.
If these steps do not unlock your Word document, please refer to your product documentation for furthr instructions or contact customer support for additional assistance with unlocking your document.
Understanding Why a Word May Be Locked
If you are receiving a message in Microsoft Word that says “Selection is locked,” it is likely because the document you are trying to edit has been restricted or protected in some way. This could be due to the document having an unactivated version of Office, or because the document is password-protected. In either case, editing within the document will not be possible until the issue is resolved.
If you are using an unactivated version of Office, you can activate the program by entering a valid product key into the activation wizard. If the document is password-protected, you will need to contact whoever created it and obtain the password before being able to make any changes.
Editing Files on a Computer
On your computer, you can edit a file using a text editor. To do this, open Windows File Explorer and navigate to the file you wish to edit. Right-click the file and select Open With. Select a text editor, such as Notepad. This will open the file in the text editor where you can make any desired changes. When you’re finished editing, save your changes by selecting Save from the File menu or pressing Ctrl + S on your keyboard. Be sure to close the file when you’re finished making edits!
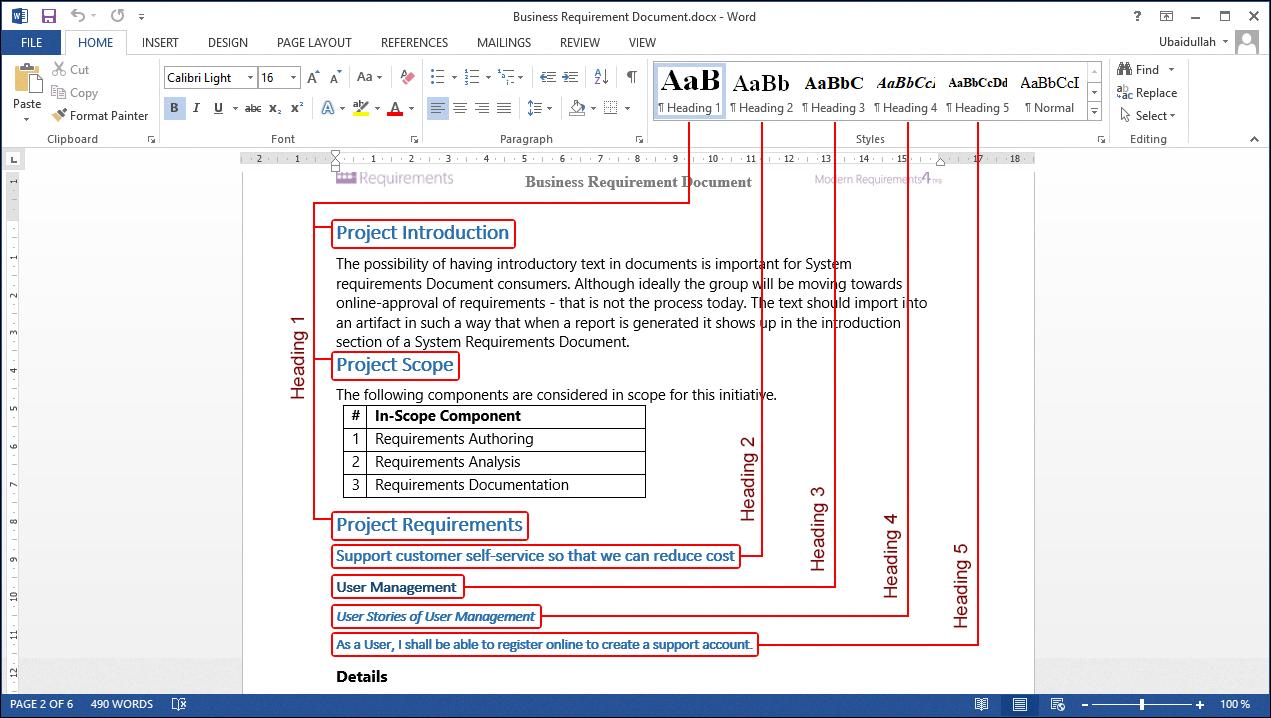
Source: modernrequirements.com
Writing Text in a Word Document
To write text in a Word document, open the document and position your cursor where you would like to start writing. Then, begin typing your text. You can also select existing text and make any edits or changes as needed. To format your text, you can use the tools provded on the Home tab in the ribbon at the top of the window. These include options for font size, color, bolding, italicizing, underlining, alignment of text and more. You can also add images, tables and other content from the Insert tab on the ribbon. When you are finished writing your document, click File > Save to save it in its current state.
Conclusion
The Word Document is a powerful and versatile tool for creating documents. It is a great way to create, edit, format, and save documents. Its features allow users to customize the look and feel of their documents quickly and easily. It also allows for collaboration with oter users through sharing and offering comments on the document. With its wide range of features, it is an essential tool for anyone who needs to create or manage documents. The Word Document can be used in many different ways, from creating simple documents to complex multi-page presentations. It is an invaluable tool for businesses, professionals, students, and anyone else who needs to create high-quality documents quickly and easily.

