Are you looking for a way to quickly and easily change the screen timeout settings on your Macbook Air? If so, you’ve come to the right place! This blog post will explain how to adjust the screen timeout settings on your Macbook Air in just a few simple steps.
First, let’s look at why changing your screen timeout settings is important. By adjusting your screen timeout settings, you can help conserve battery power and reduce eye strain when using your Macbook Air for extended periods of time.
Now that we understand why it’s important to change the screen timeout settings on our Macbook Air, let’s look at how to do it!
The first step is to open System Preferences from the Apple menu. Once System Preferences opens, click Desktop & Screen Saver. From there, select Screen Saver, and then use the slider to choose the amount of time before your display turns off (15 minutes is recommended).
If you want to completely turn off sleep mode on your Macbook Air, go back into System Preferences > Energy Saver. Tick the box next to Prevent the computer from sleeping automatically when the display is off and drag the Turn display off after slider to Never.
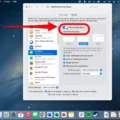
One other thing worth noting is that some Mac models have ambient light sensors that dim your screen automatically if the surrounding light dims. To turn this feature off, open System Preferences > Displays and uncheck the Automatically adjust brightness checkbox.
And there you have it – now you know how to quickly and easily adjust your screen timeout settings on a Macbook Air! If you follow these simple steps, you can conserve battery power and reduce eye strain while using your laptop for long periods of time.

Changing Inactivity Timeout on Mac
To change the inactivity timeout on your Mac, you need to adjust the screen saver settings.
1. From the Apple menu, choose System Preferences.
2. Click Desktop & Screen Saver.
3. Click Screen Saver, and then use the slider to choose the desired amount of inactivity time before the screen saver activates (15 minutes or less).
4. Once you have made your selection, click on “OK” to save these changes. Your new inactivity timeout is now set!
Preventing Macbook Air from Going to Sleep
To keep your Macbook Air from going to sleep, you’ll need to adjust the Energy Saver settings. To do this, go to System Preferences > Energy Saver. Then tick the box next to Prevent the computer from sleeping automatically when the display is off and drag the Turn display off after slider to Never. This will ensure that your Macbook Air remains active and does not enter sleep mode.
Decreasing the Time It Takes for a Mac Screen to Turn Off
Your Mac screen turns off so fast because the display is set to go to sleep after a certain period of inactivity. This is done to save energy and prolong the life of your battery. You can adjust the sleep settings by going into System Preferences > Energy Saver and changing the time before your display goes to sleep. Additionally, some Mac models have ambient light sensors that dim the screen automatically if the surrounding light dims.
Changing Screen Timeout Duration
To change how long your screen stays on before turning it off, go to your device’s Display settings menu. Look for the ‘Screen Timeout’ settings option and tap it. You can choose from a range of options for the timeout duration, including 15 seconds, one minute, two minutes, five minutes, 10 minutes, and 30 minutes. The default timeout is 30 seconds, but you can adjust it to suit your needs. Once you’ve chosen the desired setting, press ‘OK’ to save your changes.
Preventing a Mac Screen from Going Black
To prevent your Mac screen from going black, you’ll need to adjust the settings in your System Preferences. To do this, open System Preferences and select the ‘Energy Saver’ panel. Under the ‘Display’ tab, you’ll find a slider labeled ‘Display Sleep’. Drag this slider all the way across to ‘Never’ (on the right-hand side). This will ensure that your Mac’s display will remain active and won’t go dark while you’re using it.
Reasons for Macbook Air Screen Turning Off
Your Macbook Air screen may be turned off to save energy. Your Mac and display are designed to go to sleep automatically when they’re not in use, so they don’t use up unnecessary power. You can adjust the settings on your Mac and display so that they go to sleep at different times, with the display going to sleep first. To do this open System Preferences, select Energy Saver, then adjust the settings for “Turn display off after” and “Put hard disks to sleep when possible”.
Preventing Mac from Automatically Turning Off After 30 Seconds
To stop your Mac from turning off after 30 seconds, you can adjust the sleep settings. To do this, follow these steps:
1. Open System Preferences by selecting it from the Apple drop-down menu at the top left corner of the desktop.
2. Click the “Energy Saver” icon in the Hardware section.
3. Click the “Settings For” drop-down box and select “Power Adapter” from the drop-down list.
4. Click the “Computer Sleep” slider and drag it all the way to the right to disable sleep mode completely. This will prevent your Mac from turning off after 30 seconds.
5. Once you have made these changes, click “OK”. Your Mac will no longer turn off after 30 seconds of inactivity.


