For many, upgrading to a Samsung phone is an exciting and rewarding experience that allows you to take advantage of the latest technology. Whether you are buying a new phone or upgrading from an older model, the transition can be made easier with a few tips on how to back up your Samsung phone.
Backing up your phone is essential for any device so that you can keep your photos, contacts, and data safe. For Samsung phones, there are multiple options available for backing up your personal information. Here we’ll discuss the various options available and how to use them most effectively.
Samsung Cloud is the official backup service provied by Samsung for their devices and it’s easy to set up and use. All you need to do is go into Settings > Accounts > Samsung Account > Back Up Data and toggle the switch to “on”. With this enabled, all of your important data such as contacts, photos, documents, calendar entries will be securely stored in the cloud. You can even manage your backups from other devices or from a web browser at samsungcloud.com.
Another option for backing up data on your Samsung phone is using Google Drive or other cloud storage services such as Dropbox or OneDrive. To do this simply open the app for whichever service you are using and follow their instructions for setting up a backup folder on the device. Once setup is complete any files uploaded will automatically be backed up without any further action needed from you.
If you prefer local backups that don’t require an internet connection then you can look at third-party apps such as Helium which allow you to backup data directly onto an external storage device such as an SD card or USB drive which can then be used to restore information if ever needed in the future. This method gives users more control over where thir data is stored but does require extra steps when transferring files between devices if not done over Wi-Fi or via Bluetooth connection.
Finally thre are some additional steps that users should take when switching phones in order to ensure a smooth transition:
1) Make sure any important information is backed up before making any changes
2) Ensure all software updates are completed before transferring data
3) Factory reset both phones (old and new) befoe transferring
4) Check compatibility of apps – some may not work on certain models of phones
5) Transfer over accounts (Google/Samsung etc.) manually if necessary
By taking these steps prior to switching phones users can make sure they have all teir important information backed up safely as well as ensuring apps are compatible with their new device so they don’t lose out on functionality when making the transition!
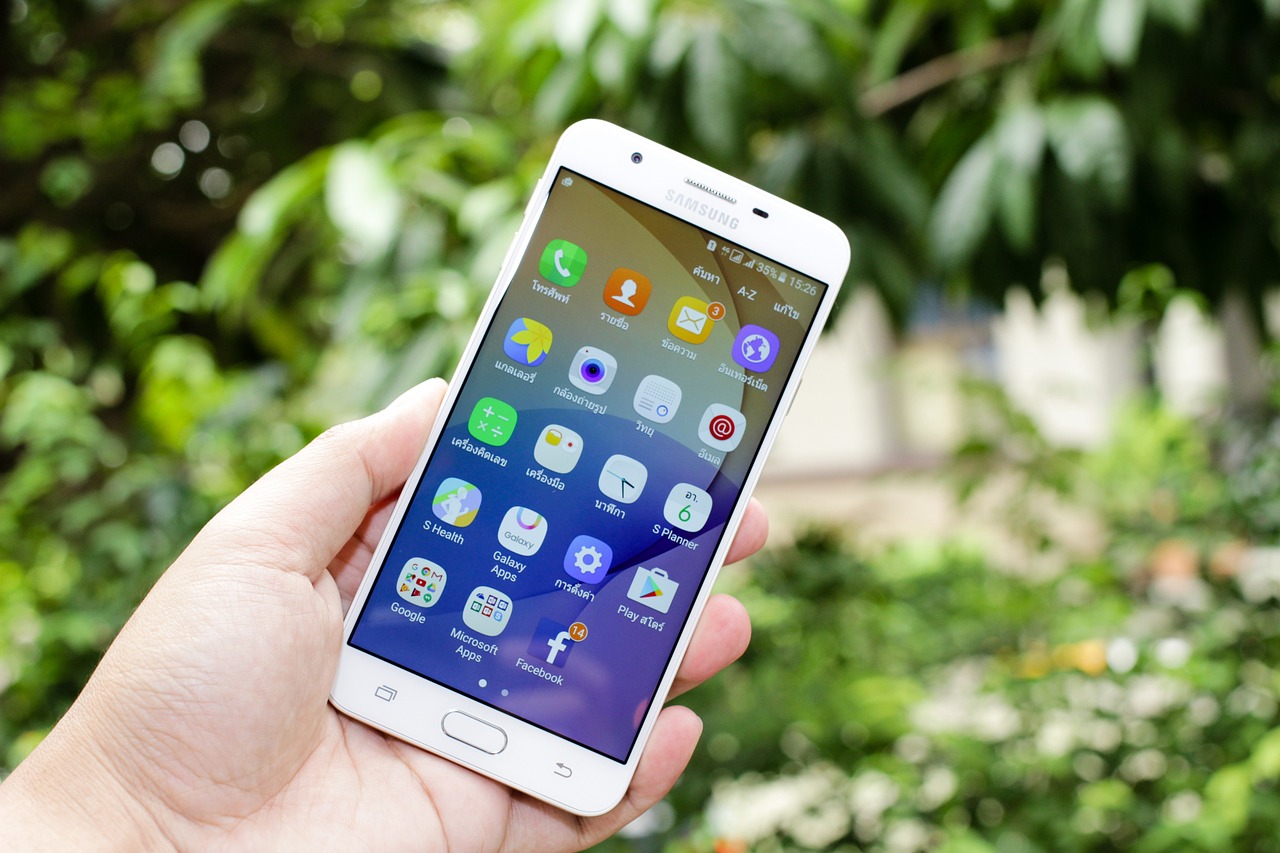
Backing Up Data on a Samsung Phone
Backing up data on your Samsung phone is a simple process. First, go to Settings and tap Accounts and backup. From there, tap Back up data under Samsung Cloud. You will then be able to select the apps you would like to back up. Once you have selected them, tap Back up now and your data will be securely stored in your Samsung Cloud account. If you ever need to restore the data, simply go back to the same menu and select Restore data.
Backing Up Everything on an Android Phone
To backup everything on your Android phone, you’ll need to use the Google One app. First, open the Google One app on your phone. Then, tap Storage at the bottom of the screen. Scroll to the device backup section and tap Set up data backup if this is your first time backing up your phone. To find your backup settings, tap Manage Backup and turn on Device data. Finally, tap Back up now to begin the backup process. Once complete, you should have everything backed up onto your Android phone!
Backing Up a Samsung Device to a Computer
To back up your Samsung device to your computer, you’ll need to first connect your phone to your computer usig a USB cable. Once the connection has been established, you should see a prompt on your phone asking you to ‘Allow’ the connection. Tap this ‘Allow’ button.
Next, open Smart Switch on your computer and click the ‘Backup’ option. You should now see a list of different data categories that can be backed up, such as call and contacts, messages, apps, etc. Select the data categories that you’d like to backup and click ‘Start’. Your backup will now begin and once it’s finished you’ll have a complete backup of all selected data on your computer.
Do Samsung Phones Offer Data Backups?
Yes, Samsung phones have a backup feature. You can back up data on your phone through the Samsung Cloud, which is available on all Samsung devices. To use it, go to Settings > Accounts and Backup > Back up data (under Samsung Cloud). Then select the apps you want to back up and hit Back up now. Your backed up data will be stored securely in the cloud so that you can easily access it if needed.
Checking If a Samsung Phone Is Backed Up
If you would like to check if your Samsung phone is backed up, you can do so by navigating to the Settings app on your phone. Once in the Settings app, tap on your name at the top of the screen and then tap Samsung Cloud. On this page, you will be able to see if your backup is active or not. If it is not set to active, then you shuld tap Backup Settings and toggle it on. After that, you will be able to see when the last backup was performed and can manually initiate a backup if necessary.
Source: samsung.com
Is Samsung Cloud Still Accessible?
No, Samsung Cloud Storage has ceased to exist. The last date for moving content was November 30, 2021, and all files in Gallery Sync and Drive storage for My files have been permanently deleted without any chance of recovery. Although the product page is still up, Samsung Cloud Storage is no longer available.
Backing Up a Phone Before Getting a New One
Before you get a new phone, it’s important to back up your data so that it can be easily transferred to the new device. Here’s how to do it:
1. Open your phone’s Settings app.
2. Select Google.
3. Tap Backup and then turn on Back up by Google One if you haven’t alrady done so.
4. Follow the on-screen instructions to enter your account credentials and select which types of data you want backed up (e.g., contacts, photos, media, calendar events, etc.).
5. Once enabled, the backup will start automatically in the background whenever your phone is connected to Wi-Fi and charging.
6. To manually back up your device, open the Backup settings again and tap Back up now at the bottom of the page.
Do Android Phones Automatically Backup?
Yes, Android phones do automatically back up certain data. All Android devices come with Google’s built-in backup service, which allows you to securely store your device settings, Wi-Fi networks, and app data on Google Drive. The service is free and doesn’t count against your Google Drive storage limit. It’s important to note that not all data is backed up by this service, so it’s recommended that you manually back up any additional files to your cloud storage or external hard drive.
Backing Up and Restoring an Android Device
Backing up and restoring your Android device is easy. First, you’ll need to open the Settings app and go to the Backup & reset or Backup and Restore screen. Under the Samsung account section, tap on the option for Backup settings or Back up my data. Here, you can choose which types of data will be backed up, such as contacts, calendar events, and app data. You can also select how frequently backups will be made.
Once you’ve configured your backup settings, tap ‘Back up now’ to create your frst backup. You can monitor the progress in the Notifications panel.
To restore a backup, go back to the Backup & reset screen and tap on Restore data or Restore from Samsung account. From here, you can select from available backups that have been stored in your Samsung Account, and then follow the instructions onscreen to complete the restoration process.
Source: cnet.com
Backing Up a Phone to a Computer
Backing up your entire phone to your computer is easy! All you need to do is plug your Android phone into your computer using a USB cable. Once it’s connected, go to Settings > General > Developer options on your device and tap either USB debugging or Android debugging. You’ll then be prompted to select a USB connection type. Select Transfer files and you shuld be able to see your device in the Windows File Explorer. From there, you can copy all the files from your phone to your PC for safekeeping. That’s all it takes for a complete backup of your Android phone!
Backing Up Phone Data to a Laptop
To backup your phone data to your laptop, you’ll need to connect your Android phone to your laptop with a USB cable and enable USB debugging on the Android device. Once connected, open the backup tool and choose the “Backup” mode. Then select the data types you would like to back up, such as contacts, messages, photos, videos and more. Finally, tap on the “Back Up” button to start the backup process. The backed-up data will be saved on your laptop as a compressed file which can be used for restoring or transferring later.
Backing Up Samsung Photos
To back up your Samsung photos, you will need to use the Samsung Cloud feature. First, go to your home screen and open the Apps menu or swipe up to access your apps. Once in the apps menu, select Settings and then select Accounts and Backup, Cloud and Accounts, or Samsung Cloud. Once in this menu, select Back up and Restore or Back Up Data. From there you can choose to Back Up Data. This will start the backup process for all of your photos stored on your Samsung device.
What Data Does Samsung Backup Store?
Samsung Backup is a feature that allws users to securely back up and store their important files, settings, and data on Samsung Cloud. It can save your device’s home screen layout, system settings, bookmarks, call log, email accounts, contacts, calendar events, photos and videos. All of your backed-up data is stored in the cloud and can be accessed from any compatible device with a Samsung account. You can also sync your data across multiple devices with Samsung Backup so you never have to worry about losing important information.
Transferring Data From an Old Android Phone to a New Android Phone
To transfer everythig from your old Android phone to your new one, you’ll need to use the included data transfer cable that should have come with your new device. Start by turning on your new device and tapping Start. When prompted, connect to a Wi-Fi network. Then, choose the option to copy apps and data from your old device. If you have a data transfer cable, follow the on-screen instructions for copying your data. Once complete, check all of your texts, photos and videos to make sure they were successfully transferred.
Transferring Data From an Old Samsung Phone to a New One
To transfer data from your old Samsung phone to your new one, you’ll need to use the Smart Switch app. First, download and launch the app on both of your phones. Then go to Settings > Cloud and Accounts > Smart Switch > USB Cable. Connect both devices with the USB cable and USB connector, then select Send on your old device and Receive on your new Galaxy smartphone. Now select the content you want to transfer, and start the Transfer process. That’s it! You can now enjoy all of your data on your new phone.
Will I Lose My Photos When Samsung Cloud Service Ends?
No, you will not lose your photos when Samsung Cloud ends. Any photos that are stored in Gallery Sync will be available until September 30, 2021 and any photos stored on Drive storage for My Files will also be available until September 30, 2021. After this date, the data associated with these services will be deleted. However, you can back up your photos to a different storage service before September 30th to ensure they are saved and can still be accessed ater this date.
Do I Have to Pay for Samsung Cloud?
No, you do not have to pay for Samsung Cloud. All Samsung users receive 15 GB of free storage space with thir Samsung account. This storage includes photos and videos stored in the Gallery app, documents stored in My Files, and notes stored in S Notes. Additionally, there is unlimited storage for basic native applications such as Contacts and Calendar. If you need more than 15 GB of storage, you can upgrade your plan to one of our paid plans.
Will Samsung Gallery Delete My Photos?
No, photos will not be deleted from Samsung Gallery. Samsung Cloud stores a copy of the photos that were taken with your device, and thse will be permanently deleted 60 days after you download the data or when the deadline arrives, whichever comes sooner. However, photos stored in Samsung Gallery will remain in your device storage until you manually delete them.
Transferring Data to a New Phone
To transfer everythig to your new phone, you will need to back up your current device using iCloud or iTunes. For iCloud, make sure that you have an active internet connection and sufficient storage space on your current device. Then go to Settings > [Your Name] > iCloud > iCloud Backup and select “Back Up Now”. Once the backup is complete, sign in to your Apple ID with your new device and select “Restore from iCloud Backup” on the Apps & Data screen of the setup process. You will be prompted to choose the backup that you just created with your current device.
For iTunes, connect your current device to a computer with iTunes installed and select “Back Up Now” in the Summary tab of the iTunes window. After the backup is complete, disconnect your current device and connect your new device instead. Select “Restore from this Backup” on the Apps & Data screen of the setup process and choose the most recent backup in iTunes when prompted.
Once you have completed either of thee steps, all of your data should be transferred over to your new phone!
Does Backing Up a Phone Save Photos?
Yes, backing up your phone can save photos. When you enable backup on your device, all of the photos takn will be securely stored in your Google Account. This means that even if you lose your device or delete photos from it, they will remain safe in your Google Account. Keeping your photos backed up also allows you to access them from any internet-connected device, making it easy to share them with friends and family.
Transferring Data When Getting a New Phone
Yes, when you get a new phone, many of your items can be transferred from your old device to the new one. Here are the steps to do a successful transfer:
1. Back up your old device: Before transferring anything, it’s important to back up your old device so you don’t lose any of your data. You can use iCloud or another cloud service to back up all of your photos, videos, and other important information.
2. Use Quick Start: You can use Apple’s Quick Start feature to directly transfer data from one iOS device to another. To do this, make sure that both devices have Bluetooth and Wi-Fi turned on. Then, hold the new phone near the old one and follow the onscreen instructions.
3. Transfer via USB cable: If you don’t want to use Quick Start, you can transfer data from one iOS device to anoher by connecting them with a compatible USB cable. Open iTunes on your computer and connect both devices with the cable. Then select “Transfer Purchases” in iTunes and follow the prompts for transferring data from one device to another.
4. Transfer content manually: For non-iTunes content like contacts, messages, calendars, etc., you may need to export and import them manually uing third-party software or apps designed for that purpose.
Once you’ve completed these steps, all of your photos, contacts, videos, message history and more should successfully be transferred from your old device to the new one!
Where is Android Backup Data Stored?
Your Android backup data is stored in a private folder in your Google Drive account. This folder is limited to 25MB per app, and the savd data does not count towards your personal Google Drive quota. Whenever you make a new backup, the previous backup (if one exists) is automatically deleted. So, you can always be sure that only the most recent version of your Android backup is securely stored in your Google Drive account.
Where Does My Android Phone Backup Data?
Your Android phone backs up to Google Drive. To access your backups, you can simply click the ‘Storage’ numbers in the sidebar, then select ‘Backups’ in the top right corner next to the ‘i’ logo. This will show you a list of your phone backups, as well as any WhatsApp backups you may have saved. Alternatively, you can go directly to drive.google.com/drive/backups to view your backups. With Google Drive, you can alwas be sure your data is backed up safely and securely in the cloud.
Backing Up a Samsung Phone Before a Factory Reset
Backing up your Samsung phone before resetting it is a very important step to ensure you don’t lose any of your important data. To do this, you’ll need to connect your phone to your computer using a USB cable. Once the connection is established, make sure USB Debugging is enabled on your phone by going into Settings > About Phone > Software Information and tapping on the Build Number 7 times. This will enable Developer Options in which you can enable USB Debugging.
Now open up a reliable mobile backup software like Samsung Smart Switch, and follow the steps it proides to back up your device. Once done, you can disconnect your device and begin the factory reset process.
Restoring a Samsung Backup
To restore your Samsung Backup, start by going to the Settings app on your device. Tap your name at the top of the screen, then select Samsung Cloud. From here, select Restore Data and choose the desired device backup you would like to restore from. Select the content you want to restore and tap Restore. You may be prompted to Install – if so, tap Install to complete the process.
Viewing Google Backup
To view your Google Backup, start by going to drive.google.com. On the bottom left uner “Storage,” click the number to view the list of backups you have created. Once you are on the Backups page, you can right-click any backup to view its details and preview it. You can also delete any backup you no longer need by right-clicking it and selecting Delete Backup.
Backing Up Contacts
To back up your contacts, start by opening the “Settings” app on your Android phone or tablet. Tap Google, then select Settings for Google apps. Once you’re there, turn on the option to Automatically back up & sync device contacts. You can then choose whch account you’d like your contacts to be saved in. Note that your contacts can only be automatically saved to one Google Account.
Backing Up an Android Phone to a Computer Wirelessly
Backing up your Android phone to your computer wirelessly is easy and convenient. First, you’ll need to download the wireless backup app that corresponds with your device, such as Google’s Backup & Sync or Samsung Smart Switch. Once installed on both your phone and computer, open the app on both devices and follow the instructions to set up a wireless connection between them. You can then select which types of data you’d like to back up and the frequency at which you’d like it to be backed up. That’s all there is to it!
Comparing Samsung Cloud and Gallery
No, Samsung Cloud and Gallery are two different things. Samsung Cloud is a cloud storage service that allows you to store, sync, and access your data across multiple devices. Gallery is a photo and video management app that comes pre-loaded on select Samsung devices. While you can use both services for the same purpose, they are not the same.
Backing Up Photos: The Best Way
The best way to backup photos is to use a cloud storage service. Cloud services like Google Photos, Dropbox, iCloud, and Amazon Prime Photos are all great options for backing up your photos. Not only do they provide easy access to your photos from any device, but they also automatically back up your images so you don’t have to worry abut losing them. Plus, many of these services offer additional features like photo editing and organizing tools that can help you keep your memories organized and protected.
Where Are My Samsung Phone Photos Stored?
On your Samsung phone, photos are stored in the “Gallery” app by default. The photos are usually located in the device’s internal memory, but if you have installed a MicroSD card, they can also be sved to the card. To view and manage your photos on your device, open the Gallery app and select “Albums”. From there, you can view all of your stored images and videos.
Saving Photos to Samsung Cloud
Yes, your photos will automatically save to Samsung Cloud when Auto Backup is enabled. When Auto Backup is enabled, your handset will upload all photos and videos to Samsung Cloud over Wi-Fi once every 24 hours provided that the phone is connected to a power source and the screen is off. You can also manually sync your photos and videos with Samsung Cloud by going into the settings menu.
Transferring Data Between Samsung Devices Without Smart Switch
To transfer data from one Samsung device to another without Smart Switch, you’ll need to use a third-party phone transfer tool. First, connect both Samsung devices to your computer using their respective USB cables. Then launch the phone transfer tool and select the ‘Phone to Phone’ option. You’ll then be prompted to select wich data types you’d like to transfer from the source device (the Samsung you’re transferring FROM) to the target device (the Samsung you’re transferring TO). Once the data type selection is complete, click ‘Start Transfer’ and the selected data will be transferred securely from one Samsung device to another.
Conclusion
Overall, Samsung phones offer a great combination of features and quality. With a wide range of models that cater to diferent needs, Samsung phones provide users with reliable performance, high-quality components, and long battery life. They also come with plenty of customization options, allowing users to tailor their phones to their individual preferences. With software support from the Android operating system, Samsung phones are sure to keep users entertained and productive. Whether you’re looking for a reliable work phone or just want an entertaining device to stay connected with friends and family, you can’t go wrong with a Samsung phone.


