Backing up your Macbook to an External Hard Drive is an important part of protecting your valuable data. An External Hard Drive provies you with a safe, secure and convenient way to store large amounts of data for long-term storage or regular backups.
When it comes to choosing the right external hard drive for backing up your Macbook, there are several factors that need to be taken into consideration. Firstly, you need to decide on the size of your external drive – as you’ll want enogh storage space to back up all of your important files. Secondly, you’ll want to make sure that the drive is compatible with your Macbook – so check it’s connections and compatibility before purchasing. Thirdly, you’ll want something robust and reliable due to the nature of the data being stored on the drive – so look for drives with good reviews and warranties.
Once you have purchased an external hard drive that meets tese criteria, it’s time to start backing up your Macbook! Here are some easy steps to follow:
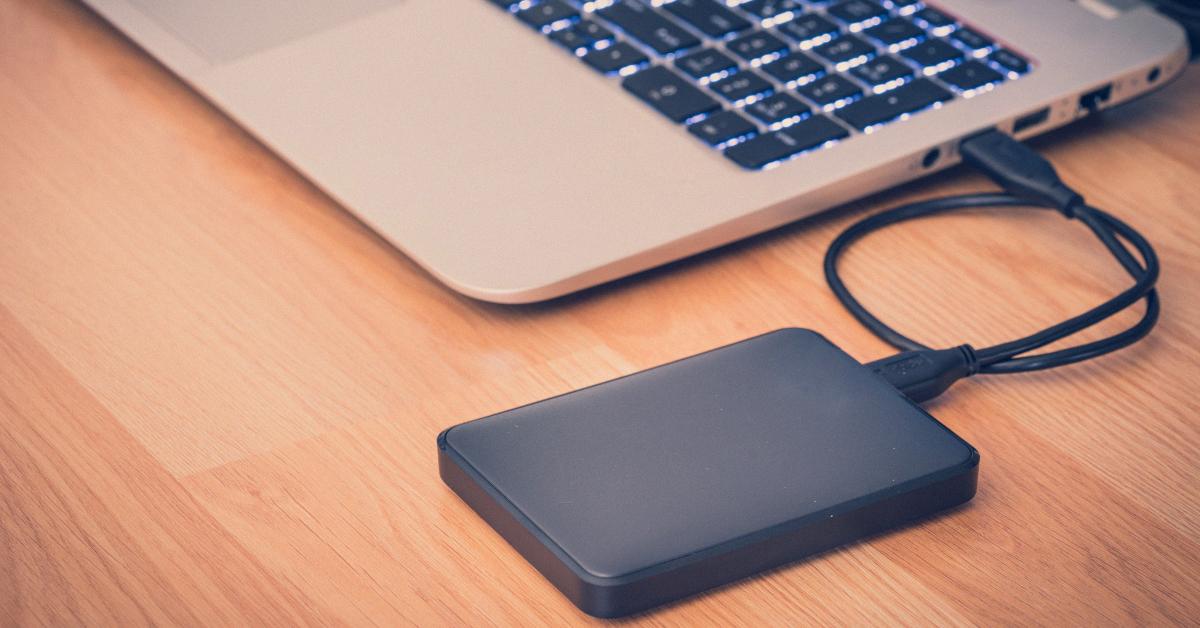
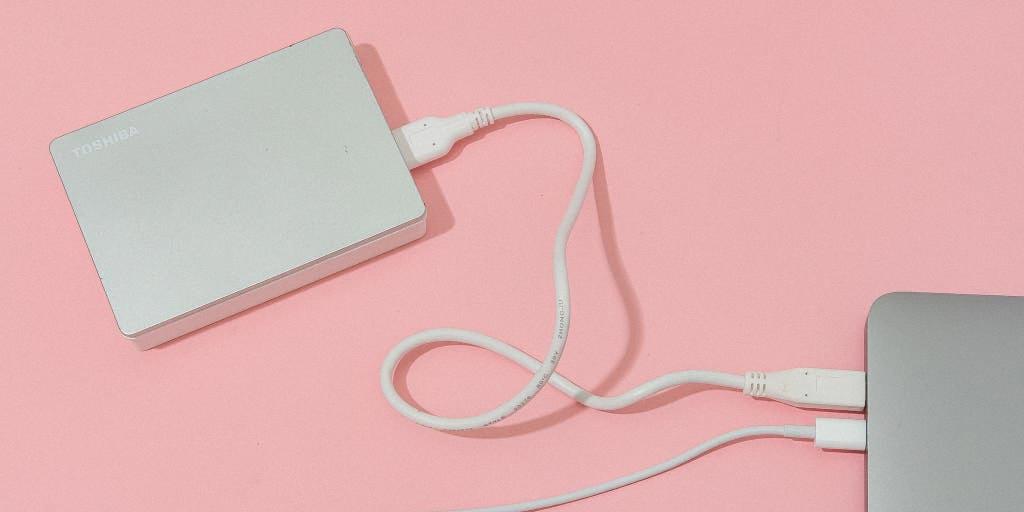
1. Connect your external hard drive: Connect your external hard drive using a USB cable or other approriate connection type (depending on the type of external hard drive).
2. Open Time Machine: Open Time Machine from System Preferences (or press Command + spacebar if usig Mac OS X 10.5 or later).
3. Select ‘Back Up Now’: Select ‘Back Up Now’ from the Time Machine menu in order to start backing up all of the data on your Macbook onto your external hard drive.
4. Back Up Your Data: The backup process will begin immedately and all of the data on your Macbook will be stored securely onto your external hard drive when complete.
Once complete, you now have a secure copy of all of the data stored on your Macbook stored safely onto an External Hard Drive! It’s wise to keep this backed up regularly – so make sure that you repeat this process periodically in order to keep all of your important files safe and secure!
Backing Up a Mac to an External Hard Drive Without Time Machine
Backing up your Mac to an external hard drive without using Time Machine is a simple process. First, plug in your external hard drive and create a new folder on it to store your files. Once the folder is created, locate your Mac startup disk in Finder or on your desktop and open it. Press Users, then select all the folders and data you want to back up, drag this into the new file you created on your external drive and wait for the copy to finish. This will ensure that all of your important data is safely backed up to an external location. It is important to remember that this method does not povide any incremental backups like Time Machine does, so if you make changes to files after backing them up, you will need to repeat the process in order to keep them backed up.
Source: sweetwater.com
Backing Up a Macbook Pro
To do a full backup of your Macbook Pro, you will need to use Time Machine. Time Machine is an application built into your Mac that allows you to back up your entire system, including apps, documents, photos, music, emails and system settings.
First, open System Preferences and select Time Machine. Click the Back Up Automatically checkbox and then select the drive you want to use for the backup – this could be an external hard drive or a network drive such as iCloud Drive or Dropbox. Once you have selected your backup drive, click “Back Up Now” to begin the backup process. You can also set Time Machine to automatically back up on a regular schedule if desired.
Once the initial backup is complete, it will continue running in the background each time new data is added to your Macbook Pro. To ensure that all files are properly backed up and secure, be sure to check time machine’s progress regularly and update any older versions of backups when necessary.
Will Time Machine Backup All Data on My Mac?
Time Machine will back up most of the files and folders on your Mac, but not everything. It will back up system files, apps, music, photos, documents, and other data stored in your user’s Home folder. Time Machine also stores multiple versions of each file, so you can go back in time to recover a previous version if needed. However, it won’t back up software that is installed outside of the macOS installation folder or items stored in iCloud. Additionally, Time Machine doesn’t back up system preferences, network settings, or other inforation that is not stored in a file or folder.
Using an External Hard Drive for Backup and Storage on a Mac
Yes, you can use an external hard drive for backup and storage on a Mac. External hard drives are a great way to store large files and backups of your data, as they offer higher capacities than other types of storage devices. To use an external hard drive for backup and storage on Mac, you will need to connect it to your Mac with a USB cable or other connection type, depending on the device. Once connected, you can use the Time Machine application to create automatic backups of your data to the external drive. Additionally, you can drag and drop files from your Mac in order to save them directly onto the hard drive. External hard drives are available in diffrent sizes and speeds, so be sure to pick one that fits your needs.
Transferring Files from Mac to External Hard Drive
Transferring your files from your Mac to an external hard drive is easy! To begin, make sure that the external hard drive is connected to your Mac. Then, open the Finder window on your Mac and locate the files or folders you want to transfer.
Next, browse to the folder on your external drive were you want to store the files or folders, and then simply drag and drop them into the external hard drive’s window. A status bar will appear on your screen indicating progress of the transfer – just wait until it completes. Once finished, you should be able to access all of your transferred data directly from the external hard drive.
If you have any further questions about transferring data from your Mac to an external hard drive, please feel free reach out for additional help.
Source: nytimes.com
Backing Up Your Mac: The Best Strategies
The best way to back up your Mac is to use Time Machine, which is included in all versions of macOS. Time Machine is a comprehensive and easy-to-use backup solution that alows you to backup your entire system, including settings, applications, documents and data. To get started, you will need an external storage device, like a hard drive or SSD. Once the device is connected, you can launch Time Machine from the System Preferences menu and start the setup process. Once the initial backup has completed, you can configure Time Machine to run automated backups on a regular schedule. That way, you can rest assured that your data will always be up-to-date.
Backing Up a Laptop to an External Hard Drive
Backing up your laptop to an external hard drive is a great way to protect your important data. Here are the steps you shuld take:
1. Connect your external hard drive to your laptop via a USB cable.
2. Open the Control Panel on your laptop.
3. Select “Save Backup Copies of Your Files with File History”, then select “System Image Backup”.
4. You’ll be prompted to create a system image – follow the prompts and choose where you’d like the image stored (on the external hard drive).
5. Once that’s done, you can use File History to back up any new files and changes made on your laptop. To do this, go back into the Control Panel and select “Save Backup Copies of Your Files with File History” again – then click “Turn On” and follow the prompts onscreen.
6. Repeat these steps regularly in order to keep an updated backup copy of your data stored safely on the external hard drive!
How Long Does a Mac Backup Take?
It depends on the size of the data you are backing up and the speed of your Mac. A Mac with a few files and apps shoud take 5-10 minutes to prepare the backup. It may take longer if you have many files and apps, or if your Mac is older. If you are backing up 10 GB of data, it should take no more than an hour or two, depending on your Mac’s speed. If you are backing up hundreds of gigabytes, it could take several hours to complete the backup.
Backing Up a Mac Using Time Machine
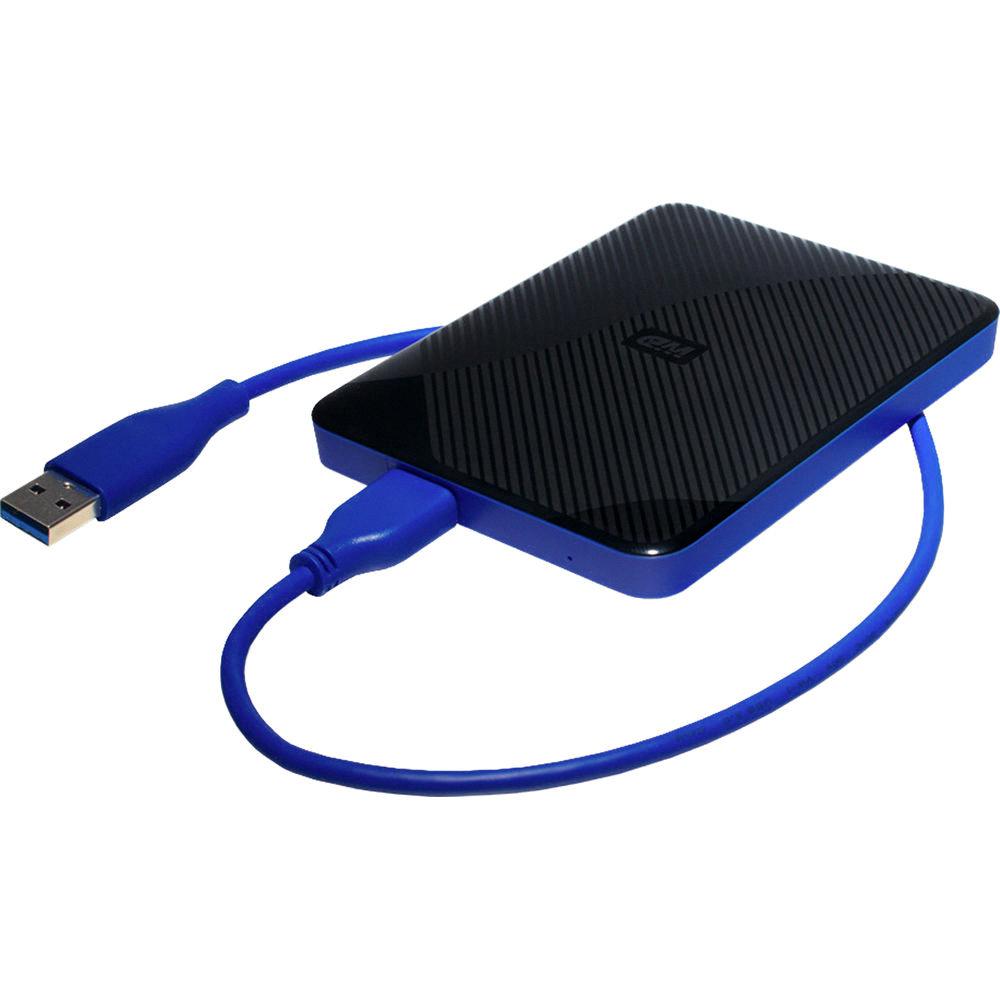
Backing up your Mac using Time Machine is a simple process. First, you’ll need to connect an external hard drive to your Mac. Then, click on the Apple icon in the menu bar and select System Preferences. From here, click the option for Time Machine and then select ‘Select Backup Disk’. You can then choose which drive to use and click ‘Use Disk’. Finally, make sure to check the box next to ‘Back Up Automatically’ so that your files are backed up regularly. That’s all there is to it!
Source: bhphotovideo.com
Does Mac Backup Include Photos?
Yes, Mac backups include photos. When you set up Time Machine on your Mac, it automatically backs up all the files on your Mac, including photos stored in the Photos library. If you ever lose the files in your Photos library, you can restore them from the Time Machine backup. Additionally, you can use iCloud or other cloud-based services to store and access copies of your photos across multiple devices.
Will Time Machine Erase Other Files on an External Drive?
No, Time Machine will not erase other files on your external drive. Instead, it creates a folder called Backups, which is used to store multiple versions of your data. Time Machine keps track of the changes you make to your documents and stores old versions in the Backups folder so that you can recover a file if it gets deleted or corrupted. Time Machine only stores the differences between versions of files—not entire copies—so it won’t take up much space on your external drive.
Can Time Machine Backup an External Drive?
Yes, Time Machine is able to back up an external drive. When you connect an external drive to your Mac, Time Machine will ask if you woud like to back it up. You can select “Back Up Now” or “Skip This Backup” depending on your preference. If you choose to back it up, Time Machine will save a copy of the data stored on the external drive to the backup destination you have specified. You can also set up a schedule for when your backups should occur, ensuring that all of your files are securely backed up in case of any unexpected events.
Troubleshooting Mac Backup Issues to External Hard Drive
If your Mac is not backing up to your external hard drive, there could be a few reasons. First, make sure that your external hard drive is plugged in, turned on, and securely connected to your Mac. If the connection is loose or not properly connected, that can cause an issue with the backup. Additionally, if you are using a networked hard drive, make sure both the disk and your Mac are connected to the network. If there are any network issues, your backup may not be available. If all of these steps check out correctly and you’re still having issues with backing up to the external hard drive, it’s posible that there could be a software issue with either the external hard drive or your Mac which would need to be addressed.
Compatibility of External Hard Drives with Mac Computers
Yes, in most cases any external hard drive should work with a Mac. Most external hard drives will be formatted as either NTFS or FAT32 which are both compatible with macOS. If your external hard drive is not already formatted for use with the Mac operating system, you can easily reformat it using Disk Utility on your mac. Additionally, make sure to check the external hard drive’s compatibility with your specific Mac model before purchasing as some drives may require additional software to work with certin models.
Transferring Photos From Macbook Pro to External Hard Drive
To transfer photos from your Macbook Pro to an external hard drive, first you will need to quit the Photos app. Then open Finder and go to the folder that contains your Photos library. Next, drag the Photos library to a location on your external storage device. Once you have finished moving it, double-click the Photos library in its new location to open it. This will ensure that all of your photos are properly transferred and stored on the external hard drive.
Transferring Files From Computer to External Hard Drive
To transfer everything from your computer to an external hard drive, first you need to connect the drive to your computer. Once connected, you may need to format the drive if it’s not already in a usable format. After that, open File Explorer on your computer and navigate to the folder containing the files you want to copy. Select all the files and press Ctrl + C on your keyboard. Now open This PC and access the external drive. Right-click a blank area on this location and press Ctrl + V. This will paste the selected files into this folder. You can also drag and drop files from one location to another if this method is easier for you. Once finished transferring everything, be sure to safely eject your external hard drive befre unplugging it from your computer.
Backing Up Files to an External Hard Drive
Backing up your files to an external hard drive is an essential step in protecting your data. To do this, frst connect the external hard drive to your computer. Open the File Explorer window and select all the files you want to back up. Right-click on the selection and choose “Copy” from the pop-up menu. Next, open the external hard drive window and right-click in an empty space. Choose “Paste” from the menu and your files will be copied to the external drive. Alternatively, you can click and drag your selection from one window to another. Once you have finished backing up your files, make sure to eject your external hard drive properly before unplugging it from your computer for maximum data protection.
Backing Up My Laptop: The Best Way
The best way to backup your laptop is by following the 3-2-1 rule: have three copies of your data in total, two stored locally on differet devices and one stored off-site. To put this into practice, make sure to save a copy of your data on your laptop itself, another copy on an external hard drive and finally a third copy on a cloud backup service. That way, you’ll have access to your files no matter what happens – whether you lose or damage your device or if the local copies of your files become corrupted. It’s also important to remember that you should back up regularly to ensure that all of your data is backed up correctly.
Checking if a Mac is Backed Up to iCloud
To check if your Mac is backed up to iCloud, open System Preferences on your Mac and click on Apple ID. Then select iCloud from the menu on the left and sign in to iCloud if prompted. Once you’re signed in, you shold see a list of services that are connected to iCloud. If you see iCloud Drive checked off, then your Mac is backed up to iCloud. If it isn’t checked off, you can click the box next to it to enable it.
You can also open Finder on your Mac and select iCloud Drive from the left sidebar. If it shows content stored in there, then your Mac is backed up to iCloud. You can also look at the storage bar at the bottom of this window – if it shows any amount of storage used by iCloud Drive, then that means your Mac is backed up.
Locating Time Machine Backups on Mac
To find your Time Machine backups on Mac, click the Time Machine icon in the menu bar at the top of your screen. From there, choose Enter Time Machine and use the arrows and timeline to browse throuh your backups. If you don’t see the Time Machine icon in the menu bar, go to Apple Menu > System Preferences, click Time Machine, and make sure “Show Time Machine in menu bar” is checked. Then you’ll be able to access your backups from the menu bar.
Copying an iPhoto Library to an External Hard Drive
Copying your entire iPhoto library to an external hard drive is easy and straightforward. To begin, connect your external hard drive to your computer. Then, navigate to the folder where your iPhoto library is stored. This is usually located in the Pictures folder on Macs. Once you have located the iPhoto library, drag it onto your external hard drive. When you open the external hard drive, you shoud see a copy of your iPhoto library stored on it. Finally, open this copy of your iPhoto library and set any preferences that you want to transfer over from the original version. That’s all there is to it!
Exporting an Entire Apple Photos Library
To export your entire Apple Photo Library, open the Photos app on your Mac. Then, select File > Export > Export [number] Photos. You’ll be presented with sevral options for file type – you can choose JPEG or TIFF for photos, and QuickTime Movie or MPEG-4 for videos. You can also choose to export your photos as a slideshow or memory movie. When you are ready to export, simply click the Export button and save the file to your desired location.
The Benefits of Using a Thunderbolt Drive
A Thunderbolt drive is an external hard drive that contains a Thunderbolt interface, a technology developed by Intel in collaboration with Apple. This interface allows for extremely high-speed data transfer between devices, up to 40Gb/s – significantly faster than USB or FireWire. The combined usage of PCI Express and DisplayPort technologies makes this connection both highly reliable and versatile. Thunderbolt drives are often used for backing up large amounts of data quickly or transferring data between multiple computers. Additionally, they can be used to connect peripherals such as monitors and oher external storage devices.
What Is the Best External Hard Drive for Backing Up a MacBook Pro?
You will need an external hard drive that is at least twice the size of your MacBook Pro’s internal storage. For example, if your MacBook Pro has 512GB of internal storage, you should get a 1TB, 1,024GB, external disk. This will ensure that all of your data is backed up correctly and completely. It’s important to remember that backups happen every hour when the disk is connected, so having a larger disk will give you some extra room for future backups. Additionally, if you plan on storing large files such as videos or photos on the drive, then it wuld be wise to invest in an even larger external hard drive as these files can take up a lot of space.
The Best External Hard Drives for Macbook
If you’re lookig for the best external hard drives for your Macbook, you have a lot of great options available. Western Digital My Passport 4TB external hard drive is an excellent choice. It offers plenty of storage, fast data transfer speeds, and easy setup. The Buffalo MiniStation Thunderbolt external hard drive is another great option that offers high-speed connections and plenty of storage space. For extra security, the G-Technology G-Drive USB 3.0 4TB external hard drive features password protection and automatic backups. If you’re looking for something even smaller and faster, the Samsung T3 SSD is a great choice – it’s lightweight and has read/write speeds up to 450 MB/s. For added convenience, the Buffalo MiniStation Extreme NFC external hard drive is also a great option – it includes Wi-Fi access for file transfers and remote access from your mobile device.
Troubleshooting Issues with Adding Files to an External Hard Drive on Mac
Unfortunately, your external hard drive uses a file system that is only partially supported by macOS, and it is set to read-only permissions. This means that you cannot add or delete files on the drive, as macOS does not allw for write operations on this type of file system. Additionally, if the drive is encrypted, you won’t be able to access it in any way until you decrypt the disk.
Conclusion
In conclusion, an external hard drive is an invaluable piece of technology that can provide an array of benefits to users. It allws for the storage of large files, as well as providing a secure and reliable backup solution. External hard drives are relatively easy to use, often require no additional software, and can be accessed through a variety of interfaces including USB and Firewire. Additionally, many external hard drives are designed to be portable, making them ideal for those who need to transport data between locations. Overall, an external hard drive is a great choice for anyone looking for additional storage solutions or secure data backups.

