Are you lookng to get the most out of your iMac? Activating the camera on your device can help you stay connected with friends and family, capture important moments, and even work remotely. In this blog post, we’ll go over the steps for enabling your iMac camera and discuss how it can help enhance your user experience.
To activate the camera on your iMac, first open up the System Preferences. Select Security & Privacy from the System Preferences menu, then select Camera from the left-hand side of the window. Ensure that Camera access for this application is enabled by clicking on “Allow” next to any applications that require access to your camera. You may need to grant permission for apps like Skype or Facetime in order to use them with your camera.
Once you’ve granted permissions for accessing the camera, open up an app that uses it such as Skype or Facetime. This will prompt a pop-up in which you must select “Allow” agin to enable access to your camera from within that particular app.
Now that you’ve enabled access to your iMac’s built-in camera, here are some of the ways you can make use of it:
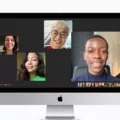
• Video calls: Make face-to-face calls with friends and family using video conferencing apps such as Skype or Facetime.
• Streaming live: Stream yourself playing games or doing other activities by broadcasting live via streaming services like Twitch or YouTube Live.
• Record videos: Capture important moments by recording videos with a webcam app such as QuickTime Player or OBS Studio.
• Photography: Take photos of yourself or others by using photo editing software like Adobe Photoshop Express or Gimp.
• Collaboration: Collaborate with colleagues remotely via video conferencing tools such as Zoom or Google Hangouts Meet.
By activating your iMac’s built-in camera, you can stay connected with loved ones and work remotely wihout needing any additional hardware! To sum up, here are the steps for enabling access to your camera on an iMac:
1) Open System Preferences > Security & Privacy > Camera > Allow Access for Applications That Require It
2) Open an App That Uses Your Camera (e.g., Skype, Facetime) > Select Allow Again When Prompted
3) Enjoy All The Benefits Of An Activated Camera On Your iMac!
Getting Mac to Recognize Camera
Getting your Mac to recognize your camera is relatively simple. First, make sure that the USB or USB-C cable is connected securely to both the camera and the computer. Then make sure that the camera is turned on and set to the correct mode for importing photos. You may also want to check the memory card for any possible damage. After this, open up your Mac’s photo importing software and use it to locate and import your photos from the camera into your computer.
Troubleshooting Mac Camera Issues
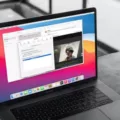
To get your Mac camera to work for video, you’ll need to first open the QuickTime Player app on your Mac. Then, choose File > New Movie Recording. This will open up a window where you can select your camera from the drop-down menu and adjust the settings like audio level and resolution. Once you’ve selected your desired settings, click the red record button to start capturing video with your Mac’s built-in camera.
Enabling Microphone and Camera on Mac
To turn on your microphone and camera on your Mac, open the System Preferences, select Security & Privacy and then click the Privacy tab. On the left side of the screen, you will see a list of categories such as Camera and Microphone. Click on either of those to enable access for specific applications. Once you have enabled access for your applications, you can now use your camera and microphone.
To use your camera and microphone in an application, launch the application and click the Video Settings icon in the video control panel. This will open a popup window with various settings for audio and video input devices. Scroll down to the Input Devices section where you can select from available cameras and microphones. Your video will immediately switch to the selected camera and microphone when you make a selection from this menu.
Troubleshooting Mac Not Recognizing Webcam
If your Mac is not recognizing your webcam, it could be due to a number of factors. It is possible that the software needs to be updated, or thre could be an issue with the camera itself. Additionally, the USB cable used to connect the camera may not be compatible with your Mac. You can try restarting your Mac, as this will often resolve any software issues that might be causing the problem. If this does not work, you can try disconnecting and reconnecting the webcam to make sure it is properly connected.
Troubleshooting a Camera That Will Not Turn On on a Mac
If your camera won’t turn on on your Mac, it could be a few different things. First, check your system preferences to make sure you don’t have the camera’s permissions denied. If that doesn’t work, try shutting down the computer and then turning it back on again. If neither of those options work, it could be a hardware issue and it may be time to take your Mac to the Apple store or a licensed service shop for further troubleshooting.
Getting Computer to Recognize Video Camera
In order to get your computer to recognize your video camera, you’ll need to make sure the drivers for the camera are installed and updated. To start, open your Device Manager and check if your camera is listed under Cameras, Imaging Devices, or Sound, Video and Game Controllers. If it isn’t listed there, select the Action menu and then select Scan for Hardware Changes. Wait for it to scan and reinstall any updated drivers that may be necessary. Once this is complete, restart your device and try opening the Camera app again. If it still isn’t working aftr that, you may need to contact the manufacturer of your camera for additional support.
Disappearance of Camera on Mac
It is possible that your Camera has been disabled in the Screen Time settings. To check this, you should open System Preferences and then click on Screen Time. From there, select Content & Privacy in the sidebar and then click Apps. Make sure that the box for Camera is ticked. You may also need to check the App Limits in the sidebar to ensure that any Camera-related limits have been lifted. If none of thse steps fix your issue, it might be a hardware issue, so you should contact Apple Support for further assistance.
Enabling Camera and Microphone Access
To get your camera and microphone to work, you first need to make sure they are both connected and enabled on your computer. Check the settings in your computer to make sure that the camera and sound settings are correct. If you’re using a laptop, double-check that the built-in camera is turned on. Also, make sure that your operating system is up-to-date for Macs or that the necessay drivers are installed and updated for PCs/Windows.
If everything looks correct but the camera and microphone still aren’t working, try restarting your computer. If that doesn’t do the trick, you may need to check for any available software updates or contact technical support for help.

