Are you looing to add a professional touch to your GarageBand project? Keyframe Volume can help! With this feature, you can easily adjust the volume of individual tracks in your song. This allows you to create smooth transitions and make certain elements stand out. In this blog post, we’ll explain how to use keyframe volume in GarageBand and why it’s such an important tool for audio production.
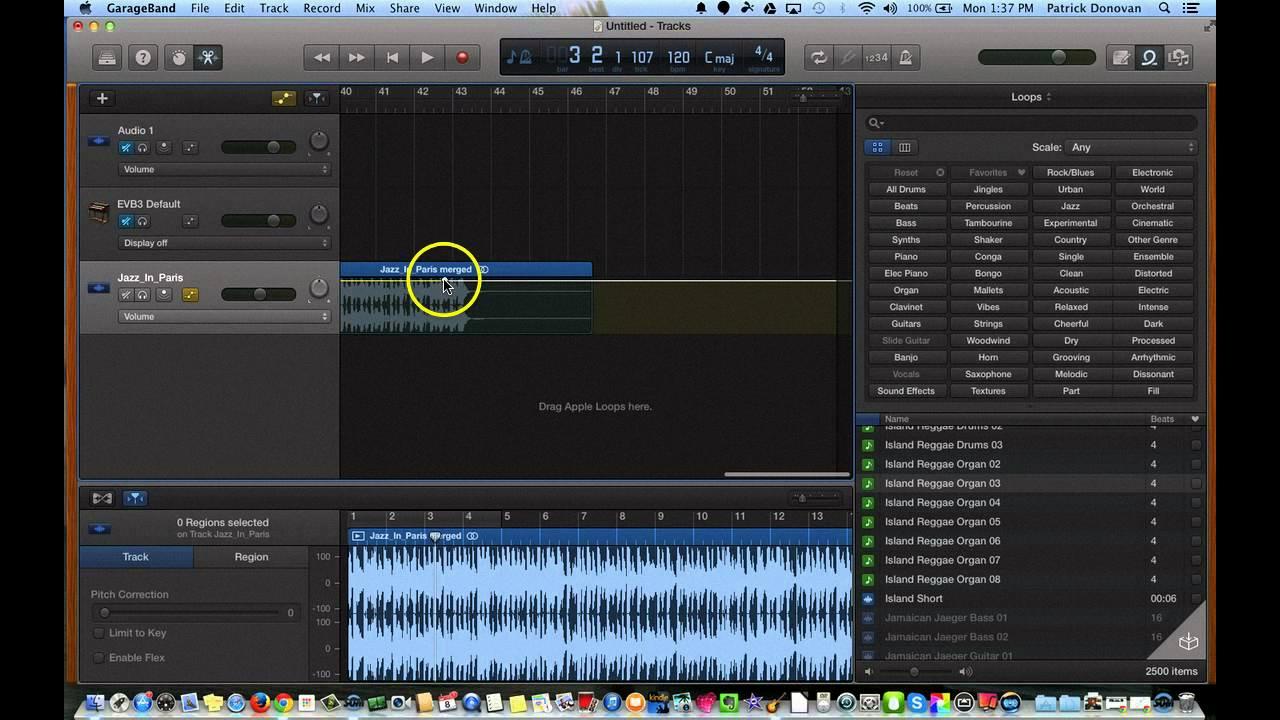
Keyframe volume is a powerful feature that enables you to adjust the volume of individual tracks within GarageBand. You can use it to create gradual chages in the volume or sudden jumps for emphasis. It also lets you set multiple points on the timeline, allowing for complex fading effects. To access keyframe volume in GarageBand, select the track that you want to adjust and choose Track > Show Automation in the menu bar. You should then see a line across the top of the track with small white circles spaced out along its length. These are called keyframes and they represent points along the timeline where you can set a specific volume level for that track.
To set a keyframe, simply click on one of these circles and drag it up or down until it reaches the desired level. If you want to add an additional point, click anywhere along the line and drag another keyframe into place. You can also delete any existing keyframes by clicking on them and pressing Delete on your keyboard. Once your settings are complete, hit Play in order to hear how they sound together as part of your song.
Using keyframe volume allows you to create dynamic transitions between different sections of your track and emphasize certain elements as well. For example, if there is a single guitar part at the beginning of your song that needs extra attention, you could lower its levels during other parts of the song so that it stands out when it comes back in later on. You could also make subtle adjustments throughout your track in order to create a smooth fade-in or fade-out effect at either end of your song.
Keyframe Volume is an incredibly useful tool for any producer who wants precise control over their audio levels within GarageBand projects. With just a few clicks, you can make subtle adjustments or dramatic changes depending on what sound results you’re looking for! Have fun experimenting with Keyframe Volume—you never know what kind of creative results will come from playing around with this great feature!
Fading Track Volume in GarageBand
In GarageBand on Mac, you can fade the volume of a track by selecting Track > Show Master Track. From there, you can choose Mix > Show Automation, and then select Volume from the Automation menu in the master track header. To create a fade-in effect, add volume points to the beginning of the volume curve. To create a fade-out effect, add volume points to the end of the curve. You can adjust the shape of the curve to suit your needs; for example, you can make it linear or curved as desired. You also have control over how quickly or slowly you want to fade in or out by adjusting how far aprt each point is.

Source: youtube.com
Normalizing Volume in GarageBand
Normalizing volume levels in GarageBand is a simple process. To begin, open your project in GarageBand and select the track or section of audio you want to normalize. Next, click the Effects menu at the top of the screen and select Normalize. Finally, adjust the Output Level to the desired level and click OK. You can also enable auto-normalizing by choosing GarageBand > Preferences, clicking Advanced, and then selecting the Auto Normalize checkbox. This will automatically adjust your project’s volume levels to optimal levels for export.
Fading Volume: How to Achieve It
To make your volume fade, you can use a variety of techniques. The most popular technique is to use a digital audio workstation (DAW) such as Pro Tools, Logic Pro, or Ableton Live. In the DAW, you can adjust the volume level of any part of the track with its fader and create a gradual fade out or fade in effect. You can also use automated effects such as panning, EQ, compression, reverb, and delay to create more subtle fades. Alternatively, if you don’t have access to a DAW, there are sevral free online tools that allow you to easily create a fade effect. These tools often allow you to make precise adjustments to the start and end points of the fade as well as adjust the speed at which it occurs.
The Effects of Fade In Volume
Fade in volume is the process of gradually increasing the sound level from complete silence to the desired level. This transition technique is commonly used when introducing an audio element such as a song or voiceover. It helps avoid a sudden and jarring increase in volume, allowing the sound to slowly build up to its full potential. Fade in volume can also be used creatively to create a desired atmosphere or mood.
Deciding Between Normalizing and Amplifying Audio
When making audio adjustments, it is important to understand the differences between normalizing and amplifying. Normalizing adjusts the audio signal so that its highest peak (or loudest moment) is at a certain level, usually 0 dB. This ensures that the audio signal is at an even and consistent level across the entire track or file. Amplifying increases the volume of an audio signal but does not necessarily bring it to a specific level. Therefore, if you want to bring a track or files to a specific level, you should use Normalize instead of Amplify in a Macro.
The Effects of Normalizing Volume
Normalizing volume adjusts the overall volume of an audio recording to a target level without changing its dynamics. This process helps ensure that all parts of the audio are heard at a consistent and comfortable level. It can also be used to make sure that different audio recordings have a similar loudness when playing them back simultaneously. Normalizing is different than compression, which adjusts the volume over time in varying amounts, and it should not change the sound in any way other than purely changing its volume.
Conclusion
Overall, GarageBand’s Keyframe Volume feature allows users to easily create fades and adjust the volume of their project by adding points to the volume curve. This makes it simple to adjust the track’s overall dynamics, as well as to create interesting effects. Furthermore, GarageBand provides an auto-normalizing feature, which ensures that exported projects are automatically optimized for maximum volume level. Thanks to its intuitive design, GarageBand Keyframe Volume makes it easy for users of all levels to adjust the audio of their projects with ease.


