DIY eGPU for Mac – A Beginner’s Guide
Are you looking to boost your Mac’s graphical capabilities? An eGPU, or external GPU, can provide the extra performance you need. If you’re a DIY enthusiast, then building your own eGPU setup is easier than ever. Here’s a beginner’s guide to setting up an eGPU on your Mac.
What Is an eGPU?
An eGPU is an external graphics processing unit that connects to your Mac via Thunderbolt 3 or USB Type-C. It allows you to add additional graphical capabilities to your machine, such as faster frame rates and improved overall performance. This makes it ideal for tasks such as gaming and video editing.
The Benefits of DIY eGPU
DIY eGPU setups offer seeral advantages over pre-built models:
– Cost savings: Building an eGPU yourself is generally cheaper than buying a pre-built model due to the fact that you can source parts individually.
– Customization: With a DIY build, you have complete control over the components used in your setup—from the GPU itself to the power supply and chassis. This allows you to customize the final product in ways that may not be possible with pre-built models.
– Increased potential: By sourcing components from different vendors, it’s possible to create an eGPU setup with superior performance compared to what’s available off-the-shelf.
What You Need for Your DIY Setup
To build an eGPU setup for your Mac, you will need the folloing components:
– GPU: The heart of any good eGPU setup is the graphics card itself. You will need a compatible card with its own power connector (usually 6 or 8 pins). Be sure to check compatibility with your Mac beore making a purchase!
– Power Supply Unit (PSU): The PSU supplies power to all of the components in your system, including the GPU itself. Make sure that it provides enouh wattage for all of your hardware—typically around 600W minimum.
– Chassis/Case : Without a chassis/case, connecting everything together won’t be possible! Make sure that whatever case you choose has enough room for all of your components and provides adequate cooling and ventilation.
– Cables & Connectors : You’ll also need various cables and connectors in order to connect all of your hardware together correctly. This includes Thunderbolt 3 cables and PCIe risers if needed.
Finally, some form of external display must be connected in order for the GPU’s output signals to be seen by users (e.g., monitors).
Putting It All Together
Once all of the components have been sourced and acquired, it’s time to put them all together! Begin by assembling the chassis/case according to instructions prvided by its manufacturer; this should include installing any necessary fans or other cooling systems as well as mounting standoffs for attaching components within it later on . Next, install the PSU into its designated location inside the case; again follow instructions provided by its manufacturer if necessary . Then proceed by connecting cables between different components inside (e.g., PCIe risers) as well as outside (e.g., Thunderbolt 3 cable) using appropriate connectors . Finally , mount any remaining parts such as GPUs or SSDs before closing up everything securely .
Now that everything has been connected together correctly , plug in all necessary power sources before turning on both macOS and then Windows via Boot Camp Assistant . After doing so , open System Information within macOS and verify that both GPUs are being detected properly ; if they are not , make sure that no cables have become disconnected during assembly ! If both appear correctly , then congratulations —you have successfully set up an external GPU on your Mac!
The Benefits of an EGPU for Mac
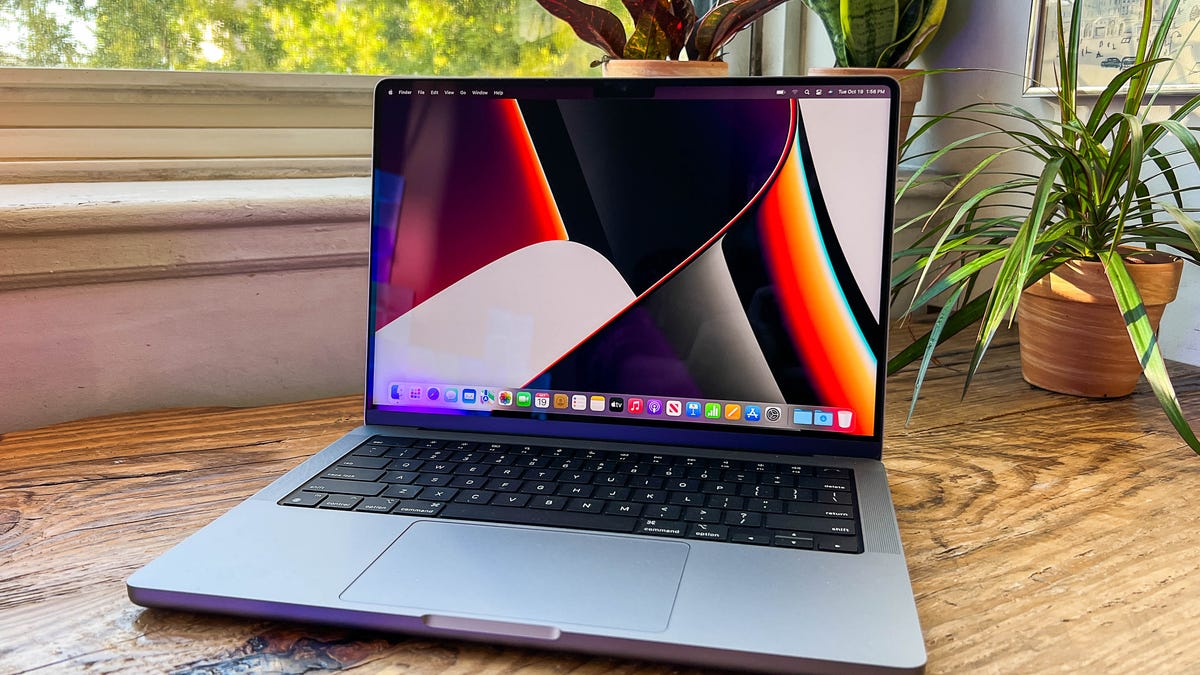
Yes, it is worth gettig an eGPU for Mac. An eGPU (external graphics processing unit) can greatly improve the performance of your Mac, especially if your system has less than 2GB of VRAM. An eGPU can be used to increase the speed of graphic-intensive tasks such as video editing, 3D modeling, and gaming. It can also be used to improve the display quality when connecting a 4K or 5K monitor. Furthermore, an eGPU may also be used to extend the life of older Macs with weak internal GPUs. If you are looking to get the most out of your Mac or want to upgrade its graphics performance, investing in an eGPU is definitely worth considering.
Forcing Mac to Use an External GPU (eGPU)
To force Mac to use an external GPU (eGPU), you first need to quit the app you want to use with the eGPU. Then, locate the app in your Applications folder and press Command-I to open its info window. In this window, select the checkbox next to Prefer External GPU. Finally, open the app and it should be using the eGPU.
Can M1 Macs Benefit from an External GPU?
No, M1 Macs cannot use eGPU. Apple does not provide support for eGPU for Macs running on Apple Silicon, and the graphical capabilities of the M1 chip are said to be superior to that of an eGPU. The M1 chip has a unified memory architecture, wich enables it to access both CPU and GPU memory in one place, giving it improved performance compared to previous generations of Macs. Additionally, the M1 chip is designed with a built-in Neural Engine and Machine Learning capability that can be used to create more powerful and efficient graphics applications.
Apple’s Use of GPUs
Apple currently uses the M1, M1 Pro, and M1 Max GPUs in their Apple Silicon processors. The M1 is an 8 core GPU with 2.6 teraflops of performance, while the M1 Pro and M1 Max are 24 core GPUs with 7.8 teraflops of performance. These GPUs are roughly equivalent to an AMD Radeon RX 560 (2.6TF) for the M1 and a Radeon RX 5700M (7.9TF) for the Pro and Max versions, respectively. In terms of Nvidia equivalents, these GPUs are roughly equivalent to a GeForce GTX 1650 (2.9TF) for the M1, and a GeForce RTX 2070 (7.4TF) for the Pro and Max versions.
Improving Mac GPU Performance
To improve your Mac GPU performance, you can use the higher-performance discrete graphics processor at all times. To do this, go to Apple menu > System Preferences, click Battery, click the Battery tab, then deselect the automatic graphics switching checkbox. On macOS Catalina 10.15 and earlier versions of macOS, this setting is located in Energy Saver preferences. Additionally, you can keep your Mac’s software up to date by regularly updating it from the App Store or System Preferences. This will ensure that you have the latest available drivers for your GPU and improve your Mac’s overall performance.
Can NVIDIA GPUs Be Installed in Mac Pro Computers?
Yes, you can put a NVIDIA GPU in a Mac Pro (2019), however it is important to note that the card must be installed into slot 1 and not slot 2. This is because the Mac Pro (2019) does not natively support NVIDIA GPUs. To use a NVIDIA GPU, you must first install an external graphics processor (eGPU) and then connect your NVIDIA card to the eGPU. Once the eGPU is set up, then you can install the NVIDIA GPU into slot 1 of your Mac Pro and use it with Boot Camp to run Windows on your Mac.
Enabling GPU Acceleration on a Mac
GPU acceleration on a Mac is enabled by accessing System Preferences -> Energy Saver -> Options tab for “Processor Performance” and selecting the Automatic, Highest, or Reduced options. This will then allow the Mac to use its GPU (Graphics Processing Unit) to accelerate tasks that can benefit from it such as graphics-intensive applications like video editing, 3D gaming, and CAD software. To get the most out of your Mac’s GPU, you may need to also adjust settings in your applications or enable specific features within them.
Can Macs Use GPU Rendering?
Yes, GPU rendering is available on Macs with an AMD graphics card. Through the new Metal API available on macOS, you can use the GPU for faster and more efficient rendering with Blender. The Metal API provides direct access to the GPU, allowing for much faster rendering times of up to twie as fast as before. In addition, Blender itself runs faster on M1 Macs due to the improved access to the graphics card.
Comparing the Apple M1 GPU to Other GPUs
The Apple M1 GPU is a powerful integrated graphics card offering 8 cores (1 deactivated core in the entry MacBook Air) designed by Apple and integrated in the Apple M1 SoC. It is faster and more energy efficient than most competing products, such as Intel’s Tiger Lake Xe GPU.
However, there are some other powerful GPUs out there that may offer similar performance to the M1 GPU. AMD’s Radeon RX 5000-series GPUs, for example, provide similar levels of performance with power efficiency comparable to the M1. Nvidia’s RTX 30-series GPUs also offer impressive performance for gaming, although they consume more power than the M1.
Ultimately, your choice of GPU will depend on your usage neds and budget. The M1 provides good value for money and excellent performance in terms of speed and power efficiency, while AMD’s Radeon RX 5000-series GPUs offer similar levels of performance but at a slightly higher cost. Nvidia’s RTX 30-series GPUs also offer great gaming experiences, but come with a significantly higher price tag.
Conclusion
In conclusion, a DIY eGPU for Mac can be a great way to boost your Mac’s graphics performance if you have an older model. The eGPU will provide extra memory and better performance, allowing you to make use of the latest software and games. However, if you have an Apple Silicon-based Mac, there is currently no way to connect an eGPU. For those with pre-M1 Macs, however, setting up a DIY eGPU can be a great solution for improving your system’s graphical capabilities.

