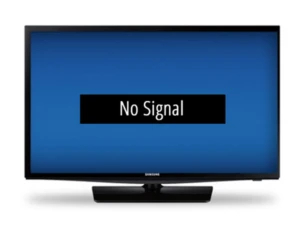
When you sit down to watch your favorite show or catch up on the latest news, the last thing you want to see is a “No Signal” message on your TV screen. It can be frustrating and inconvenient, but don’t worry – there are steps you can take to fix this issue.
One of the first things you can try is resetting your DISH receiver. To do this, simply unplug the power cord from the electrical outlet for about 10 seconds, then plug it back in. If you have a Hopper & Joey system, make sure to unplug the power cord of the Hopper, which is the main, large receiver.
After you’ve reset the receiver, give it a few minutes to complete the reset process. Sometimes, it may take up to 5 minutes for the receiver to fully reset. Once the reset is complete, you can check the signal strength on your TV.
If you have a Hopper or Wally receiver, you can find the signal strength by going to Menu, then Settings, then Diagnostics, and finally Dish. On a ViP receiver, you can find the signal strength by going to Menu, then System Setup, then Installation, and finally Point Dish.
If you’re still not getting a signal, you can try repositioning your satellite dish. Start by loosening the nuts that attach the dish and support pole together. Then, with the help of someone watching the TV, reorient the dish to find the best angle for a good signal. It may take a few tries to find the optimal position, so don’t get discouraged.
Once you’ve made any necessary adjustments to the dish, you can try tuning to channel 60 on your TV using the TV manufacturer’s remote or the channel buttons on the TV itself. If a DISH picture does not appear, you can try channel 73. If your previous TV was usually set to a different channel, try that channel number as well.
By following these steps, you should be able to fix the “No Signal” issue on your DISH TV. Remember to be patient and try different troubleshooting methods if needed. If you’re still experiencing problems, it may be helpful to contact DISH customer support for further assistance.
So don’t let a “No Signal” message ruin your TV-watching experience. Take action and get back to enjoying your favorite shows in no time.

How Do You Fix a DISH TV When It Says No Signal?
To fix a DISH TV when it says “no signal,” you can follow these steps:
1. Check the connections: Ensure that all cables are securely connected to the back of the DISH receiver and the TV. Make sure the cables are not damaged or loose.
2. Reset the receiver: Unplug the power cord of the DISH receiver (look for the one with a red tag) from the electrical outlet. Leave it disconnected for 10 seconds, and then plug it back in. If you have a Hopper & Joey system, unplug the power cord of the Hopper (the main, large receiver). The reset process may take up to 5 minutes to complete.
3. Check the satellite dish: Ensure that the satellite dish is properly aligned and free from any obstructions, such as trees or buildings. If you notice any physical damage to the dish, contact your service provider for assistance.
4. Check for weather conditions: Severe weather conditions, such as heavy rain or snowstorms, can interfere with the satellite signal. If the weather is bad, you may need to wait until it improves for the signal to be restored.
5. Run a signal strength test: Access the “System Info” or “System Status” menu on your DISH receiver. This option will provide you with information about the signal strength and quality. If the signal is weak, adjust the satellite dish or contact your service provider for assistance.
6. Contact your service provider: If the above steps do not resolve the issue, or if you suspect there is an issue with your account or equipment, contact your DISH service provider for further troubleshooting and assistance.
Remember, these steps are general troubleshooting guidelines, and it’s always best to consult your service provider for specific instructions or if you need further assistance.
How Do You Check Your DISH TV Signal?
To check your DISH TV signal, follow these steps:
1. On a Hopper or Wally receiver, press the Menu button on your remote control.
2. Use the arrow buttons to navigate to the Settings option, then press Select.
3. In the Settings menu, select Diagnostics.
4. Choose the Dish option from the Diagnostics menu.
5. On a ViP receiver, press the Menu button on your remote control.
6. Navigate to System Setup using the arrow buttons, then press Select.
7. Select Installation from the System Setup menu.
8. Choose Point Dish from the Installation menu.
Once you have reached the Signal Strength screen, you will be able to view the signal strength and quality indicators. The signal strength is represented by a bar or a percentage, and the higher the number, the stronger the signal. The signal quality indicates how clear the signal is, and it is also represented by a bar or a percentage. A higher signal quality is desirable for optimal viewing experience.
It’s important to note that the signal strength and quality can vary depending on various factors such as weather conditions, obstructions, or dish alignment. If you are experiencing issues with your DISH TV signal, you may want to consider checking these factors or contacting your service provider for assistance.
What Input Should TV Be on for Dish Network?
To watch Dish Network on your TV, you need to ensure that your TV is set to the correct input or channel. The specific input or channel may vary depending on your TV model and setup, but here are some general guidelines to follow:
1. Using the TV remote or the channel buttons on the TV itself, start by tuning to channel 60. This is the most common channel for Dish Network. If a Dish picture appears on your screen, you’re good to go!
2. In some cases, if channel 60 doesn’t work, you can try channel 73. This alternate channel is sometimes used by Dish Network.
3. If neither channel 60 nor 73 work, it’s possible that your previous TV was typically set to a different channel for Dish Network. Try the channel number that you usually used with your previous TV. This can vary from person to person, so there is no specific channel number to mention here.
The input or channel your TV should be on for Dish Network can be channel 60, channel 73, or a channel number that you previously used. It’s important to consult your TV’s user manual or contact the TV manufacturer if you are unsure about the specific input or channel for Dish Network on your TV model.
How Do You Fix Your Satellite Dish?
To fix your satellite dish, follow these steps:
1. Start by loosening the nuts that attach the dish and support pole together. Use a wrench or pliers to loosen them enough to allow movement.
2. Next, reorient the dish to improve the signal. The easiest way to do this is to ask someone to watch the TV while you adjust the dish. They can provide feedback on the signal strength as you make adjustments.
3. Begin by moving the dish in small increments horizontally and vertically. Start by moving it left or right, and then up or down. Keep checking the TV for any signal improvement.
4. If you notice some improvement in signal strength, continue fine-tuning the dish’s position until you achieve the best possible signal.
5. If you don’t see any improvement, try rotating the dish slightly in both directions. This can help find a better angle for signal reception.
6. If possible, consult the manual or contact the satellite service provider for the recommended positioning of the dish. This can give you a starting point to work from.
7. Keep in mind that obstacles such as trees or buildings can affect the signal. Try to find a clear line of sight between the dish and the satellite.
8. Once you have adjusted the dish and achieved a good signal, tighten the nuts securely to hold the dish in place.
9. Check the TV again to ensure the signal remains strong and stable.
10. If you continue to experience issues with the signal, it may be necessary to consult a professional technician who specializes in satellite dish installation and repair.
Remember, it’s important to exercise caution when working with a satellite dish, especially if it is installed on a rooftop or at a height. Ensure your safety by taking necessary precautions and seeking professional help when needed.
Conclusion
If you are experiencing a “no signal” issue with your DISH receiver, there are a few steps you can take to troubleshoot and fix the problem. First, try resetting your receiver by unplugging the power cord from the electrical outlet for 10 seconds and then plugging it back in. This can often resolve minor technical glitches.
If you have a Hopper & Joey system, make sure to unplug the power cord of the Hopper, which is the main receiver. Allow the reset process to complete, which may take up to 5 minutes.
To check your signal strength, navigate to the appropriate settings on your receiver. On a Hopper or Wally receiver, go to Menu > Settings > Diagnostics > Dish. On a ViP receiver, go to Menu > System Setup > Installation > Point Dish. This will provide information on the quality of your satellite signal.
If the signal strength is low, it may be necessary to adjust the position of your dish. Start by loosening the nuts that attach the dish and support pole together. Then, with the help of someone watching the TV, reorient the dish to find the best angle for a good signal. This can often be done by slowly moving the dish until a clear picture is obtained.
Additionally, it is worth trying different channels to see if the signal improves. Tune your TV to channel 60 first, and if a DISH picture does not appear, try channel 73. If your previous TV was typically set to a different channel, try that channel number as well.
By following these steps and troubleshooting methods, you should be able to resolve the “no signal” issue and regain a strong satellite connection for your DISH receiver.


