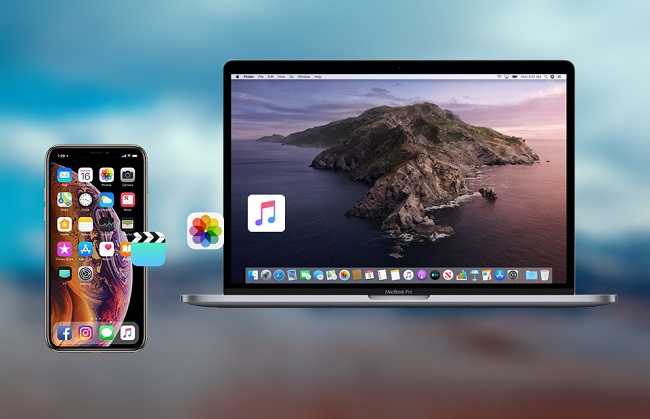
Are you looking for an easy way to transfer files from your Macbook to your iPhone? If so, AirDrop is the answer. AirDrop is a feature that allows you to wirelessly send documents, photos, videos, websites, map locations, and more to a nearby Apple device like your iPhone. It is a simple and convenient way to share files between devices witout having to use iTunes or other software.
To use AirDrop on your Macbook and iPhone:
1. Make sure that both devices have AirDrop turned on. On the Macbook, click the Finder icon in the dock and then select “AirDrop” from the sidebar. On the iPhone, open Control Center by swiping up from the bottom of the screen and then tapping on “AirDrop”.
2. Select which device you wuld like to send files to by tapping on its icon in the list of available devices.
3. Select which files you would like to transfer by clicking on each one individually or by selecting multiple items at once if desired (you can do this by clicking and dragging).
4. Click “Send” when you are ready to transfer the selected files over AirDrop.
Once you have sent your files over AirDrop they will appear in their respective apps on the receiving device (i.e., Photos for photos, Notes for notes etc.). You can also view transferred files directly in AirDrop if desired – just tap on them in the list of received items aftr they have been transferred over successfully.
Transferring files between your Macbook and iPhone with AirDrop is quick and easy – no cables or external software required! So if you ever need a fast way to share documents or media between devices then don’t forget about this handy feature!
Transferring Files From Mac to iPhone Without iCloud
You can transfer files from your Mac to your iPhone without iCloud by using AirDrop. To use AirDrop, press and hold the Control button and click on the file you want to transfer. Then choose Share and then AirDrop from the pop-up menu. This will show you a list of devices you can AirDrop the file to. Select your iPhone from the list of devices, and the file will be transferred wirelessly to your iPhone. If both devices are logged into the same iCloud account, you can also use iCloud Drive to store and transfer documents between them.
Copying a File from a Laptop to an iPhone
To copy a file from your laptop to your iPhone, you will need to use iTunes. First, connect your iPhone to your laptop usig a USB cable. Once connected, open iTunes and select your device in the ‘Devices’ section. Next, navigate to the ‘Files’ tab on the left side of the window and select ‘Documents’. You can now drag and drop files from a folder or window onto the Documents list to copy them to your device. Alternatively, you can click ‘Add’ in the Documents list in iTunes, find the file or files you want to copy from your computer, and then click ‘Add’. iTunes will then copy these files to the app on your device.
Transferring Files from Computer to iPhone Without iTunes
Transferring files from your computer to your iPhone can be done without using iTunes. Here are five methods you can use to accomplish this:
1. AirDroid Personal: AirDroid Personal is a free app that allows you to transfer files from your computer to your iPhone wirelessly over a Wi-Fi connection. It supports all major file types, including music, photos, videos, documents, and more. All you need is the AirDroid Personal app installed on your iPhone and the AirDroid web client open on the same network as your computer.
2. iCloud: iCloud is Apple’s cloud storage service and is built into every iPhone. You can transfer files directly from your computer to iCloud and then access them on any device with an Internet connection. All you need to do is enable iCloud Drive in Settings > [Your Name] > iCloud > iCloud Drive and then drag and drop files into the folder of your choice in Finder (on Mac) or File Explorer (on Windows).
3. Email: You can also use email to transfer files from your computer to your iPhone. Simply attach the file(s) you want to send in an email message and send it to yourself or another recipient who has an iOS device (iPhone or iPad). Once the recipient has opened the message on their device, they will be able to save the attachments directly onto their device for easy access later.
4. Dropbox: Dropbox is a cloud storage service that alows you to store and transfer files between devices with an internet connection. You can upload any type of file from your computer into Dropbox and then access it on any other device with the Dropbox app installed, including iPhones and iPads.
5. Google Drive: Google Drive is another cloud storage service similar to Dropbox, but it’s integrated into Google’s suite of services like Gmail and YouTube. You can upload files from your computer directly into Google Drive with just a few clicks and then access them on any other device with a compatible internet connection, including iPhones or iPads running iOS 11 or later versions.
These are just some of the ways you can transfer files from your computer to your iPhone without using iTunes – thee are many other services available too!

AirDropping From Mac to iPhone
Yes, you can AirDrop from Mac to iPhone. AirDrop is a feature available on Mac and iOS devices that allows users to quickly and easily wirelessly send documents, photos, videos, websites, map locations, and more to a nearby Mac, iPhone, iPad, or iPod touch. To AirDrop from Mac to iPhone, both devices must have AirDrop turned on and be within 30 feet of each other. On the Mac computer, open Finder and click “AirDrop” in the sidebar. On the iPhone or iPad open Control Center by swiping down from the top-right corner of the screen for iPhone X and newer models or swiping up from the bottom of any screen for older models. Tap AirDrop and select whether you want to be discoverable by anyone or only people in your contacts list. Then press and hold an item on your Mac computer (such as a file) util you see an option to share it with your nearby device. Select your iPhone from the list of available devices and click Send. The item will then transfer over to your iPhone or iPad device.
Transferring Files Wirelessly From Computer to iPhone
Transferring files from your computer to your iPhone wirelessly is a simple process. You can do it using email, messages, or AirDrop.
To transfer files uing email, simply attach the file you want to transfer to an email and send it to yourself. Then open the email on your iPhone and download the attachment.
If you have both devices connected to iMessage, you can also use messages to transfer files. Simply select the file you want to transfer on your computer and click ‘Share’. Choose ‘Send with Messages’ from the sharing options and select your iPhone from the list of avalable devices. The file will be sent directly to your iPhone where you can then view or download it.
Finally, AirDrop allows you to quickly and easily transfer files between Apple devices without needing an internet connection or an email address. To use AirDrop, make sure both devices have Bluetooth enabled and are in close proximity of each other. On your computer, select the file you want to send, click ‘Share’ and choose ‘AirDrop’ from the sharing options. Your iPhone should now appear in a list of available devices – select it and your file will be transferred wirelessly in a few seconds!
Transferring Files Using AirDrop
To transfer files using AirDrop, you’ll need an Apple device that supports AirDrop. On a Mac computer, open the document you want to transfer and then select Share > Send a Copy from the Share menu at the top of the screen. Alternatively, you can Control-click a document file on your computer and then choose Share > AirDrop.
On an iPhone or iPad, open the document you want to transfer and tap the Share icon. Then tap AirDrop and select the device you want to send it to. The recipient will receive a notification askig if they’d like to accept the file; once they accept, the file will be sent securely over AirDrop.
Transferring Files From Laptop to Phone
1. Connect your phone and laptop with a USB cable.
2. On your phone, tap the “Charging this device via USB” notification.
3. Under “Use USB for,” select File Transfer.
4. On your laptop, an AutoPlay window may appear, select Open folder/view files or similar option to open the File Explorer window.
5. You shold now see your phone’s storage folders in the explorer window on your laptop.
6. Copy and paste or drag-and-drop the files you wish to transfer from your laptop to your phone’s storage folders.
7. Once the files have been transferred, unplug the USB cable and disconnect your phone from your computer.
Transferring PDF Files from Laptop to iPhone
Transferring a PDF from your laptop to your iPhone is easy! First, make sure that you have the latest version of iTunes installed on both your laptop and iPhone. Then, connect your iPhone to your laptop with a USB cable. Once connected, open iTunes and select the iPhone icon at the top of the page. Next, click “Books” located on the left side of the page and check “Sync Books”. From here, you can choose to sync “All books” or “Selected books” from your laptop to your iPhone. If you only want to add one particular PDF file, then select “Selected books” and manually drag and drop the PDF file into iTunes. Finally, click the “Sync” button at the bottom right corner of iTunes and wait for it to finish transferring beore disconnecting your phone from your laptop. That’s it! You can now find the PDF in iBooks or in its designated folder on your iPhone.
Transferring Files from Computer to iPhone 8
To transfer files from your computer to your iPhone 8, you first need to make sure you have the latest version of iTunes installed on your computer. Once you have done that, connect your iPhone 8 to your computer with the charging cable. Your phone should then show up in iTunes.
In iTunes, click on the device icon in the top left corner, and select File Sharing from the sidebar menu. This will bring up a list of apps that can share files between your iPhone and computer. Select an app from this list and then click “Add” in the bottom right corner. This will bring up a window that allows you to choose which files or folders to transfer from your computer to your iPhone 8. Click “Open” once you have chosen the files or folders you want to transfer and they will be sent over to your iPhone.
If the app you are using does not support file sharing, then you can also transfer files using AirDrop or iCloud Drive. To use AirDrop, open a Finder window on your Mac and select AirDrop from the sidebar menu. You should then see an option for sending files over AirDrop – just drag and drop any files you want to send into this window and they will be sent directly to your iPhone 8. To use iCloud Drive, open System Preferences on your Mac, select iCloud, and then enable iCloud Drive if it is not aleady enabled. You can then find any files stored in iCloud Drive by opening a Finder window and selecting “iCloud Drive” from the sidebar menu. Drag any files or folders you want to transfer into this window and they will be sent over to your iPhone 8 automatically.
Turning On AirDrop on a Mac
To turn on AirDrop on your Mac, click the Control Center in the menu bar. Then, click the AirDrop icon and it will be turned on. You can also choose who can send items to you by clicking the arrow next to AirDrop and selecting either Contacts Only or Everyone.
Transferring Photos Wirelessly from Laptop to iPhone
In order to transfer photos from your laptop to your iPhone wirelessly, you’ll need to use AirDrop. First, make sure both your laptop and your iPhone are connected to the same Wi-Fi network. On your laptop, locate the photos you want to transfer and click the Share button. Select AirDrop from the list of sharing options. On your iPhone, open Control Center by swiping up from the bottom of the screen. Tap on AirDrop and select eiter “Contacts Only” or “Everyone” depending on who you want to send photos to. When you see your laptop’s name in the list of devices, select it and then tap Accept when prompted. The photos will be transferred wirelessly over Wi-Fi!
Transferring Photos from Laptop to iPhone Using USB
To transfer photos from your laptop to your iPhone usig a USB cable, first you’ll need to start iTunes and connect your iPhone to your laptop. Once the connection is established, click on the iPhone icon in iTunes and choose “Photos” in the drop-down menu. From there, click on “Sync photos from” and select the folder containing the photos you want to transfer. When you’ve made your selection, click on “Apply” at the bottom of the window and wait for the transfer to finish. Once it’s done, you can disconnect your iPhone from your laptop and access the photos through its Photos app.
The Inability to AirDrop from Mac to iPhone
There are a few possible reasons why you may not be able to AirDrop from Mac to iPhone. First, make sure that both devices have Bluetooth and Wi-Fi enabled and that they are within a reasonable distance of each other. Additionally, ensure that AirDrop is set to receive from either Everyone or your Contacts on both the Mac and iPhone. Finally, try restarting both devices to reset their networking connections. If these steps don’t resolve the issue, you may need to update the software on each device to ensure compatibility with AirDrop.
Transferring Files from Mac to iPhone Using AirDrop
AirDrop is a great way to quickly and securely share files betwen Mac and iPhone devices. When AirDrop is enabled, files you’ve received through AirDrop will automatically go to the app associated with their file type on your iPhone and to the Downloads folder on your Mac. To enable AirDrop, make sure both your iPhone and Mac are connected to the same Wi-Fi network and open the Control Center on your iPhone by swiping up from the bottom of your screen. Tap AirDrop and select Everyone or Contacts Only, depending on who you want to be able to send you files. On a Mac, open Finder, then click AirDrop in the sidebar. Make sure that Allow me to be discovered by is set to Everyone or Contacts Only.
Can You AirDrop From Mac To iPhone Without Wi-Fi?
Yes, you can AirDrop from Mac to iPhone without Wi-Fi. AirDrop uses Bluetooth to find devices that you can send files to, and then creates a secure peer-to-peer Wi-Fi network connection betwen the sending and receiving devices. This connection does not require access to the Internet or a local Wi-Fi network; you don’t need to be on any Wi-Fi network to use AirDrop.
Conclusion
In conclusion, transferring files from one device to another does not have to be complicated and time-consuming. AirDrop is an easy and secure way of transferring files from a Mac, iPhone, iPad, or iPod touch to any oter device. It allows you to quickly and securely send documents, photos, videos, websites, map locations and much more between devices. iCloud and email are also great options for transferring files as they are both secure and reliable. And if you need more space or need to access your files from multiple devices then Dropbox or Google Drive might be the right choice for you. Ultimately, the best way to transfer files depends on what type of files you are transferring and how often you will use them.


