If you’re experiencing a “No Signal” error on your TV while using a cable box, it could be due to a loss of signal. To troubleshoot this issue, you should check all of the connections between the cable box and the TV. Here’s a step-by-step guide on how to do it:
1. Check the ports: Ensure that all the ports on the cable box and TV are clean and free from any dust or dirt. You can use a dry microfiber cloth or an earbud to clean the ports.
2. Check the cables: If your cable box uses HDMI, ensure that both connectors are not damaged or bent. If your TV is not an HDTV, you will need standard A/V cables (red, yellow, and white cables) to connect the box to your TV. The cable box usually comes with A/V cables. You can purchase an HDMI cable online or in a tech store for under $15.
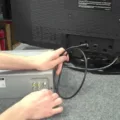
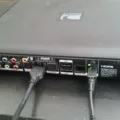
3. Connect the cable box to the TV: Plug one end of the HDMI cable into the back of your TV and the other end into the receiver where it says “Out-to-TV.” Alternatively, plug the A/V cables into the corresponding ports on the TV and cable box. Then, plug the receiver into the power adapter and a wall socket. Make sure the green power light is on.
4. Change the input: Turn on your TV and change the input to the HDMI port you chose. If using A/V cables, select the corresponding input on your TV.
5. Troubleshoot: If you’re still experiencing issues, try unplugging the cable box and TV for a few minutes and then plugging them back in. You can also try resetting the cable box by unplugging it and holding down the power button for 30 seconds before plugging it back in.
Troubleshooting a “No Signal” error on your TV while using a cable box can be done by checking all the connections between the cable box and the TV. Following the above steps should help you resolve the issue.

Troubleshooting Issues Connecting TV to Cable Box
There could be several reasons why your TV is not connecting to your cable box. One of the most common reasons is a loss of signal. To fix this issue, check all the connections between your cable box and TV. Ensure that the ports are clean and free of any dust or dirt. You can use a dry microfiber cloth or an earbud to clean the ports. If your cable box uses HDMI, check the ends of both connectors to ensure they are not bent or damaged. Another reason for the issue could be a faulty cable box or TV. Make sure both devices are turned on and functioning properly. In some cases, resetting your cable box or TV may also help resolve the issue. Check your device’s manual for instructions on how to do this. If the problem persists, you may need to contact your cable provider or a professional technician for further assistance.
Connecting a Comcast Cable Box to a Smart TV
To connect your Comcast cable box to your smart TV, you can follow these steps:
1. Make sure your TV and cable box are turned off.
2. Locate the HDMI port on your cable box and your TV. If your TV is not an HDTV, you will need to locate the A/V ports.
3. Insert one end of the HDMI cable into the HDMI port on the cable box and the other end into the HDMI port on the TV. If you are using A/V cables, insert the red, yellow, and white cables into the corresponding ports on the TV and cable box.
4. Turn on your TV and cable box.
5. Use your TV remote to change the input to the HDMI port that you connected the cable box to. If you are using A/V cables, you will need to change the input to the A/V input.
6. Follow the on-screen instructions to activate your cable box.
7. Enjoy watching your favorite shows!
Note: If you encounter any issues with the connection, double-check that the cables are securely inserted and that the TV input is set correctly. If you continue to have issues, consult the user manual for your specific TV and cable box or contact the manufacturer’s customer support.
Connecting a Cable Box to a TV Using HDMI
You can connect a cable box to a TV with HDMI. To do this, you will need an HDMI cable and an available HDMI port on both the cable box and the TV. Here are the steps to connect the cable box to the TV using HDMI:
1. Plug one end of the HDMI cable into the HDMI port on the cable box.
2. Plug the other end of the HDMI cable into the HDMI port on the TV.
3. Turn on the TV and cable box.
4. Change the input on the TV to the HDMI port where the cable box is connected.
5. You should now see the cable box output on your TV screen.
It’s important to note that some cable boxes may have multiple HDMI ports, so make sure to connect the HDMI cable to the correct port. Additionally, if your TV doesn’t have an HDMI port, you won’t be able to connect the cable box using HDMI. In that case, you may need to use a different type of cable, such as component or composite.
Conclusion
A cable box is an essential device that allows you to access a wide range of TV channels and programming. However, it can be frustrating when you encounter a “No signal” error on your TV. The good news is that this problem can often be resolved by checking your cable connections and ensuring that all cables are properly plugged in and free from dust or dirt. If you’re using an HDMI cable, make sure that both connectors are not damaged or bent. Additionally, you can use A/V cables to connect your cable box to your TV if you don’t have an HDTV. By following these simple steps, you can troubleshoot your cable box and enjoy your favorite TV shows and movies without any interruptions.

