Are you looking to connect a Logitech mouse to your Mac? If so, you’re in the right place. In this blog post, we’ll cover the basics of connecting a Logitech mouse to your Mac and provide step-by-step instructions on how to do so.
First, let’s start with some background information. Logitech is a well-known brand in the world of computer mice. They offer a wide range of products including wireless and wired mice for both Windows and Mac computers. The company also provides software that can be used to customize your mouse settings and even assign it special functions.
To connect your Logitech mouse to your Mac, you’ll need to make sure you have the necesary hardware components:
• A Logitech mouse
• A USB receiver (for wireless mice)
• A Bluetooth adapter (for Bluetooth mice)
• A free USB port on your Mac
Once you have all these components, follow these steps:
1. Connect the USB receiver or Bluetooth adapter into an available USB port on your computer.
2. Turn on the Logitech mouse by pressing the power button located at the bottom of the device.
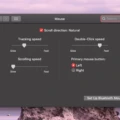
3. Your Mac will detect the mouse and list it uder “Devices” in System Preferences > Bluetooth or System Preferences > Mouse & Trackpad (depending on which type of connection you’re using). Select “Pair” from this window to establish a connection between your computer and mouse.
4. If you chose Bluetooth as your connection type, enter the pairing code displayed on your monitor when prompted by your Mac during setup.
5. Once connected, click “Done” in System Preferences > Mouse & Trackpad or System Preferences > Bluetooth (depending on which type of connection you used). Your Logitech mouse is now ready for use!
With this guide, connecting a Logitech mouse to your Mac should be a breeze! Now that you know how easy it is to set up this device on your computer, why not explore all that it has to offer? With its customizable buttons, convenient scrolling wheel, and ergonomic design – it’s perfect for getting through those long work days without any hassle!
Troubleshooting Logitech Bluetooth Mouse Connection Issues on Mac
There are a few possible reasons why your Logitech Bluetooth mouse is not connecting to your Mac. First, make sure that your Mac has Bluetooth enabled and is within range of the mouse. Then, try restarting both the mouse and your Mac to reset the connection. If that doesn’t work, you can try removing and re-pairing the mouse with your Mac. Finally, if none of these solutions work, it’s possible that there may be a hardware issue with either the mouse or your Mac. In this case, you should contact Logitech or Apple Support for further help.
Source: logitech.com
Using a Logitech Mouse with a Mac
Yes, you can use a Logitech mouse with a Mac. Logitech offers two versions of their ergonomic Lift mouse – a universal model that works with all operating systems (Windows, Mac, and Linux) and comes in several colors, and the Lift For Mac model whih is specifically designed for Mac users. Both models are compatible with Macs and offer great performance.
Pairing Logitech Mouse with a Device
To put your Logitech mouse into pairing mode, press and hold the Easy-Switch™ button (on the bottom of the mouse) for 3 seconds. The light on the mouse will start blinking when it is in pairing mode and ready to be connected to your computer.
Troubleshooting Logitech Mouse Issues on Mac
If your Logitech mouse is not beng detected on your Mac, there are several troubleshooting steps you can try to get it working again. First, check the batteries in the mouse and replace them if needed. If you have a wireless mouse, make sure the connection is secure and that it hasn’t moved too far away from the receiver. Next, try toggling the power off and on again, as well as rebooting your Bluetooth connection. If you’re still having issues, you may need to update your macOS software or check if your mouse is compatible with your computer. Additionally, try using a different surface or improving your connection if possible. If none of these steps work, contact Logitech support for further assistance.
Troubleshooting Logitech Mouse Detection Issues
There could be a few reasons why your Logitech mouse is not beng detected. First, make sure the dongle is properly inserted into your PC’s USB port. If that doesn’t help, try resetting the mouse by removing the battery and waiting for a few moments before replacing it and then switching on the mouse before reinserting the dongle. If that still doesn’t work, it’s possible that there could be an issue with the drivers or settings of your computer. You can try updating your drivers or checking to see if there are any settings that need to be adjusted in order to get your mouse working again.
Connecting a Wireless Mouse to a Mac
To get your Mac to recognize your wireless mouse, you’ll need to make sure the mouse’s batteries are charged and inserted properly, and that the device is turned on and discoverable. Then, open System Preferences on your Mac by selecting Apple menu > System Preferences. Click Bluetooth in the sidebar, then hover your pointer over the mouse in the list and click Connect. If eerything is setup correctly, you should be all set to use your wireless mouse with your Mac!
Troubleshooting Mouse Connection Issues on Mac
It is possible that there may be a few different reasons why your mouse won’t connect to your Mac. First, make sure that the mouse is compatible with your Mac and that the latest version of macOS is installed. Second, check to see if the Bluetooth on your Mac is enabled and that it can be seen by other Bluetooth devices. Third, make sure the batteries in the mouse are fresh and that you’ve folowed all of the manufacturer’s instructions for pairing the device. Finally, try restarting both your Mac and mouse to see if this solves the issue.
Connecting a Non-Apple Mouse to a Mac
Connecting a non-Apple mouse to your Mac is very straightforward. First, make sure the mouse is powered on. If it’s connected via USB, simply plug it into one of the available ports on your Mac. If it’s a Bluetooth mouse, you’ll need to first navigate to System Preferences > Bluetooth in order to pair it with your Mac. Once you’ve switched the mouse on and enabled discovery mode (if necessary), wait untl it’s detected by your Mac, then click Pair. That’s all there is to it!
Location of the Connect Button on a Logitech Mouse
The Connect button on a Logitech mouse is usually located on the bottom of the mouse near the battery compartment. Depending on the model, you miht need to use a paperclip or thin object to press it. When pressed, the mouse will connect to its wireless receiver. If your Logitech mouse does not have a Connect button, then it may use a wireless dongle instead.
Locating the Mouse Pairing Button
Your mouse pairing button should be located at the bottom of the mouse. It is usually a small, round button that may be difficult to locate. Once you have found it, press and hold it untl the LED light starts to flash (about 5 seconds).
Connecting a Logitech Bluetooth Mouse Without USB
To connect your Logitech Bluetooth mouse without USB, you will need to first ensure that your computer is Bluetooth enabled. Following that, press and hold the Connect button on the bottom of the mouse. Then, on your computer, open the Bluetooth software. Click the Devices tab, and then click Add. Follow the instructions that appear on the screen to complete the pairing process. Once it is successfully paired with your computer, you should be able to use it as your primary mouse.
Troubleshooting Mouse Non-Discoverability
The mouse may not be discoverable if it is not properly paired with your PC. To pair the mouse, press and hold the pairing button on the bottom of the mouse for 5-7 seconds, then let the button go. The light will blink to show that the mouse is discoverable. If that doesn’t work, try restarting your PC or checking to make sure there are no other Bluetooth devices in close proximity that might be interfering with the connection.
Troubleshooting Issues with Wireless Mouse Detection
It is possible that your wireless mouse may not be detected due to a few different factors. Firstly, the batteries in the mouse may be low in power, so try replacing them with fresh ones. Secondly, make sure that the receiver is plugged into a working port. Lastly, it could be possible that there is interference from other nearby wireless devices so try turning off any other wireless devices in the area and try resynchronizing your mouse with the receiver.
Getting Logitech to Work on Mac
To get Logitech to work on your Mac, you’ll first need to go to the Bluetooth preferences. Once you’re there, make sure that your Logitech keyboard is in pairing mode (where it flashes continuously for a couple of minutes). After that, look for your keyboard’s name in the list of Bluetooth devices and click connect. You may be asked to enter a specific number or code- just follow the instructions and you should be connected shortly!
Conclusion
In conclusion, Logitech’s ergonomic Lift mouse is a great choice for Mac users, offering both style and functionality. With its universal model available in a variety of different colors and its specially designed Lift for Mac model, Mac users can pick the mouse that best fits their needs. It also has a wide range of features, including an Easy-Switch button for quick pairing with a computer, adjustable tilt legs for added comfort, and long battery life. With all these features and more, Logitech’s Lift mouse is sure to meet the needs of any Mac user.

