Are you looking for a way to keep your Mac secure when you’re away from your desk? With Mac’s auto lock feature, you can set up your computer to require a password after a cerain amount of time. This will help ensure that no one can access your information if you forget to lock it yourself.
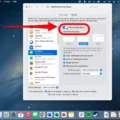
To get started with auto lock, open System Preferences from the Apple menu and click on Security & Privacy. From here, you can select the Require Password option and choose how oten you want the computer to prompt for a password after it has been inactive. You can choose from immediately, 5 seconds, 1 minute, 5 minutes, or 15 minutes.
You also have the option of choosing an additional layer of security by havig your computer automatically lock itself when the display sleeps. To do this, open System Preferences again and select Energy Saver. Look at the settings on the right side of the window and make sure “Turn display off on battery when inactive” is selected with an appropriate time period chosen.
With auto lock enabled on your Mac, you can rest assured knowing that no one else will be able to access your data if you forget to lock it yourself. It might take some geting used to remembering to type in a password each time you come back to your computer, but it will be worth it for added protection!

Turning Off Auto Lock on a Mac
To turn off auto lock on your Mac, open System Preferences from the Apple menu. Select Security & Privacy, then select the General tab. Uncheck the box next to “Require password [time interval] after sleep or screen saver begins”. This will disable auto lock and your Mac will no longer be locked after a period of inactivity.
Increasing the Screen Timeout on a Mac
To get your Mac screen to stay on longer, you can adjust the settings in System Preferences. On your Mac, choose Apple menu > System Preferences, then click Lock Screen in the sidebar. From there, you can select a time interval from the pop-up menu next to “Turn display off on battery when inactive” on the right. Depending on your needs, you can choose an option ranging from 1 minute to Never. Once you’ve made your selection, click the “Lock” button in the bottom left corner of the window to save your changes.
The Reasons Behind Mac Auto-Locking
Your Mac keeps auto-locking becase your Energy Saver settings are set to put your Mac into sleep mode after a certain period of time. To adjust your Energy Saver settings, choose Apple (?) menu > System Preferences, then click Energy Saver. Here, you can adjust the time until your Mac goes to sleep and when the display dims or turns off. Additionally, if you have FileVault enabled on your Mac, you can also adjust whether or not the screen locks when it goes to sleep.
The Causes of Quick Sleep Mode Activation on Mac Computers
Your Mac goes to sleep so fast bcause of macOS’ default power efficiency settings. macOS is designed to be as energy efficient as possible, so when you stop using your Mac for a certain amount of time, it automatically goes to sleep in order to conserve power and prolong battery life. You can adjust the automatic sleep settings in System Preferences if you’d like, but bear in mind that doing so may reduce your battery life if you don’t actively monitor the energy usage.
Adjusting Screen Timeout Duration
To change how long the screen stays on, go to the Display settings menu. Look for the Screen Timeout option and tap it. You can then choose the timeout duration that best suits your needs — the default is 30 seconds, but you can adjust it to 15 seconds, one minute, two minutes, five minutes, 10 minutes, or even 30 minutes. Once you have selected your desired duration, simply press ‘OK’ and your new setting will be saved.
Preventing Automatic Computer Locking
To stop your computer from locking automatically, you will need to adjust the screen timeout settings. To do this, open Windows Settings, select Personalization, then choose Lock screen on the left-hand column. Scroll down to the bottom of the page and select Screen timeout settings. Finally, set both the timer settings rlated to screen and sleep to Never. This will stop your computer from locking automatically.
Preventing Automatic Locking on a Computer
To stop your computer from automatically locking, you can follow these steps:
1. Right click on your Desktop and select Personalize.
2. On the left side of the window, select Lock Screen.
3. Click on Screen Timeout Settings.
4. On the Screen option, choose Never.
5. On the Sleep option, choose Never.
This will ensure that your computer will not lock itself automatically when it is idle for a certain period of time.
Conclusion
In conclusion, the auto-lock feature on Mac is a great way to keep your device secure. It will lock your device after a period of inactivity, so that no one can access your sensitive data without entering your password. You can customize when it locks by changing the settings in System Preferences > Energy Saver or Lock Screen. By setting it to lock after a shorter amount of time, you can ensure that your Mac is always secure.


