Windows 10 is a popular operating system that offers a range of features and customization options. One such option is the ability to create desktop shortcuts for all users. This can be particularly useful in business or educational settings where multiple users share a computer.
To create a desktop shortcut for all users, you can utilize Group Policy Objects (GPO). GPOs are a set of rules that are applied to a group of computers or users within a network. They allow administrators to manage various settings and configurations centrally.
To get started, you will need to login as the Administrator (Local Admin) on the Windows 10 computer. Once logged in, follow these steps:
1. Open the Group Policy Management Console by pressing the Windows key + R on your keyboard to open the Run command. Then, type “gpmc.msc” and hit Enter.
2. In the Group Policy Management Console, create a new GPO by right-clicking on your domain and selecting “Create a GPO in this domain, and Link it here.” Give the GPO a descriptive name.
3. Edit the GPO settings by right-clicking on the newly created GPO and selecting “Edit.”
4. In the Group Policy Management Editor, browse to the following settings: User Configuration > Preferences > Windows Settings and Shortcuts.
5. Under the Shortcuts section, right-click and select “New > Shortcut.” This will open the New Shortcut Properties dialog box.
6. In the New Shortcut Properties dialog box, specify the target location for the shortcut. This can be a file, folder, or program that you want to create a shortcut for.
7. Customize the shortcut properties such as the name, icon, and other options according to your preferences.
8. Once you have configured the shortcut properties, click “OK” to save the changes.
9. Close the Group Policy Management Editor and exit the Group Policy Management Console.
10. Reboot the Windows 10 computer or run the “gpupdate” command in the Command Prompt to apply the changes.
After following these steps, the desktop shortcut you created will be available to all users on the Windows 10 computer. This can be a convenient way to provide quick access to commonly used files, folders, or programs for all users.
It’s important to note that GPOs can have a range of other settings and configurations, so it’s recommended to consult the Windows documentation or seek assistance from an IT professional if you are not familiar with using GPOs.
Creating desktop shortcuts for all users on Windows 10 can be easily accomplished using Group Policy Objects. This allows administrators to centrally manage shortcuts and provide quick access to important files, folders, or programs for all users on a computer.
How Do You Access All Users Desktop in Windows 10?
To access the “Public Desktop” folder in Windows 10, you need to follow these steps:
1. Login to your Windows 10 computer as the Administrator or a user with administrative privileges.
2. Open the Control Panel. You can do this by clicking on the Start menu and searching for “Control Panel” or by right-clicking on the Start button and selecting “Control Panel” from the menu.
3. In the Control Panel, locate and click on the “File Explorer Options” or “Folder Options” icon. This will open the Folder Options window.
4. In the Folder Options window, click on the “View” tab. This tab contains various options related to file and folder visibility.
5. Under the “Advanced settings” section, scroll down and look for the “Hidden files and folders” option.
6. Select the option that says “Show hidden files, folders, and drives.” This will enable the visibility of hidden files and folders on your computer.
7. Click on the “Apply” button at the bottom of the window, and then click “OK” to close the Folder Options window.
8. Now, open the File Explorer by either clicking on the File Explorer icon on the taskbar or pressing the Windows key + E on your keyboard.
9. In the File Explorer, navigate to the main drive where Windows is installed, usually the C: drive.
10. Open the “Users” folder, which contains user profiles for all the users on your computer.
11. Locate the folder named “Public” within the “Users” folder and double-click on it to open it.
12. Inside the “Public” folder, you will find the “Public Desktop” folder. Double-click on it to access the contents of the “Public Desktop.”
You should now be able to view and access the files and shortcuts on the “Public Desktop” in Windows 10. Remember to revert the “Hidden files and folders” option back to its original setting if necessary, to maintain the privacy and security of your system.
How Do You Set Up Desktop for All Users in Windows 10?
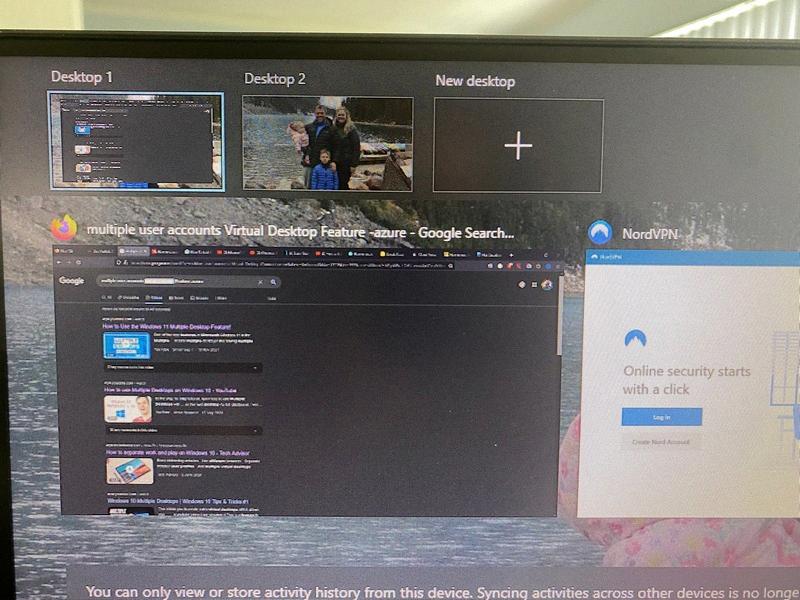
To set up the desktop for all users in Windows 10, you can follow these steps:
1. Press the Windows key + R on your keyboard to open the Run command.
2. In the Run dialog box, type “gpedit.msc” (without the quotes) and hit Enter. This will open the Local Group Policy Editor.
3. In the Local Group Policy Editor, navigate to User Configuration -> Administrative Templates -> Desktop -> Desktop.
4. On the right-hand side, you will see a list of settings related to the desktop. Look for the setting called “Desktop Wallpaper” and double-click on it.
5. In the Desktop Wallpaper Properties window, select the “Enabled” option to enable the setting.
6. In the “Wallpaper Name” field, enter the path of the image you want to set as the default background for all users. You can either enter a local path (e.g., C:\Path\To\Image.jpg) or a network path (e.g., \\Server\Share\Image.jpg).
7. Click on the “Apply” button and then click “OK” to save the changes.
By following these steps, the specified image will be set as the default desktop background for all users on the Windows 10 computer. Note that this method requires the use of the Local Group Policy Editor, which is only available in Windows 10 Pro, Enterprise, and Education editions.
How Do You Create a Desktop Shortcut for All Users?
To create a desktop shortcut for all users using Group Policy, follow these steps:
1. Open the Group Policy Management Console (GPMC) on your domain controller or administrative workstation.
2. Create a new Group Policy Object (GPO) by right-clicking on the desired domain or organizational unit (OU) and selecting “Create a GPO in this domain, and Link it here…”.
3. Give the new GPO a descriptive name, such as “Desktop Shortcut GPO”.
4. Right-click on the newly created GPO and select “Edit” to open the Group Policy Editor.
5. In the Group Policy Editor, navigate to “User Configuration” > “Preferences” > “Windows Settings” > “Shortcuts”.
6. Right-click on the “Shortcuts” folder and select “New” > “Shortcut”.
7. In the “New Shortcut Properties” window, specify the desired settings for the shortcut:
– Location: Choose whether you want the shortcut to be placed on the desktop or in another folder.
– Target Type: Select the type of target for the shortcut (e.g., file, folder, URL).
– Target Location: Specify the path or URL for the target.
– Name: Enter the desired name for the shortcut.
– Icon File: If desired, specify the path to an icon file for the shortcut.
8. Once you have configured the shortcut properties, click “OK” to save the changes.
9. Close the Group Policy Editor.
10. Apply the GPO to the appropriate domain or OU by linking it to the desired location.
11. Reboot the computers or run the “gpupdate” command on the client machines to apply the new Group Policy settings.
12. After the Group Policy has been applied, the desktop shortcut will be created for all users on the specified computers.
By following these steps, you can easily create a desktop shortcut for all users using Group Policy. This allows you to centrally manage and deploy shortcuts across multiple computers in your domain or OU.
Where are All Users Profile in Windows 10?
To locate user profiles in Windows 10, you can follow these steps:
1. Open the Settings menu by clicking on the Start button in the bottom left corner of your screen and selecting the gear icon.
2. In the Settings menu, click on “Accounts.”
3. Within the “Accounts” section, select “Family & other people” from the left-hand menu.
4. Here, you will find a list of all the user accounts on your Windows 10 computer. The primary account will be labeled as “Your family” or “You,” while other user accounts will be listed under the “Other people” section.
Alternatively, you can use the Command Prompt to view the user accounts:
1. Press the Windows key + R to open the Run dialog box.
2. Type “cmd” and press Enter to open the Command Prompt.
3. In the Command Prompt window, type the following command and press Enter: “net user”
4. This will display a list of all the user accounts on your Windows 10 computer, including the built-in system accounts.
By following these steps, you will be able to locate and view all user profiles on your Windows 10 operating system.
Conclusion
Accessing the desktop for all users on Windows 10 can be done by following a few simple steps. Firstly, as an administrator, you need to log in to the system using the local admin account. Then, navigate to the Control Panel and open the File Explorer Options. Under the View tab, find the Advanced settings and look for the option to show hidden files, folders, and drives. By enabling this option, you can reveal the hidden “public desktop” folder.
To create a desktop shortcut for all users using Group Policy Objects (GPO), you need to create a new GPO and open the Group Policy Management Console. From there, navigate to User Configuration > Administrative Templates > Desktop and select the Desktop option. Enable the option and specify the path of the image you want to set as the default background.
To view user accounts on Windows 10, you can go to the Settings menu and click on the Accounts section. From there, click on Family & Other People to see a list of the existing accounts. Alternatively, you can open the Command Prompt and run the “net user” command to view all the user accounts on the system.
Managing the desktop and user accounts on Windows 10 can be easily accomplished by following these steps. By accessing the hidden “public desktop” folder, creating desktop shortcuts using GPO, and viewing user accounts through the Settings menu or Command Prompt, you can efficiently customize and organize the desktop for all users on Windows 10.

