When it comes to editing and enhancing photos on your iPhone, one of the most common tasks is cropping an image. Cropping allows you to remove unwanted parts of a photo or focus on a specific subject. In this article, we will explore how to crop a picture on your iPhone, step by step.
1. Open the Photos app: Locate and open the Photos app on your iPhone. This app is usually found on your home screen and has a multicolored flower icon.
2. Select the photo you want to crop: Browse through your photo library and choose the photo you wish to edit. Tap on it to open it in full-screen view.
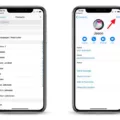
3. Tap on Edit: Once you have the photo open, look for the Edit button, which you can find in the top-right corner of the screen. Tap on it to enter the editing mode.
4. Tap on the Crop button: In the editing mode, you will see various editing options at the bottom of the screen. Look for the Crop button, which is represented by a square icon. Tap on it to activate the cropping tool.
5. Adjust the crop area: Once you have entered the cropping tool, you will see a rectangular frame overlaid on your photo. You can drag the corners or sides of this frame to adjust the crop area. Resize and reposition the frame until you are satisfied with the composition of the photo.
6. Choose a crop aspect ratio: At the bottom of the screen, you will find a list of aspect ratios to choose from. These ratios determine the shape and dimensions of the cropped photo. You can select a preset ratio or tap on “Original” to maintain the photo’s original aspect ratio.
7. Rotate or straighten the photo (optional): If your photo needs rotation or straightening, you can use the rotation and straightening tools available in the editing mode. These tools can be found near the bottom-right corner of the screen. Adjust the photo as needed.
8. Apply the crop: Once you are satisfied with the crop area and any additional adjustments, tap on the Done button in the bottom-right corner of the screen. This will apply the crop and save the edited version of the photo.
9. Save or revert changes: After applying the crop, you will be taken back to the main editing screen. From here, you can choose to save the edited photo by tapping on Save, or revert back to the original version by tapping on Revert.
10. Enjoy your cropped photo: Once you have saved the edited photo, you can find it in your photo library. The cropped version will replace the original photo, but don’t worry, as long as you haven’t deleted the original, you can always revert back to it.
That’s it! Now you know how to crop a picture on your iPhone. Whether you want to remove unwanted backgrounds, focus on specific subjects, or simply enhance the composition of your photos, cropping can be a valuable tool in your editing arsenal. Experiment with different crops and let your creativity shine!
How Do You Crop And Resize Photos on iPhone?
To crop and resize photos on an iPhone, you can follow these steps:
1. Open the Photos app on your iPhone.
2. Select the photo you want to edit by tapping on it.
3. At the bottom right corner of the screen, you will see an Edit button. Tap on it.
4. Once in Edit mode, you will notice a set of tools at the bottom of the screen. Tap on the Crop tool, which looks like a square with arrows pointing outwards.
5. Adjust the crop box by dragging the corners or sides to select the desired area of the photo you want to keep. You can also move the entire box to reposition the crop.
6. To resize the photo, tap on the Aspect Ratio button, which looks like a rectangle. This will allow you to choose from preset aspect ratios or manually adjust the size using the handles on the sides and corners of the crop box.
7. After cropping and resizing the photo, tap on the Done button at the bottom right corner of the screen.
8. You will be prompted to either Save as New Photo or Replace Original. Choose the option that suits your preference.
9. The edited photo will now be saved in your Photos app.

How Do You Crop Something Out of a Picture?
To crop something out of a picture, you can follow these steps using the YouCam Perfect app:
1. Download and install the YouCam Perfect app on your Android or iOS device.
2. Open the app and select the photo you want to edit.
3. Click on the “Edit” button to enter the Photo Edit mode.
4. Look for the “Removal” button and tap on it.
5. Use your finger to paint over the object or area you want to crop out. Make sure to be as precise as possible.
6. If needed, you can use the Eraser tool to refine the selected area and make any necessary adjustments.
7. Once you are satisfied with the selection, click on the “Finish” button.
8. The app will process the image and remove the selected object or area from the photo.
9. You will see the edited result instantly, and you can save the cropped photo to your device.
By following these steps, you can easily crop out unwanted objects or areas from your photos using the YouCam Perfect app.
Conclusion
Resizing an image on an iPhone is a simple process that can be done using the built-in Photos app. By following the steps mentioned in the video, you can easily resize any image to your desired dimensions. It is a handy feature to have, especially if you want to reduce the file size or fit the image within specific dimensions for a website or social media platform. Additionally, if you want to remove unwanted objects from your photos, you can use apps like YouCam Perfect, which offer a user-friendly interface and powerful editing tools. With just a few clicks, you can paint over the object you want to remove and see the results instantly. This can be particularly useful for enhancing the overall aesthetics of your photos and creating a cleaner, more professional look. with the right tools and techniques, you can easily manipulate and improve your images on your iPhone.


