Time Machine is a valuable tool for Mac users, allowing them to easily back up their data and restore it in case of any unforeseen issues or accidents. However, there are times when users may encounter an error message stating that their Time Machine has become read-only. This can be frustrating and may cause concerns about the safety of their data. In this article, we will explore the possible causes of this read-only error and provide some solutions to help resolve the issue.
One of the main causes of the Time Machine read-only error is a change in drive permissions. This can happen when there is a power outage or some other disruption in the system. The Mac mistakenly assumes that the drive permissions have been altered and sets it to read-only mode. It is important to note that this error is unlikely to be caused by any accidental changes made by the user.
Another possible cause of the read-only error is the formatting of the external hard drive. In many cases, Mac users connect an external hard drive that is formatted with Microsoft’s NTFS filesystem, which is not supported by macOS by default. As a result, the Mac treats the drive as read-only, preventing any modifications or additions to the Time Machine backup.
To resolve the read-only error, there are a few steps you can take. Firstly, if you suspect that the error is due to a change in drive permissions, you can try resetting the permissions. To do this, go to the file or folder that is experiencing the read-only issue, right-click on it (or control-click on Mac), and select “Properties” from the context menu. In the Properties window, navigate to the General tab and uncheck the Read-only checkbox. Click OK to save the changes. This should allow you to edit and save the file as needed.
If the read-only error is caused by the formatting of the external hard drive, you will need to reformat the drive to a compatible filesystem. Keep in mind that reformatting will erase all the data on the drive, so make sure you have a backup of any important files before proceeding. To reformat the drive, connect it to your Mac and open Disk Utility, which can be found in the Utilities folder within the Applications folder. In Disk Utility, select the external hard drive from the list on the left-hand side. Click on the Erase tab and choose a compatible filesystem such as macOS Extended (Journaled) or exFAT. Give the drive a name and click Erase to reformat it. Once the process is complete, you should be able to use the drive with Time Machine without encountering the read-only error.
The Time Machine read-only error can be caused by changes in drive permissions or incompatible formatting of the external hard drive. Resetting the permissions or reformatting the drive can help resolve the issue. Remember to always keep backups of your important data to avoid any data loss.
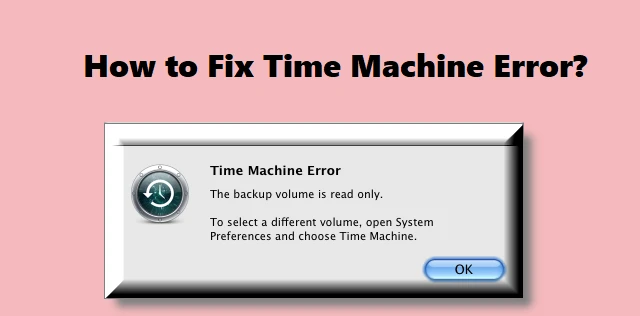
Why is Your Time Machine Hard Drive Read-only?
The Time Machine hard drive can become read-only due to various reasons. Here are some possible causes:
1. Power Outage: If your Mac experiences a sudden power outage or gets shut down improperly, it may lead to file system errors on the Time Machine hard drive. In such cases, macOS automatically mounts the drive as read-only to prevent data corruption.
2. File System Corruption: Over time, the file system on the Time Machine hard drive can become corrupted due to various factors like improper ejection, software conflicts, or hardware issues. When the file system is damaged, macOS may mount the drive in read-only mode to protect the data.
3. Disk Errors: Physical errors on the hard drive, such as bad sectors or disk failures, can also trigger the read-only mode. When the system detects these errors, it switches the drive to read-only to prevent any further damage or data loss.
4. Drive Permissions Issue: In some cases, incorrect drive permissions can cause the Time Machine hard drive to be read-only. This can happen if the permissions were changed accidentally or due to a software glitch.
5. Faulty Hardware: A malfunctioning USB or Thunderbolt cable, a faulty port on your Mac, or a defective external hard drive enclosure can also be responsible for the read-only error. These hardware issues can disrupt the connection between the Mac and the Time Machine drive, leading to read-only mode.
It’s important to note that the exact cause of the read-only error may vary in different situations. To resolve the issue, you can try the following solutions:
– Restart your Mac and try connecting the Time Machine drive again.
– Check the cable connections and try using a different cable or port.
– Repair the file system on the Time Machine drive using Disk Utility.
– Reset the drive permissions using the “Get Info” option in the Finder.
– If the drive still remains read-only, consider backing up your data and reformatting the drive.
Remember to consult professional help if you are unsure or uncomfortable performing these troubleshooting steps yourself.
Why is Your Hard Drive Suddenly Read-only Mac?
There are several possible reasons why your hard drive suddenly becomes read-only on your Mac. Here are some of the most common causes:
1. Drive formatted with NTFS: If your external hard drive is formatted with the NTFS filesystem, which is commonly used in Windows, macOS may only have read access to the drive by default. This means you can view and copy files from the drive, but you can’t modify or delete them. macOS uses the HFS+ or APFS filesystems, so NTFS drives are read-only unless you install additional software.
2. File system errors: Sometimes, file system errors can occur on your hard drive, making it read-only. These errors can be caused by improper ejection of the drive, sudden power loss, or other factors. When the system detects errors, it may automatically mount the drive in read-only mode to prevent further damage. In such cases, you may need to repair the drive using Disk Utility or other third-party tools.
3. Permissions issues: Another reason for your hard drive to be read-only could be permission problems. If the permissions on the drive or specific files/folders are not set correctly, macOS might restrict write access. This can happen if the drive was previously used on a different Mac or if permissions were accidentally changed. You can adjust permissions in the “Get Info” window for the drive or individual files/folders.
4. Hardware failure: In some cases, a read-only hard drive can be an indication of a hardware failure. This can occur if the drive’s firmware or controller is malfunctioning. If you suspect hardware failure, it is recommended to back up your data immediately and seek professional help if needed.
How Do You Turn Off Read-only On Your Mac?
To turn off the read-only attribute on a file on your Mac, you can follow these steps:
1. Locate the file that you want to edit. It could be on your desktop, in a specific folder, or in your Documents folder, for example.
2. Control-click on the file to open a contextual menu.
3. From the contextual menu, click on “Get Info.” This action will open the Info window for the file.
4. In the Info window, you will see a section called “General.” Look for the “Sharing & Permissions” section within it.
5. If the file is locked or in read-only mode, you will notice a lock icon at the bottom right of the Info window. Click on the lock icon and enter your administrator password when prompted.
6. After unlocking the file, you will see a list of user names and their respective privilege levels in the “Sharing & Permissions” section.
7. Locate your username in the list and click on it. By default, your privilege level should be set to “Read only.”
8. To change the privilege level, click on the small arrow next to your username to expand the options.
9. From the expanded options, click on the privilege level drop-down menu and select “Read & Write.”
10. Once you have selected “Read & Write,” close the Info window.
Now, the file should no longer be in read-only mode, and you should be able to edit and save changes to it as needed.
It’s worth noting that some files, such as system files or files in specific directories, may be protected and cannot be modified. In such cases, you may need to authenticate as an administrator or use Terminal commands to change file attributes.
How Do You Change The Read-only Permissions On Your Mac Hard Drive?
To change the read-only permissions on your Mac hard drive, you can follow these steps:
1. Select the disk, folder, or file for which you want to change the permissions.
2. Go to the “File” menu at the top of your screen and choose “Get Info.” Alternatively, you can right-click on the item and select “Get Info” from the context menu.
3. In the information window that appears, make sure the “Sharing & Permissions” section is visible. If it’s not, click on the arrow next to it to expand the section. You may need to scroll down to see it.
4. In the “Sharing & Permissions” section, you will see a list of users and groups that have permissions for the selected item.
5. To change the permissions for a specific user or group, select them from the list by clicking on their name.
6. Once a user or group is selected, click on the small pop-up menu next to their name. This menu allows you to choose a privilege setting.
7. The available privilege settings are “Read & Write,” “Read Only,” and “No Access.” Choose “Read & Write” if you want to allow full access, “Read Only” if you want to restrict editing but allow viewing, or “No Access” if you want to completely deny access to the user or group.
8. If you want to apply the same permissions to all enclosed items within a folder, click on the gear icon at the bottom of the “Sharing & Permissions” section and choose “Apply to enclosed items.”
By following these steps, you can effectively change the read-only permissions for files, folders, or disks on your Mac hard drive.
Conclusion
The read-only error message in Time Machine can be caused by a variety of factors, but it is commonly attributed to the Mac perceiving a change in drive permissions due to a power outage. It is important to note that this error is unlikely to be the result of accidentally setting the drive to read-only.
One common scenario where this error occurs is when connecting an external hard drive formatted with the Microsoft NTFS filesystem, which macOS does not support by default. This can lead to the drive being read-only when connected to a Mac.
To resolve this issue, you can change the read-only status of a file by finding it, right-clicking (PC) or control-clicking (Mac) on the file, and selecting Properties. In the Properties window, navigate to the General tab and clear the Read-only check box. Finally, click OK to save the changes.
For Mac users, you can also change the privilege settings of a disk, folder, or file by selecting it, going to File > Get Info, and navigating to the Sharing & Permissions section. If the information is not visible, click on the arrow to expand the section. From there, you can select a user or group in the Name column and choose a privilege setting from the pop-up menu.
By following these steps, you should be able to resolve the read-only error in Time Machine and regain the ability to edit and save your files as needed.


