Mac computers are known for their sleek design, intuitive interface, and powerful capabilities. One of the many useful features of a Mac is the ability to record Zoom meetings. Whether you want to save important discussions for future reference or capture a presentation for later viewing, recording a Zoom meeting on your Mac is a simple process.
To begin, open QuickTime Player on your Mac. You can find it in your Applications folder. Once opened, click on the “File” tab in the menu bar and select “New Screen Recording.”
A small recording window will appear on your screen. Before you start recording, you have the option to customize your recording settings. Simply click on the arrow next to the red record button to access these settings. You can choose to record your entire screen or select a specific area by clicking and dragging the cursor. You can also enable or disable audio recording.
Once you have set your preferences, click on the red record button to start recording. If you are recording a Zoom meeting, make sure to join the meeting before starting the recording. The recording window will disappear, indicating that the recording has started.
During the meeting, everything happening on your screen will be captured, including video, audio, and any shared content. You can freely navigate through different windows and applications while the recording is in progress.
To stop the recording, simply click on the stop button in the menu bar or press the “Command + Control + Esc” keys on your keyboard. A preview of the recorded video will appear, allowing you to review and make any necessary edits.
After reviewing the recording, you can save it by selecting “File” and then “Save” from the menu bar. Choose a location on your Mac where you want to save the recording and give it a name. You can also choose the format in which you want to save the recording, such as MOV or MP4.
Once the recording is saved, you can easily access it anytime you want. You can share it with others, edit it using video editing software, or simply keep it for personal use.
Recording a Zoom meeting on your Mac is a valuable tool for capturing important discussions, presentations, or any other content shared during the meeting. It allows you to revisit the information at your own convenience and ensures that no details are missed.
So, whether you are a student, professional, or just someone who wants to keep a record of their Zoom meetings, using the built-in screen recording feature on your Mac is a convenient and easy way to accomplish this task. Give it a try and enhance your Zoom meeting experience on your Mac.
How Do You Record A Zoom Meeting Without Host Permission On Mac?
To record a Zoom meeting without host permission on Mac, you can follow these steps:
1. Install a screen recording software: Download and install a reliable screen recording software on your Mac. There are several options available, such as QuickTime Player, OBS Studio, or Movavi Screen Recorder.
2. Configure the recording settings: Open the screen recording software and adjust the settings according to your preferences. Set the recording area to capture the entire Zoom meeting window or select a specific portion of the screen.
3. Enable audio recording: Ensure that the audio recording option is enabled in the screen recording software. This will allow you to capture both the video and audio of the Zoom meeting.
4. Start the recording: Launch the Zoom meeting and join as a participant. Once the meeting has started, start the screen recording software to begin capturing the meeting. Make sure to position the recording window properly to avoid any distractions or obstructions.
5. Record the meeting: During the meeting, the screen recording software will capture everything that happens on your screen, including the video, audio, and any shared content. Make sure to keep the recording focused on the meeting and avoid capturing any unrelated or private information.
6. Stop and save the recording: When the meeting is over, stop the screen recording by clicking on the respective button in the recording software. Then, save the recorded file to a desired location on your Mac.
Note: It is important to respect the privacy and permissions of others when recording Zoom meetings. Recording meetings without host permission may violate privacy laws or organizational policies. Always ensure that you have the necessary permissions before recording any meeting.
How Do You Record a Meeting On Your Mac?
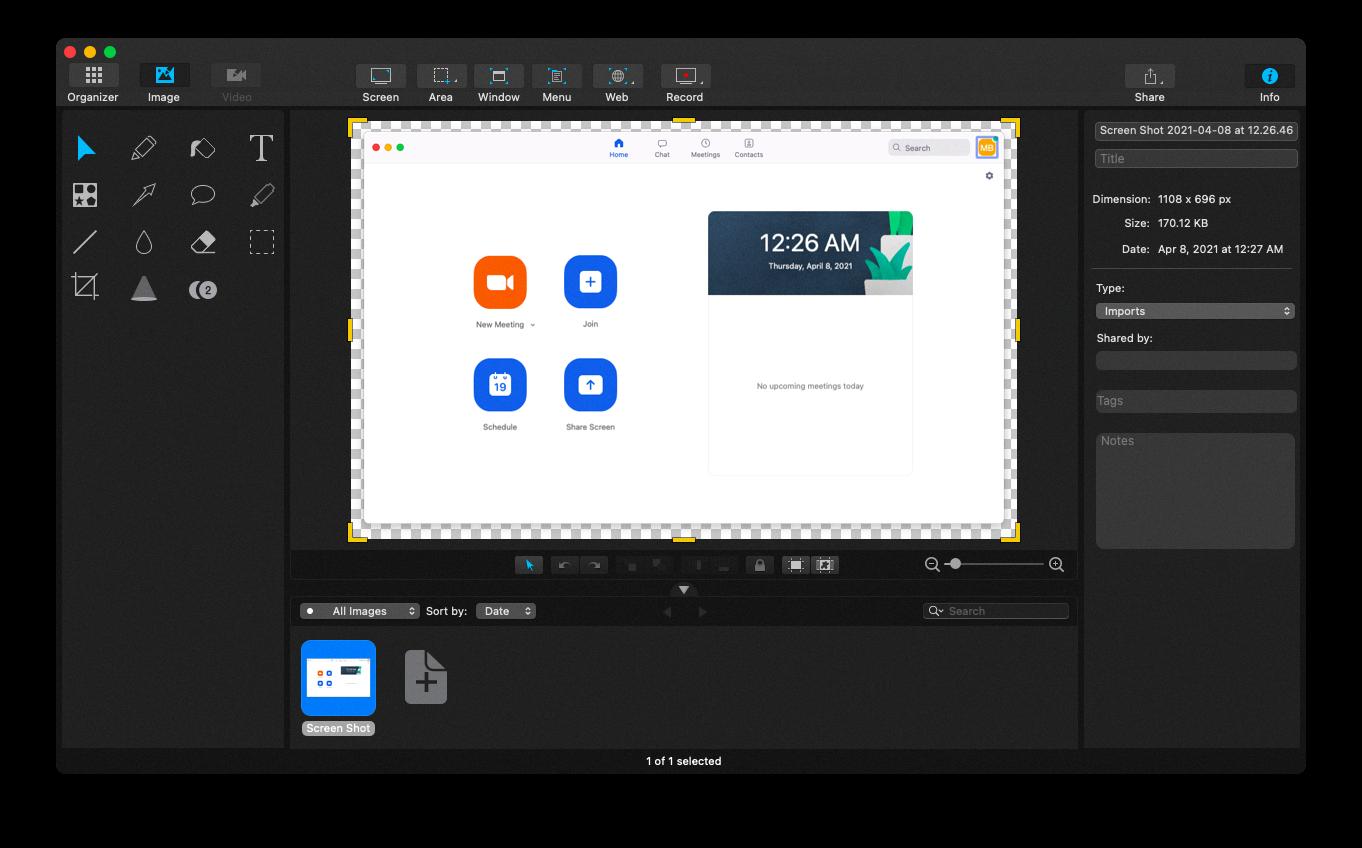
To record a meeting on your Mac, you can use the built-in QuickTime Player application. Here’s a step-by-step guide:
1. Open QuickTime Player: Go to your Applications folder, find QuickTime Player, and open it.
2. Start a new screen recording: Once QuickTime Player is open, click on the “File” option in the menu bar, then select “New Screen Recording.”
3. Adjust recording settings: Before you start the recording, you can modify the recording settings by clicking the arrow next to the red Record button. Here, you can choose the microphone input, show mouse clicks, and select the quality of the recording.
4. Choose recording area: After clicking the Record button, you will see a screen recording toolbar. To record the entire screen, simply click anywhere on the screen. If you want to record a specific portion of the screen, click and drag the selection over the desired area.
5. Start the recording: Once you’ve selected the recording area, click on the “Start Recording” button in the screen recording toolbar. You can also click on the “Options” button to enable or disable microphone audio during the recording.
6. Record the meeting: With the recording started, proceed to conduct your meeting as usual. QuickTime Player will capture everything that happens within the chosen recording area.
7. Stop the recording: When the meeting is finished, click on the “Stop Recording” button in the menu bar. Alternatively, you can press the “Command + Control + Esc” keys together to stop the recording.
8. Save the recording: After stopping the recording, QuickTime Player will automatically open the recorded file. To save it, click on the “File” option in the menu bar, then select “Save.” Choose a location on your Mac to save the recording and give it a descriptive name.
That’s it! You have successfully recorded your meeting on your Mac using QuickTime Player. You can now share the recording with others or review it for reference.
Where is The Record Button On Zoom Macbook?
The Zoom Macbook app does not have a specific “Record” button visible on the main interface. However, the recording functionality is still accessible. To start recording a Zoom meeting on your Macbook, you can follow these steps:
1. Launch the Zoom app on your Macbook.
2. Join or start a meeting as a host.
3. Look for the meeting controls at the bottom of the window. You will find various options like Mute, Stop Video, Share Screen, and more.
4. To access the recording options, click on the “…” (three-dot) More button located at the bottom-right corner of the meeting controls. This will open a dropdown menu with additional features.
5. From the dropdown menu, select “Record” to initiate the recording process. You can also choose to record the meeting to the cloud or your local computer, depending on your preferences.
6. Once the recording begins, a small recording indicator will appear on the top-left corner of the Zoom window, indicating that the meeting is being recorded.
7. During the meeting, you can control the recording by hovering over the Zoom window and clicking on the “Pause/Stop Recording” button that appears on the top-left corner.
8. When you are ready to stop the recording, click on the “Stop Recording” button.
After you stop the recording, Zoom will automatically convert the recording into a video file. By default, it is saved to your local computer unless you have chosen to record to the cloud. You can then find and access the recorded file in the designated folder on your Macbook.
It is important to note that the availability of the recording feature may vary depending on your Zoom account type and the settings enabled by the host of the meeting.
How Do You Record a Zoom Meeting With QuickTime On Mac?
To record a Zoom meeting with QuickTime on your Mac, follow these steps:
1. Open QuickTime Player: Go to your Mac’s Applications folder and double-click on QuickTime Player to open it.
2. Start a new screen recording: Once QuickTime Player is open, click on the “File” tab from the menu bar at the top of the screen. Then, select “New Screen Recording” from the drop-down menu.
3. Adjust recording settings: A small screen recording window will appear on your screen. Before you start recording, you can customize some settings. To record audio from the Zoom meeting, click the small arrow next to the record button and select the microphone you want to use. You can also choose to show mouse clicks during the recording by clicking on the Options button.
4. Start recording: When you’re ready to start recording the Zoom meeting, click on the red record button in the screen recording window. You can choose to record the entire screen or select a specific portion of the screen to capture.
5. Record the Zoom meeting: Once you click the record button, a countdown will appear, and then the screen recording will begin. Open the Zoom meeting and navigate through it as you normally would. QuickTime will capture everything happening on your screen, including the audio from the meeting.
6. Stop and save the recording: When you’re done recording the Zoom meeting, click on the stop button in the menu bar at the top of the screen, or you can press the Command + Control + Esc keys on your keyboard. After stopping the recording, QuickTime Player will automatically open the recorded video in a new window.
7. Save the recording: To save the recording, click on the “File” tab in the menu bar and select “Save” or “Save As” to choose a specific location and name for the recorded video. You can save it in a format of your choice, such as MOV or MP4.
That’s it! You have successfully recorded a Zoom meeting using QuickTime on your Mac. Now you can share or edit the recording as needed.
Note: It’s important to inform all participants in the Zoom meeting that you are recording the session as it may be subject to legal and privacy considerations.
Conclusion
Mac offers a range of features and functionalities that make it a reliable and efficient platform for recording Zoom meetings. With the help of QuickTime Player, Mac users can easily capture their screen and record their Zoom meetings without needing any additional software. This built-in feature allows for a seamless recording process and offers options to customize recording settings according to individual preferences.
By following a few simple steps, Mac users can initiate the screen recording feature in QuickTime Player and start recording their Zoom meetings effortlessly. This convenient method eliminates the need for seeking permission or relying on external applications.
The QuickTime Player’s screen recording feature provides users with the flexibility to choose their desired capture area, ensuring that only the relevant parts of the meeting are recorded. This can be particularly useful in instances where only specific sections of the meeting are of interest.
With Mac’s reliable and user-friendly interface, recording Zoom meetings becomes a hassle-free task. The ability to record meetings without permission offers convenience and flexibility, allowing users to save important discussions, presentations, or collaborations for future reference.
Mac’s QuickTime Player presents a convenient solution for recording Zoom meetings without requiring permission. Its intuitive interface and customizable settings make it a reliable choice for capturing important moments during meetings or collaborations. With Mac, users can easily record their Zoom meetings and have a reliable recording to refer back to whenever needed.


