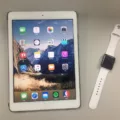
The iPad is one of the most popular tablets in the world. It has been designed and developed by Apple, a technology giant that has been leading the industry for decades. The iPad is a versatile device that can be used for a wide range of purposes, including browsing the internet, watching videos, playing games, and more. One of the most useful features of the iPad is its ability to connect to cellular networks, allowing you to access the internet no matter where you are. In this article, we will take a look at how you can add a cellular plan to your iPad.
Setting up a cellular plan on your iPad is a straightforward process. If you are setting up your first plan, you will need to go to Settings > Cellular Data > Set Up Cellular Data. From there, you will be prompted to choose a carrier. Make sure to choose a carrier that has good coverage in your area. Next, you will need to choose a plan and create an account, or add your iPad to an existing plan. Once you have done this, you can tap Confirm to complete the setup process.
If you have already set up a cellular plan on your iPad in the past, you can add a new plan by going to Settings > Cellular and tapping Add a New Plan. Follow the onscreen instructions to choose a carrier, and plan, and create an account or add your iPad to an existing plan.
It is important to note that the extra cost for a cellular option for an iPad ranges from $130 for the three iPad models and $150 for the two current iPad Pro models. The newest iPad models have eSIM, but no include an Apple SIM card. eSIM iPad models are as follows: 11-inch iPad Pro 2020.
It is also important to remember that a WiFi-only model iPad cannot be made into a cellular data service iPad. It does not have the components that allow for cellular data service. If you order or purchase a WiFi-only iPad, you cannot change your mind and then use it with cellular service. Instead, you must purchase a cellular service version of the iPad model.
Adding a cellular plan to your iPad is a simple process that can be completed in just a few steps. By connecting your iPad to a cellular network, you can access the internet no matter where you are, making it a valuable tool for both personal and professional use. Just remember to choose a carrier with good coverage in your area and understand the additional cost of a cellular option. With these things in mind, you can enjoy all of the benefits of the iPad’s cellular capabilities.

Adding a Cellular Plan to an iPad
To add a cellular plan to your iPad, first, navigate to the “Settings” app on your device. From there, select “Cellular Data” and then “Set Up Cellular Data” if this is your first time setting it up. Next, choose a carrier that offers a cellular plan for iPads. If you’re unsure which carrier to choose, do some research or ask for recommendations from friends or family members. Once you’ve selected a carrier, you can choose a plan and create an account or add your iPad to an existing plan. Follow the on-screen prompts to provide any necessary personal and billing information. Finally, tap the “Confirm” button to complete the setup process. Once you’ve added a cellular plan to your iPad, you’ll be able to use it to access the internet, make phone calls, and send text messages, depending on the plan you’ve chosen.
Adding Cellular to an Existing iPad
It is possible to add cellular service to an existing iPad. To do this, you need to go to the Settings app on your iPad and select the Cellular option. From there, tap on “Add a New Plan” and follow the onscreen instructions to set up your new cellular plan. Depending on your carrier, you may need to provide some additional information, such as your account details, to complete the process. Once you have set up your new plan, you should be able to use cellular data on your iPad just like you would on a smartphone or other mobile device. It is important to note that there may be additional fees associated with adding cellular service to your iPad, so be sure to check with your carrier to understand the costs involved.
Adding an iPad to a Cellular Plan: Cost Considerations
It does cost extra to add an iPad to a cellular plan. The additional cost varies depending on the iPad model and the carrier you choose. Typically, the extra price for a cellular option ranges from $130 for the three standard iPad models and $150 for the two current iPad Pro models. It is important to note that the newest iPad models have eSIM, but not included Apple SIM cards. Below is a list of eSIM iPad models:
– 11-inch iPad Pro 2020
If you want to use your iPad to access the internet, make calls, or send text messages when you are away from a Wi-Fi connection, then you need to choose a cellular plan and pay the extra cost. However, if you only plan to use your iPad when you have access to Wi-Fi, then you can opt for the Wi-Fi-only model and save on the cost of a cellular plan.
Adding Cellular to a WiFi iPad Later
You cannot buy a WiFi-only iPad and add cellular later. The reason for this is that the cellular version of the iPad has additional hardware components that are necessary for cellular data services, such as a SIM card slot and an antenna. These components are not present in the WiFi-only version of the iPad. Therefore, if you want to use cellular data service on your iPad, you will need to purchase a cellular version of the device from the outset. It is not possible to convert a WiFi-only iPad into a cellular version at a later time.
Conclusion
The iPad is a versatile device that can be used for a variety of tasks, from browsing the internet and checking email to creating content and playing games. The option to add cellular data service allows for even more flexibility, allowing users to stay connected on the go. With the latest iPad models featuring eSIM technology, users have the option to easily add a cellular plan without the need for a physical SIM card. Whether you are a student, professional, or simply looking for a device to stay connected, the iPad is a reliable and powerful option.


