Have you ever wondered how to find all the devices connected to your home or office network? Local subnet scanning is a great way to get a comprehensive overview of all the IP addresses in your local area network (LAN). It’s an essential tool for security, troubleshooting, and analyzing your network’s performance.
Subnet scanning can be done with a few simple commands on Windows, Mac, and Linux. First, open the command line on your computer and type “ipconfig” (for Windows), “ifconfig” (for Mac), or “ifconfig -a” (for Linux). This will display the IP address of your computer as well as its subnet mask and gateway address.
Next, type “arp -a” in the command line to view all devices connected to your network. This will list all IP addresses within your subnet along with their associated MAC addresses. You can also use additional tools such as nmap or netdiscover if you need more detailed information about the devices on your network.
Subnet scanning is an invaluable tool for anyone who needs to keep track of their home or office network. By scanning regularly and keeping records of changes in IP addresses, you can ensure that only authorized users are able to access resources on your LAN. Additionally, by looking for suspicious activity in scan results it can help you identify potential security threats before they become serious issues.
If you haven’t already started using local subnet scanning for security purposes, now is a great time to start!

Scanning a Local Subnet
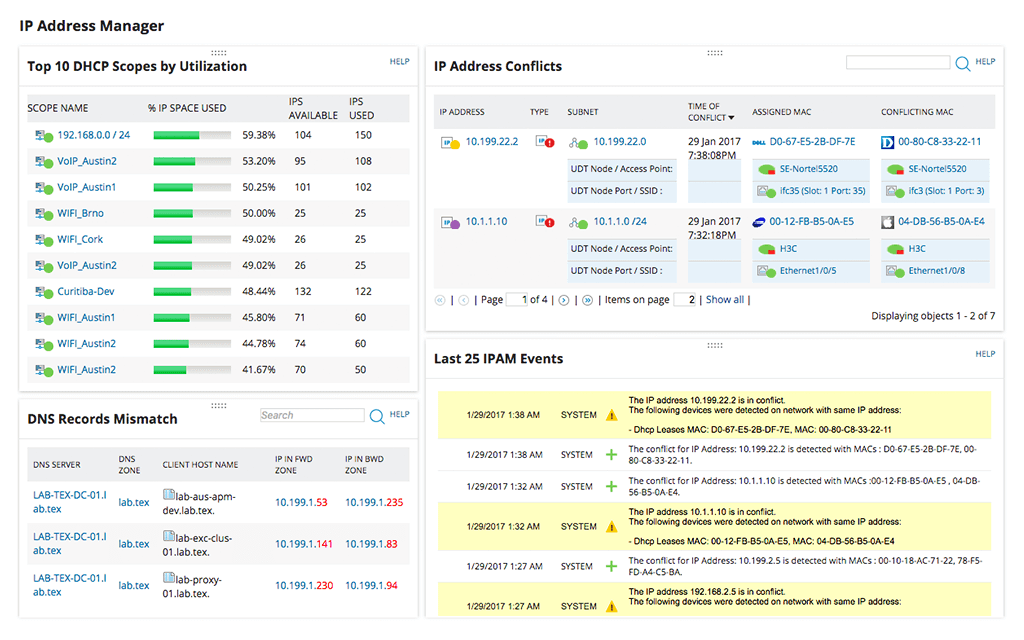
Scanning a local subnet is relatively simple. First, you’ll need to determine the network number on your own computer. To do this, you can enter either the command “ipconfig” (on Windows PCs) or “ifconfig” (on Mac or Linux) in the command line. This will display your IP address, subnet mask, gateway address, and more. Once you have determined the network number, you can use a network scanning tool such as nmap or Angry IP Scanner to scan the local subnet for any active hosts. With these tools, you can specify which ports to scan and which services to detect. Finally, if you want a more detailed report of all the devices on your network, use a network mappings tool such as SolarWinds Network Performance Monitor or Spiceworks Network Monitor. These tools provide comprehensive reports on all active hosts and services that are connected to your local subnet.
What is a Subnet Scan?
A subnet scan is a process that scans a network IP address range to identify all the hosts (devices) connected to it. It can also be used to discover any open ports, protocols, services, and other information related to each host. Subnet scans are typically done using specialized software such as Nmap or Angry IP Scanner. They can be used for troubleshooting network issues, ensuring that unauthorized devices aren’t connected to the network, or for security auditing. A subnet scan will usually generate a list of all the active hosts within the scanned range, along with detailed information about each one including its IP address and MAC address.
Scanning an IP Address on a Local Network
Scanning an IP address on a local network is a simple process. First, open the Command Prompt window by typing “cmd” into the Windows search box. Once you are in the Command Prompt window, type “ipconfig” and press Return. This will display the IP address of your computer as well as any other connected devices. To get more detailed information about devices connected to your network, type “arp -a” into the Command Prompt window and press Return. This will list all of the IP addresses connected to your network, along with their respective MAC addresses.
Viewing All Devices on a Local Network
In order to view all devices connected to your local network, you will need to open an administrator Command Prompt window. To do this, click on the Start menu and type ‘cmd’ in the search box. Then right-click on the ‘Command Prompt’ icon and select ‘Run as administrator’. Once the Command Prompt window is open, type in ‘net view’ and hit enter. This will show a list of all the devices connected to your local network.
What Is My Local Subnet Mask?
The local subnet is a network of devices that are all connected to the same router. A subnet mask is a number that tells the router which of the devices on the network should be sent data, such as internet traffic or shared files. This helps keep your network secure and efficient by limiting the amount of traffic your router has to deal with. To find your local subnet on an Android device, go to Settings > Wireless & Networks > Wi-Fi. Tap on the network you’re connected to, and you will find the subnet mask along with other network details.
The Purpose of a Subnet
The primary purpose of a subnet is to create a smaller, more efficient network within a larger network. Subnets are used to logically organize large networks into smaller, more manageable pieces. By dividing a network into subnets, traffic can be contained within the subnet, reducing the amount of data that must pass through unnecessary routers. This improves overall performance and helps prevent congestion on the larger network. Subnets also provide an added layer of security by isolating sensitive information from public access. Additionally, subnets are used to allocate IP addresses and assign specific rights and privileges to users within a network.
Identifying Devices on a Subnet
To determine if a device is on a subnet, you need to compare the IP address of the device to the subnet mask. The subnet mask defines the range of IP addresses that make up the subnet. If the first three octets (or sets of 8 bits) of the device’s IP address and subnet mask match, then the device is on that particular subnet. For example, if a device has an IP address of 192.168.0.5 and a subnet mask of 255.255.255.0, then it is in 192.168.0.* subnet because the first three octets match between both addresses (192.168.0).
Scanning an IP Address on a Local Network in Windows
To scan an IP address on a local network with Windows, you’ll need to open the Command Prompt. To do so, press the Windows key + R and type in ‘cmd’. Then, type in ‘ipconfig’ which will display all of the current network configuration settings for your computer. From here, you can view your own IP address and the subnet mask. Once you have these two pieces of information, you can use the ‘ping’ command to send out an echo request to other computers on your local network. By typing ‘ping’ followed by the IP address, you can send out an echo request and wait for a response from the specified address. This process allows you to determine whether or not that computer is active on your network.
Scanning a Local Network with Nmap
To scan your local network with Nmap, you need to first open the Nmap command line window. Once it is open, you can use the following command to perform a basic scan of your local network:
nmap -sn 192.168.x.0/24
The “-sn” flag stands for “ping scan”, which allows Nmap to determine which devices are online on your local network by sending out ICMP Echo requests (known as “pinging”). The “192.168.x.0/24” indicates the range of IP addresses on your local network that should be scanned; this number may vary depending on your specific network setup, so consult with your ISP for the exact details.
Once you have entered this command, Nmap will begin scanning your local network and display a list of all active devices found on the network along with their IP addresses and other information such as the hostname and operating system version.
Conclusion
In conclusion, local subnet scanning is a great way to identify devices connected to your home network. By using the command “ipconfig” on Windows or “ifconfig” on Mac and Linux, you can view your computer’s own IP address, subnet mask, gateway address, and more. Additionally, typing the command “arp -a” provides a basic list of the IP addresses of devices connected to your network. Finally, typing the command “net view” displays a list of all devices connected to your network. With this knowledge, you can ensure that all of the devices in your network are safe and secure.


