If you are a frequent smartphone user, you know how annoying it can be when your phone locks itself after a few minutes of inactivity. This is called the “screen timeout” setting and it is an important feature to keep your device secure from unauthorized access.
The purpose of this setting is to protect the data stored on your device. When enabled, it helps to ensure that no one else can use the device while you are away or distracted. As such, it is an important security measure that should not be taken lightly.
Screen timeout settings can easily be adjusted in the display settings menu of your device. Depending on your needs, you can choose from several different timeouts including 15 seconds, one minute, two minutes, five minutes, 10 minutes, and 30 minutes. The default option is usually 30 seconds but if you find this too short or too long for your needs then don’t be afraid to adjust it accordingly.
It’s also important to remember that some apps may override your screen timeout settings depending on their functionality. For example, some navigation apps may require a longer timeout period so that they remain functional even when the screen has timed out and locked itself. For this reason, it’s always best to keep any necessary apps updated so that they maintain their expected performance even with the screen timeout setting activated.
Overall, screen timeout settings are an important feature of modern smartphones and other mobile devices as they help protect our data from unauthorized access while we are away or distracted. Whether you choose a shorter or longer timeout period will depend on your individual needs but one thing is certain – ensuring that your screen times out when not in use will help keep your information safe and secure at all times!

Adjusting Screen Timeout
To adjust your screen timeout, you’ll need to open the Display settings menu. Once you’ve opened the menu, look for the Screen Timeout option. Tap into it and select a timeout duration that best suits your needs. The default is 30 seconds, but you can choose from 15 seconds, one minute, two minutes, five minutes, 10 minutes, or even 30 minutes.
Increasing Screen Time Beyond 30 Seconds
To make your screen stay on longer than 30 seconds, go to Settings > Display & Brightness > Auto-Lock. From there, you can choose a length of time that works best for you. You can choose from 30 seconds, 1 minute, 2 minutes, 3 minutes, 4 minutes, 5 minutes, or Never. Select the length of time that works for you and your screen will stay on for that amount of time before it automatically locks.
Preventing Windows from Locking After Inactivity
To stop Windows from locking after a period of inactivity, you can configure your computer’s settings using the Administrative Templates in the Control Panel.
First, open the Control Panel and select “Administrative Templates”. From there, select “Control Panel” and then “Personalization”. In the Personalization folder, find “Do not display the lock screen” and double-click it. This will open a new window where you can select Enabled. Once enabled, the lock screen will no longer appear when your computer is inactive for a certain period of time.
After making this change, close the window and restart your computer for it to take effect.
Shortened Screen Time: Investigating the Causes of Quickly Turning Off Screens
The screen turns off so fast because your phone or tablet has a power save function that is set to turn off the screen after a predetermined amount of time. This time is usually set to 15 seconds, but it can be adjusted in the settings to 10 minutes or any other amount of time you prefer. This power save function helps conserve battery life when the device is not in use.
Preventing Screen from Turning Off After 30 Seconds
To make your phone screen not turn off after 30 seconds, you need to go to the Settings menu from the notification panel or the app drawer and click on the Display icon. Once you are in the Display settings, click on Screen Timeout and select the Never option. This will ensure that your phone screen will remain on until you manually turn it off.
Preventing Phone from Turning Off After 30 Seconds
To stop your phone from turning off after 30 seconds, you’ll need to adjust the Auto-Lock setting in the Display & Brightness settings. To do this, open the Settings app and tap “Display & Brightness.” Scroll down and tap “Auto-Lock.” From here, you can select a longer time period (up to 5 minutes). Note: If you have Low Power mode enabled, Auto-Lock will be set to 30 Seconds, and you won’t be able to change it. To change it, first, disable Low Power mode.
Changing the Inactivity Timeout in Windows 10
To change the inactivity timeout in Windows 10, first press Win + I to open the system settings. Then select the Personalization option from the menu items. Next, click the Lock screen option on the left-hand side pane. Scroll down on the right-hand side and click Advanced screen saver settings. You will then be directed to an additional screen where you can alter your timeout settings. Select the amount of time you would like your computer to remain inactive before your screen saver appears or locks your screen. Finally, click apply and you have successfully changed your inactivity timeout settings in Windows 10!

Disabling Screen Timeout in Windows 10
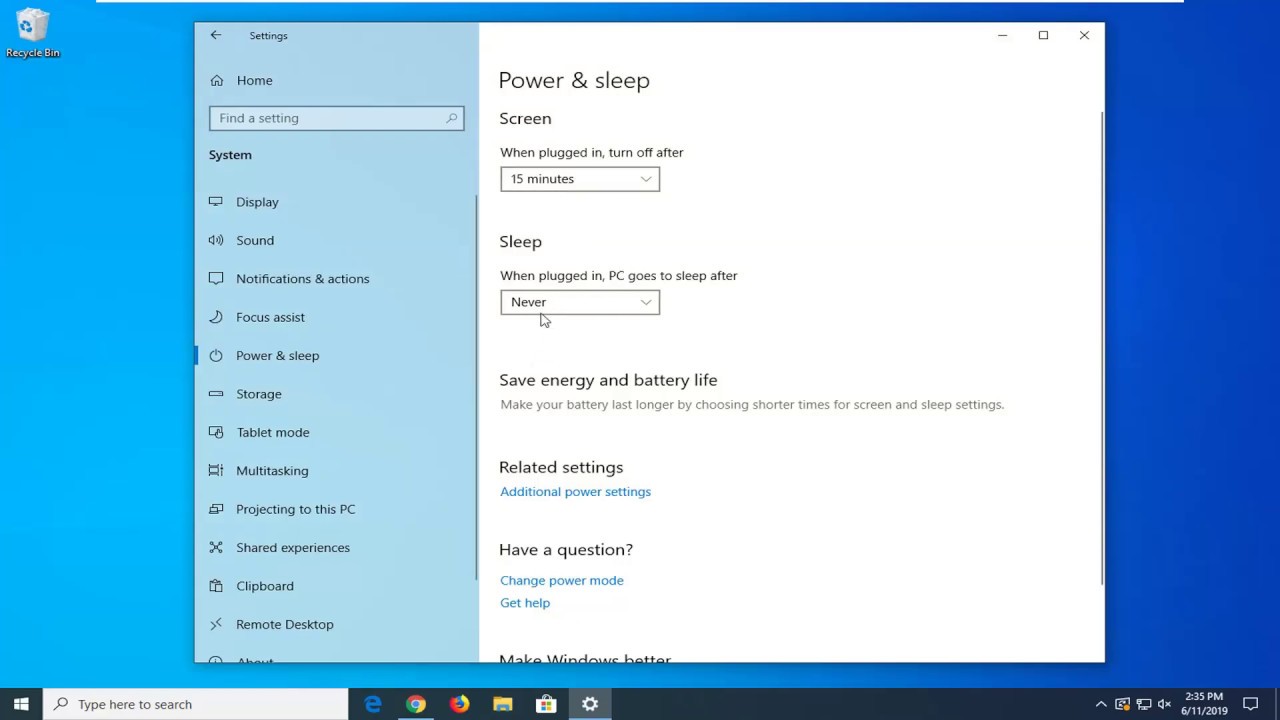
To disable the screen timeout in Windows 10, open the Power Options menu by pressing the Windows Key + X and selecting Control Panel. From there, select ‘System and Security’, then click on ‘Power Options’. On the left side of the window, select ‘Change when the computer sleeps’ or ‘Choose when to turn off the display’. Under the dropdown list for both options, choose ‘Never’ and click ‘Save Changes’. Your screen should now never time out as long as your computer is powered on.
Preventing Automatic Computer Lock
The good news is that it’s pretty easy to stop your computer from locking automatically. All you need to do is make a few adjustments in Windows settings.
First, open the Start Menu and type “Control Panel” into the search bar. Select “Control Panel” from the list of results.
In the Control Panel, click on “System and Security” and then select “Power Options.” This will bring up all of your computer’s power settings.
Under “Power Options,” select “Change when the computer sleeps.” You can then adjust how long your computer waits before going into sleep mode. Choose a longer time than you usually use for locking your computer and hit “Save Changes.”
You can also adjust when your screen turns off if you want to prevent it from doing so as well. Go back to the Power Options screen and select “Change when the computer turns off the display.” Then, adjust this setting to be longer than the time you usually use for locking your computer and hit “Save Changes.”
That’s all there is to it! Now your computer should no longer lock automatically – or turn off its display – after a certain amount of time has passed without acting on it.

Source: walmart.com
Conclusion
Screen timeout settings are a useful tool to help manage how long your device stays on when idle. It can be adjusted to fit your needs, allowing you to conserve battery life and reduce distractions. Setting your screen timeout to a reasonable amount of time can also increase the security of your device as it will automatically lock after a given period of time. Ultimately, taking advantage of screen timeout settings is an easy way to ensure your device remains secure and responsive.


