Are you looking to take your music production to the next level? With FL Studio, you can create professional-sounding tracks without ever having to leave your computer. But what about when you want to add some real-time drumming into your mix? That’s where drum pads come in! Drum pads are a great way to add depth and texture to any track. But how do you map drum pads in FL Studio?
Mapping drum pads in FL Studio is actually quite simple, once you know what to do. Here’s a quick guide on how to get started:
1. Connect your MIDI controller or drum pad of choice to your computer and make sure it is recognized by FL Studio.
2. Open the MIDI settings window by going to Options > MIDI Settings.
3. Select “Enable input port” and select the input port associated with your device from the drop-down menu.
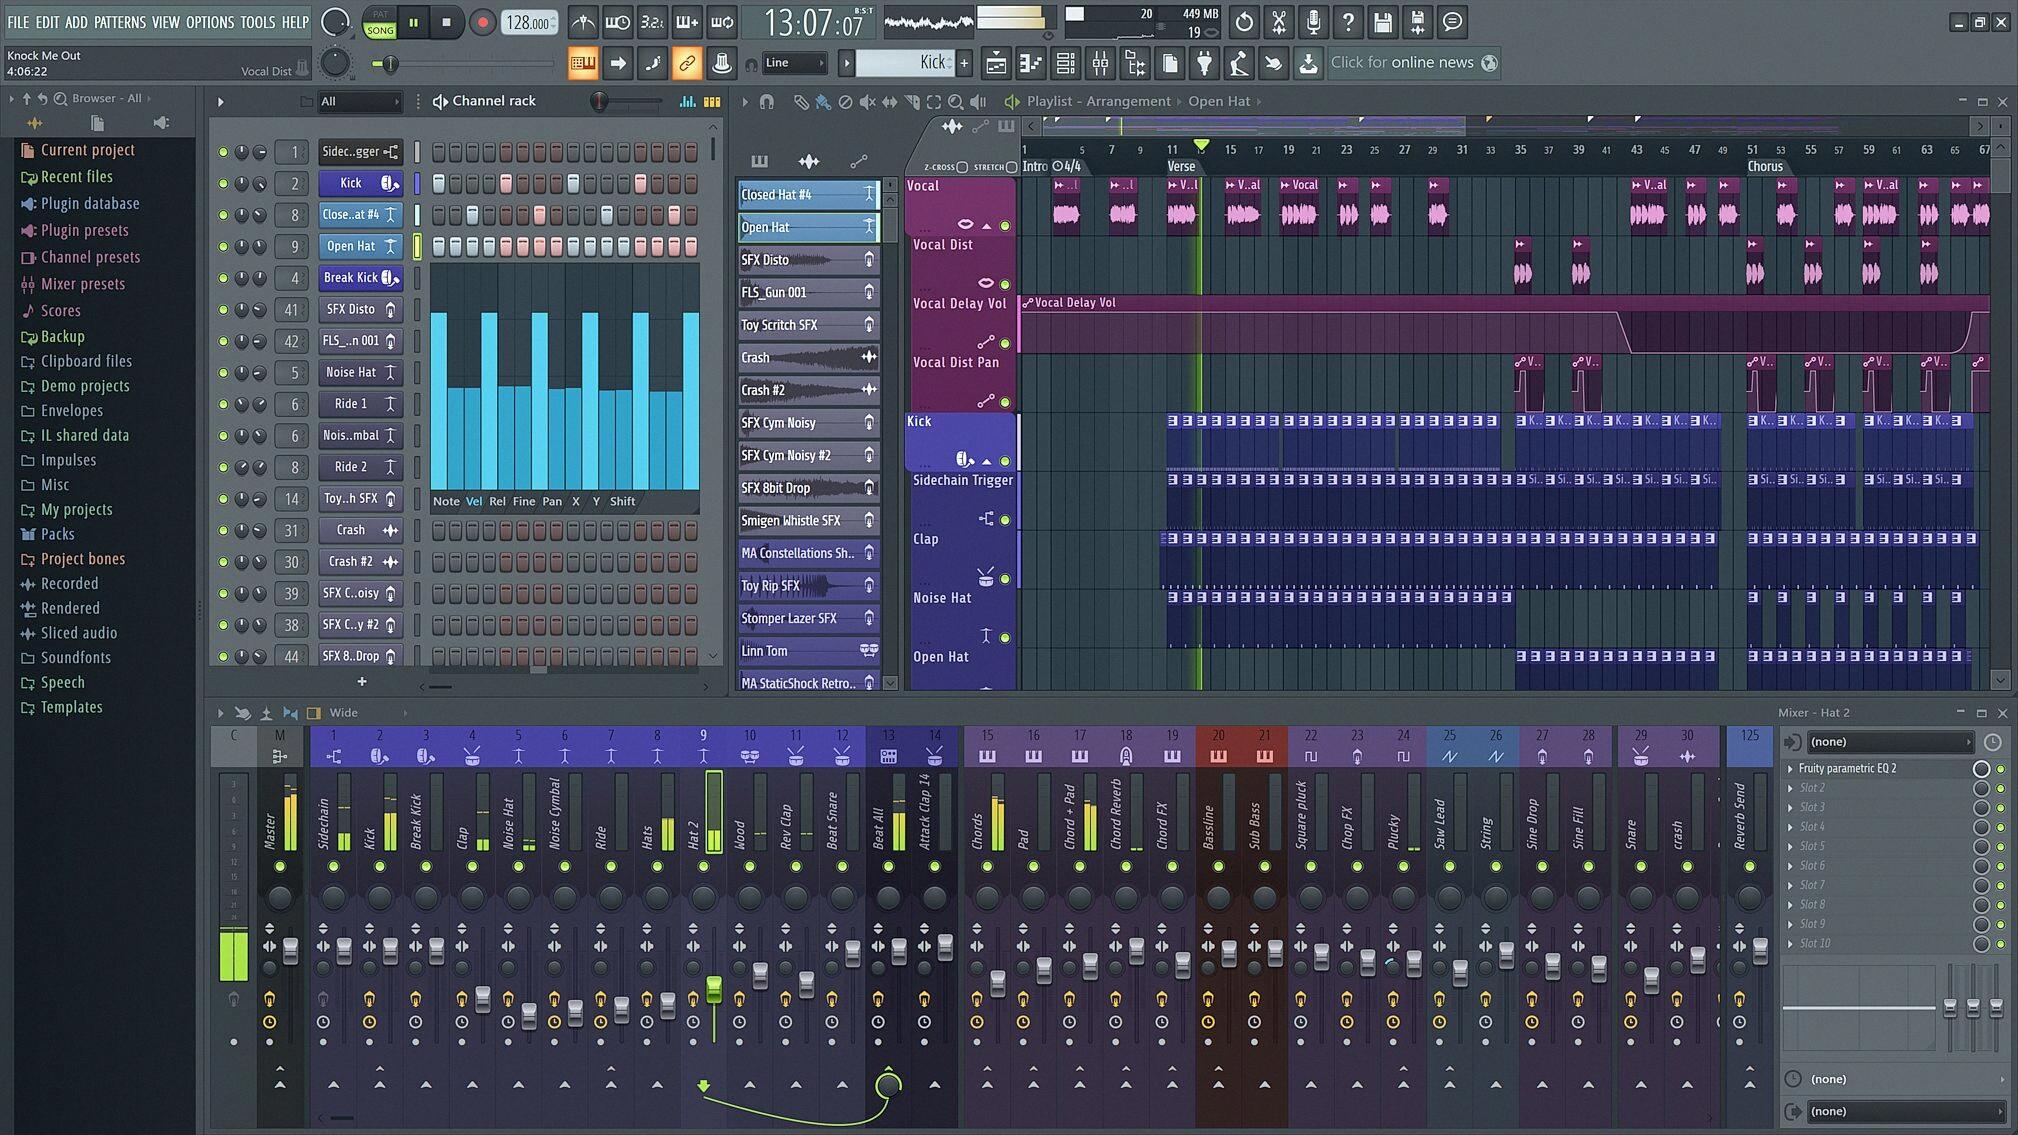
4. Go back to the main FL Studio window and open the Channel Rack window (located near the top left corner).
5. On the left side of the Channel Rack window, select “Drum Pads” from the list of available instruments. This will open up 16 slots that can be used for mapping drum sounds.
6. Now go back into the MIDI settings window and click “Map Inputs To Outputs” at the bottom right corner of the window. This will bring up a mapping interface where you can assign each pad on your device with a specific sound from within FL Studio (or another DAW). Simply drag and drop each sound onto its corresponding slot in order to complete this step.
7. Finally, press play in FL Studio and start jamming away! Your connected device should now be sending commands directly into FL Studio, so you can begin creating beats in no time at all!
That’s it! You now know how to map drum pads in FL Studio using either an external MIDI controller or a dedicated drum pad device such as an Akai MPD232 or Arturia BeatStep Pro – two of our favorite devices for producing beats with instruments like drums, basses, synths, and more! So what are you waiting for? Get creative and start making some serious music with FL Studio today!
What Drum Pads are Compatible with FL Studio?
The Akai Fire, Akai MPD232, Arturia BeatStep Pro, and Akai LPD8 are all excellent MIDI controllers that work with FL Studio. In particular, the Akai Fire has been designed to integrate seamlessly with the software for an optimized workflow. With four banks of pads and four rotary knobs, it’s perfect for drum sequencing and sample manipulation. The MPD232 is also great for beat-making; it features 16 velocity-sensitive pads, eight programmable knobs, and eight faders. Meanwhile, the Arturia BeatStep Pro offers a hybrid design combining both a traditional step sequencer with a set of velocity-sensitive pads. And finally, the Akai LPD8 is ideal for music production on a budget; it sports eight velocity-sensitive pads and eight programmable knobs in an ultra-compact form factor. Ultimately, whichever MIDI controller you choose will depend on your individual needs and preferences.

Source: zzounds.com
Matching Drums to Melody
Matching drums to melody is all about creating a groove that supports and compliments the tune. To do this, you need to understand the time signature of your song and choose a drum pattern accordingly. Start by listening to the melody and feeling out what type of groove you want to create. Are you looking for a rock feel, a swing feel, or something in between? Once you have an idea of the type of groove you want to create, choose a tempo that fits with the meter of your song. Then create a drum pattern that follows the same beats per measure as the melody and fits with the desired groove. Be sure to experiment with different kick and snare patterns, fills, and cymbal placements until you find one that works with your melody. Finally, don’t forget to adjust your dynamics so that everything fits together nicely!
Adding Drum Plugins to FL Studio
Adding drum plugins to FL Studio is a straightforward process. First, you need to locate the plugins you want to add. Most plugins come in either VST or AU formats, and you’ll need to ensure that your FL Studio project is compatible with those formats. Once you’ve got the plugin files, open up your project and go to Options > Manage Plugins. Here, you can select the plugin folder and add the drum plugins you want. After that, simply click ‘Scan’ and your new drum plugins will appear in the list of available plugins in your project. You can then drag them onto your channel rack or mixer window as usual.
Conclusion
In conclusion, FL Studio is an incredibly powerful and versatile music production software. It is capable of producing professional quality music and has a wide range of features that make it suitable for both novice and experienced producers alike. When paired with the right MIDI controller, FL Studio can be used to create unique and memorable musical compositions. With its extensive library of sounds, effects, and tools, FL Studio can help you take your music to the next level.


