Are you looking to upgrade your Macbook Pro to the 2019 model and want to know the best way to connect an external hard drive? If so, you’ve come to the right place. The Macbook Pro 2019 is an amazing device, and it’s important that you choose the right external hard drive for your needs.
In this blog post, we’ll explore everything you need to know about connecting an external hard drive to your Macbook Pro 2019. We’ll cover what type of external hard drives are compatible with the Macbook Pro 2019, how to set up the connection, and some troubleshooting tips for when things don’t go as planned.
First off, let’s talk about which types of external hard drives are compatible with the Macbook Pro 2019. The most common type of hard drive used is a USB 3.0 or USB-C connection. USB-C is becoming increasingly popular due to its fast speeds and versatility – so if you can afford it, choosing a USB-C connection is probably your best bet. You can also use a Thunderbolt 3 connection or another type of port depending on what your device supports.
Once you have chosen an appropriate type of external hard drive for your Macbook Pro 2019, it’s time to set up the connection:
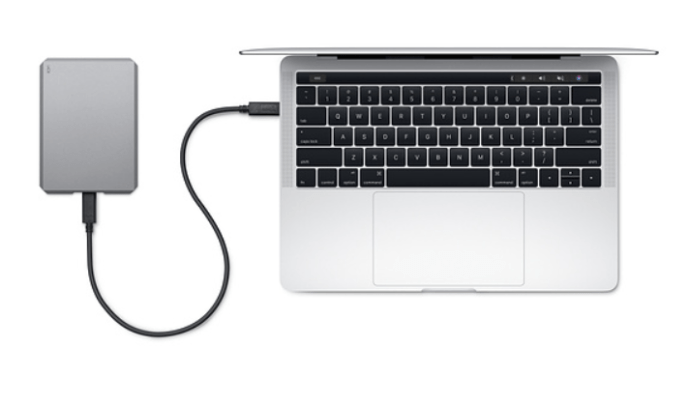
1. Plug in the external hard drive into one of your computer’s USB ports or other ports if applicable.
2. Wait for your computer to recognize the device – this may take a few minutes depending on how big the hard drive is and how quickly it can be recognized by your computer.
3. Open Finder and locate the device in the sidebar – If you don’t see it here, try searching by name or description in Spotlight Search (the magnifying glass icon in Finder).
4. Finally click on “External Hard Drive” in Finder and start transferring files between devices!
That should be all you need for a successful setup process! However, there may be instances where things don’t go as planned – so here are some tips for troubleshooting:
1) Make sure that all cables are securely connected at both ends – from your computer to the external hard drive as well as from any power source (if applicable).
2) Check that there are no visible signs of damage or wear-and-tear on any cables used – if necessary replace them with new ones (make sure they’re compatible with your device).
3) Try disconnecting/reconnecting all cables multiple times while restarting both devices at least once during each attempt (this often helps reset any issues).
4) Try using different ports/USB connectors – sometimes a particular port may not be functioning correctly but another one will do just fine!
Hopefully, these tips will help get you up and running quickly with connecting an external hard drive to a Macbook Pro 2019! If none of these methods work then we recommend contacting Apple Support directly as they’ll be able to provide more detailed advice specific to your situation. Good luck!
Troubleshooting Macbook Pro Not Recognizing External Hard Drive
It’s possible that your Macbook Pro is not recognizing your external hard drive for a few reasons. First, check that the cable from the hard drive to your Mac is securely connected. If the cable is loose, it can cause problems with connecting the drive. Additionally, check that the external hard drive has power if it needs it. If you are using a cable with multiple connectors (USB-C, USB-A, etc.), make sure you are using the correct one for your device. If you are still having trouble connecting, try changing the hard drive power cable if you have a spare or swapping out the cable with another one. Finally, if none of these steps work, it could be due to compatibility issues between your Mac and external hard drive or due to driver issues on either device.
Transferring Files From Macbook Pro to External Hard Drive
To transfer files from your Macbook Pro to an external hard drive, you’ll first need to connect the external hard drive to your computer using a USB cable. Once the icon for the external hard drive appears on the Desktop, launch a new Finder window by clicking ‘Finder’ on your Desktop. Then, locate and select the files that you want to transfer to the external hard drive, and drag them onto the external hard drive icon in the Finder window. Your files will then be transferred to the external hard drive.
Making an External Hard Drive Compatible with a Mac
In order to make your external hard drive compatible with your Mac, you need to format it using the Disk Utility app. To do this, start by connecting the external hard drive to your Mac. Then, open the Disk Utility app (you can find it in Applications > Utilities). Select the drive that you want to format and click Erase. Give the drive a descriptive name and leave the default settings – ‘OS X Extended’ format and ‘GUID partition map’. Finally, click ‘Erase’ and OS X will begin formatting your external hard drive, making it compatible with your Mac.
Troubleshooting an Unresponsive External Drive on a Mac
If your Mac does not recognize the external drive when you plug it in, there are several things you can do to troubleshoot the issue. First, make sure that the external drive is turned on and that all cables are securely connected. If it is still not recognized, try a different USB port on your Mac. It could be that one of the ports is not functioning properly. If that doesn’t work, restart your Mac and try again. You may also want to check for any software updates for your Mac or the external drive itself. Finally, if none of these solutions work, contact the manufacturer of the external drive for further assistance.
Troubleshooting an Unrecognized External Hard Drive
If your external hard drive is not showing up when you plug it in, there are a few things to try. First, check to make sure the drive is securely connected to your computer using the correct cable and port. If the connection appears to be secure, try another cable or port. It could be that your specific drive is finicky with that particular USB port or cable. If you’re using a USB 3.0 port, try a USB 2.0 port instead. Additionally, if you’re plugging the drive into a USB hub, try plugging it directly into the PC instead. If none of these solutions work, unplug the drive and try again on another computer.
Troubleshooting Issues with External Drive Detection
If your external hard drive is not showing up in Windows, it could be due to a few different causes. First, you should check the partition on the drive itself to make sure it is set up correctly, as this can sometimes cause issues with detection. It’s also possible that you’re using an incompatible file system for your drive. If that’s the case, you’ll need to reformat the drive using a compatible file system.
It’s also possible that there is an issue with either one of your USB ports or drivers in Windows. To rule these out, try connecting the drive to another USB port or using a different computer and see if it shows up correctly. If none of these options work, then there may be an issue with the drive itself and you may need to replace it.
Using an External Hard Drive with a Macbook Pro
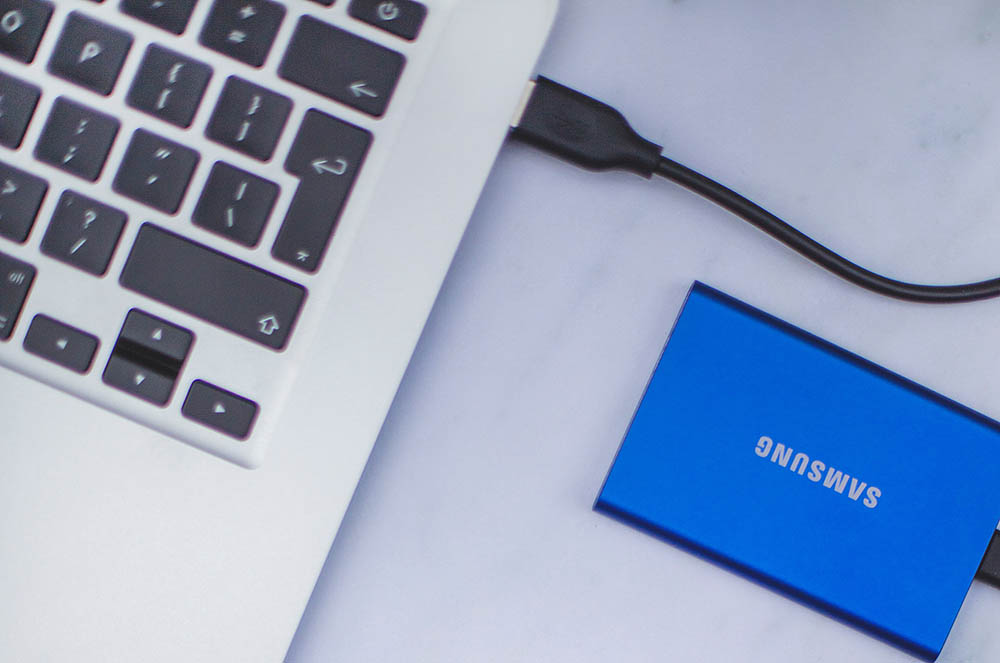
Yes, you can use an external hard drive with a Macbook Pro. All you need to do is plug the hard drive into an available USB port on the Macbook Pro – this could be straightforward and simple to do. The external hard drive must be compatible with your Macbook Pro, so it’s best to check that before purchasing one. Once you’ve plugged in the hard drive, your Mac will automatically recognize it and you will then be able to access it by selecting it from the Finder window or by going to ‘Go > Connect To Server’ in the Finder menu. You can then store files on the external hard drive and access them from there as if they were stored on your Mac itself.
Accessing an External Hard Drive on a Macbook Pro
To open an external hard drive on a Macbook Pro, first, make sure that it is correctly plugged into the USB port of your Mac. After connecting it, you should see the drive appear on your desktop, or in the Finder window in the left column under Locations (or Devices on older versions of macOS). You can then double-click on the drive icon to open it and view its contents. Alternatively, if you would like to access it from the command line, you can open the Terminal app and use the ‘open’ command followed by the path to your external hard drive. For example, open /Volumes/MyExternalDrive.
Transferring Photos From Mac to External Hard Drive
The easiest way to transfer photos from Mac to an external hard drive is to use the Finder. First, quit Photos and open the folder that contains your Photos Library. Then, drag the Photos Library to a location on your external storage device. Once the move is complete, double-click on the Photos Library in its new location to open it. This will allow you to access all of your photos from the external hard drive.
Do Macs Support All External Hard Drives?
Yes, some external hard drives will not work with Mac. This is because the hard drive may be formatted in a format that is not supported by macOS, such as NTFS or HFS+. Additionally, an external hard drive may not be recognized on Mac if the USB cable connecting the two devices is loosely connected or frayed. To ensure compatibility, you should check the format of your external hard drive and make sure your USB cable is securely connected before attempting to use it with your Mac.
Formatting an External Hard Drive for Mac
When choosing a file system format for an external hard drive on a Mac, the most important thing to consider is compatibility. The best option for most Mac users is Mac OS Extended (Journaled), which is compatible with all Macs. This format is also known as HFS+, and it has been around since 1998. It offers full read-write compatibility with Macs and provides reliable performance, good data integrity, and strong encryption options.
For newer Macs running macOS 10.13 or later, you can use APFS (Apple File System). This format was specifically designed for solid-state drives and flash storage devices, so it offers faster performance than HFS+. It also supports advanced features such as cloning and snapshotting, which are not available in HFS+.
Finally, if you need a format that is compatible with both PC and Mac computers, you can use exFAT. This format does not have the same level of encryption or data integrity as HFS+ or APFS, but it does provide better cross-platform compatibility than either of those formats.


