Are you looking to connect your Canon 5D Mark III to your computer? If so, you’ve come to the right place! In this blog post, we’ll walk you through the steps necessary to connect your Canon 5D Mark III camera to a computer.
By setting up a Canon 5D USB connection with your computer, you can transfer photos from your Canon 5D to your computer. That will allow you to edit the videos using advanced photo editing software.
Connecting Canon Camera to Laptop via USB
To connect your Canon camera to your laptop via USB, follow these steps:
- Turn on the camera.
- Press the menu button.
- Press the menu button again until you select the yellow setup tab, which looks like a wrench.
- Turn the menu dial until you select Auto Power Off. Then, press the Set button.
- Turn the Quick Control Dial until you select Disable, and then press the Set button.
- Press the menu button again and turn off the camera.
This disables the Auto Power Off setting. Once you have done that, you can set up a Canon camera USB connection to your laptop. Using the USB cable that came with your camera, connect the two by inserting one end of the cable into the USB port on your laptop and the other end into the A/V OUT / DIGITAL port on your camera. Once you have connected the two physically, turn on the camera.
Transferring Files from Canon Camera to a Computer via USB

To transfer files from your Canon camera, follow the steps above to establish the USB connection from your Canon camera to your computer while the camera is off.
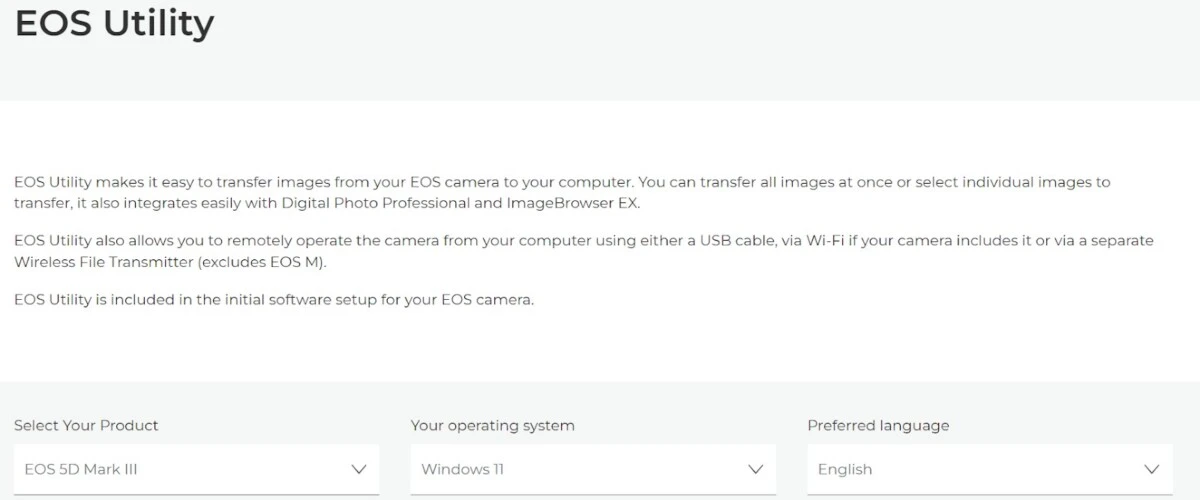
You will also need to download the Canon EOS Utility software to your computer so it can connect with your camera. You will need this software to move Canon files to the computer. Go to this page and select EOS 5D Mark III from the drop-down list and your operating system from the second dropdown list, as shown in the screenshot above. Download it and install it on your PC. You only need to download it once.
Once you have done that, turn the camera on. EOS Utility should start automatically. If it doesn’t, open the Windows start tab and search for “EOS Utility” or find it in All Programs and start it.
Once the EOS Utility software has started up, select “Downloads images from EOS camera using Canon EOS Utility.” Your computer will then download the images from your camera to your computer.
Transferring Photos From Canon 5D Mark III to a Mobile Device
Unfortunately, this camera doesn’t support built-in Wi-Fi, so it doesn’t support wireless Canon 5D mobile photo transfers like other models. Instead, you can first transfer the photos from your Canon camera to your computer and then transfer them from your computer to your phone. You can transfer photos from your computer to your phone by connecting the two with a USB cable.
Alternatively, you can take the SD card from your camera and insert it into your phone’s SD slot to transfer them to your phone. Many new phones nowadays, though, don’t support an SD card and don’t have an SD slot. You can also try connecting the camera to your phone via a USB cable directly.
Does Canon 5D Mark III Have Clean HDMI Output?
Yes. The Canon 5D Mark III is capable of clean HDMI output. To get clean HDMI output on a Canon 5D, make sure it has the latest firmware.
Using HDMI to Transfer Photos From Canon Camera to Computer
You can’t transfer photos via HDMI from a Canon camera, but you can view still images and videos on your computer or TV by using an HDMI connection with your Canon camera.
Most laptops nowadays don’t have an HDMI port, so if you want to connect your camera to your laptop via HDMI, you might need an adapter. It makes more sense to simply transfer files directly via the EOS Utility software and a regular USB cable, as explained above.
However, you can display the images or videos on a TV or any other monitor as well via HDMI. Simply connect an HDMI cable to the HDMI ports on both your camera and the monitor. Select the HDMI cable as the input source on the monitor.
Features and Uses of the Canon 5D Mark III
The Canon 5D Mark III features a 22.3 megapixel CMOS camera, ideal for taking crystal-clear pictures. It allows you to shoot 1080p videos and supports high-speed shooting. The Canon 5D supports photography uses such as low-light and nighttime photography as well. It can take beautiful low-light photos without the need for flash or artificial lighting, making it perfect for capturing moments in natural light and creating beautiful landscapes.
Thanks to its 1080p support, you can also use the Camera 5D Mark III for videography. It also supports HDR mode.
The camera has other useful features, such as the ability to instantly back up pictures and videos to a storage card. It has several autofocus modes, such as AI Focus, One Shot, and AI Servo, allowing you to take pictures at the perfect angle. It also supports auto white balance thanks to its imaging sensor.
All of these features make the Canon EOS 5D Mark III an outstanding choice for a wide range of photographic applications including portrait, travel, event photography, wedding photography, and more.
Does Canon 5D Mark III Support 4K Video?
No. The Canon 5D Mark III doesn’t support 4K recording, but it does support 1080p videos. With 14-bit 1080p video, you will get pretty good video quality considering the price of this camera.
Conclusion
You can easily connect the Canon 5D Mark III to devices such as laptops and desktop computers via a USB cable. The EOS Utility software is a Canon 5D file transfer solution that allows you to download files from your camera to your computer. You can also display still images and videos from your camera to an HDMI output source, such as a monitor or TV, by connecting the two via an HDMI cable.


