Are you ready to take your music production to the next level? If so, AirPods in GarageBand may be the way to go. AirPods provide a wireless and convenient way to monitor your recordings and mixes. With ther high quality sound, you can ensure that every detail of your track comes through clearly.
However, there are some drawbacks when it comes to using AirPods with GarageBand. For one, the gain control for the track is always grayed out, meaning that you won’t be able to adjust the volume of your recordings or mixes while using AirPods as an input source. Additionally, due to ther Bluetooth nature, AirPods are prone to latency issues – meaning that there will be some delay between when you play something and when you hear it in GarageBand.
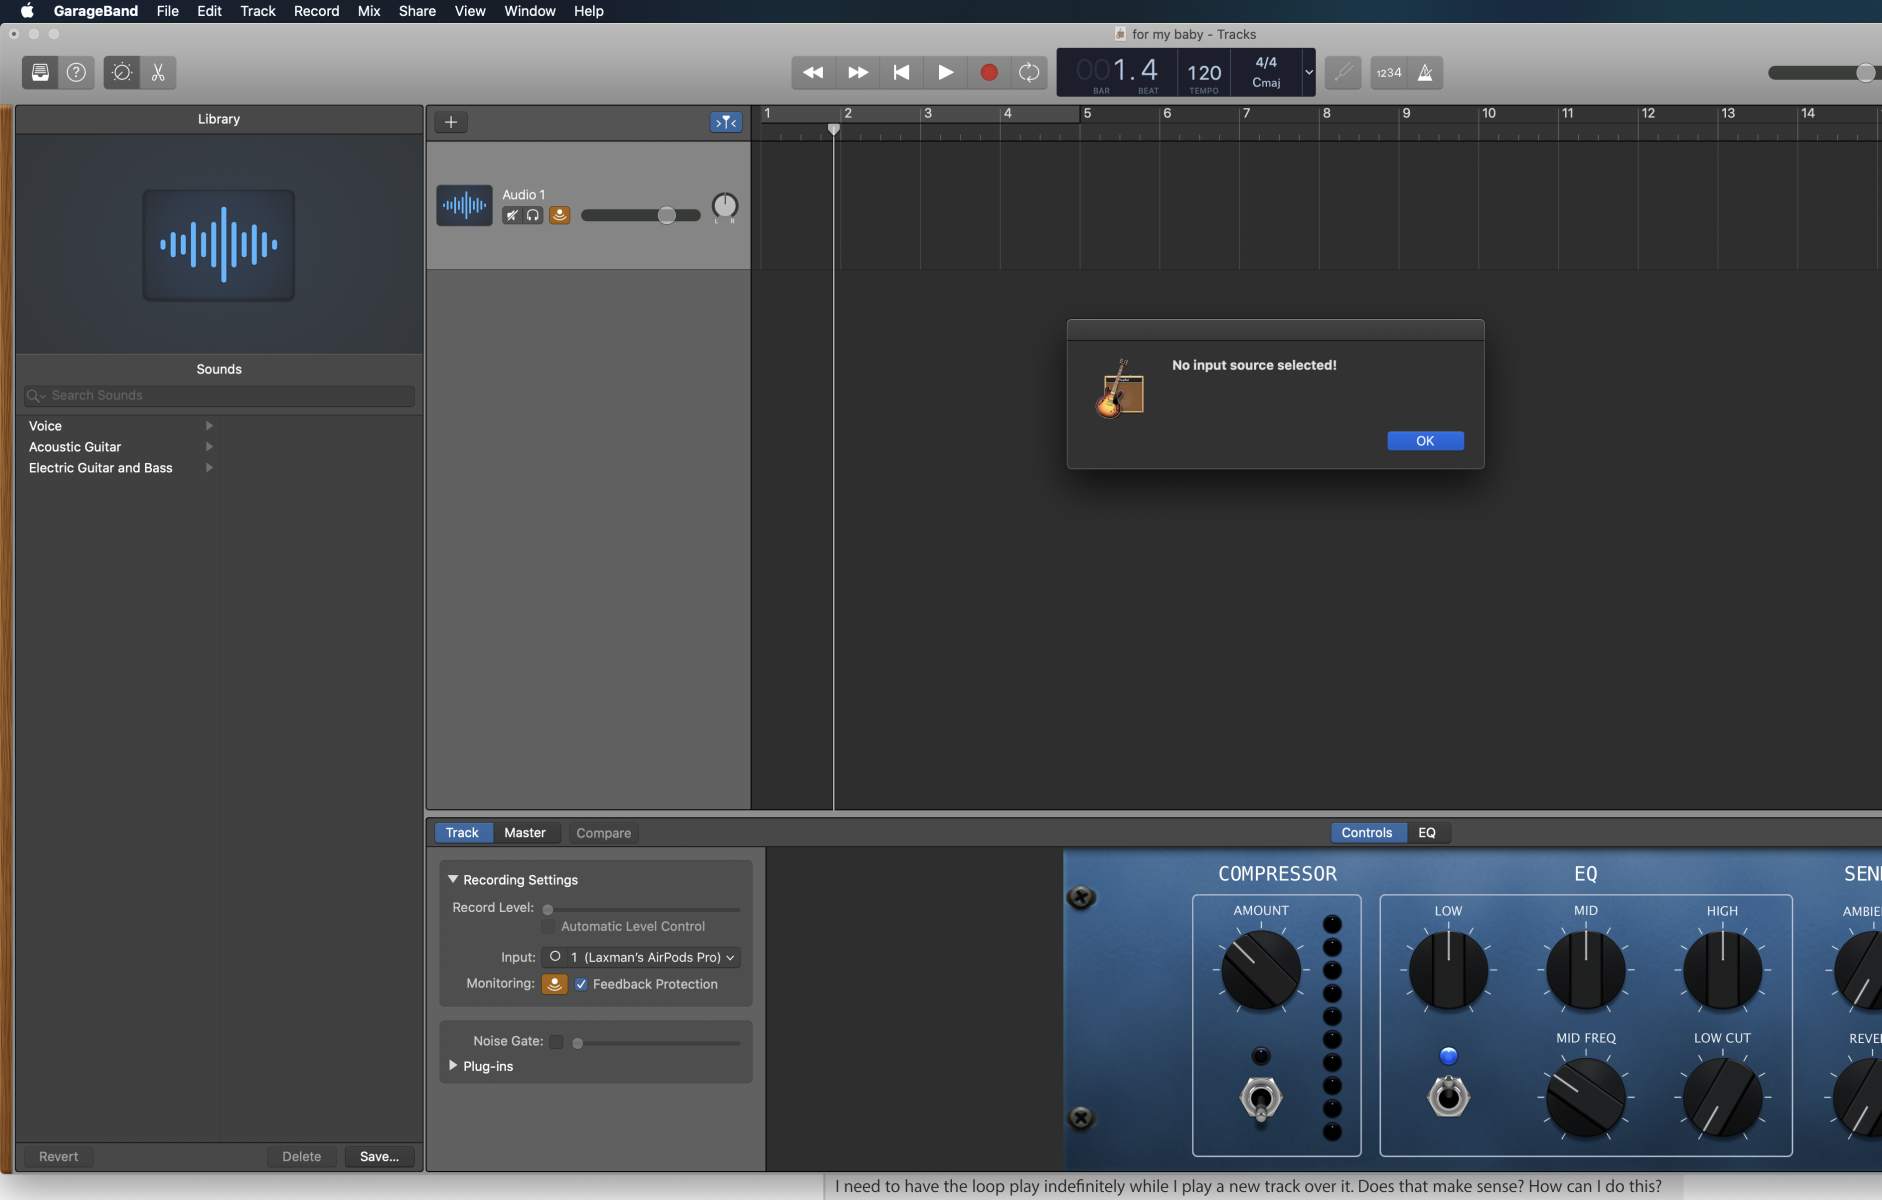
So how can you use AirPods with GarageBand? The first step is making sure that your input/output settings are properly configured – this can be done by going into the “Preferences” section of GarageBand. Once this is done, simply plug in your AirPods and select them as an input source from within GarageBand’s “Audio Settings” menu. To make sure everything is working properly, make sure that monitoring is enabled on both the track header and on the Smart Controls panel (found underneath the timeline).
Using AirPods with GarageBand brings a whole new level of convenience and mobility to music production – no longer do you have to worry about tangled wires or having access to a nearby sound system! However, due to the latency issue caused by Bluetooth technology, they are not ideal for multitrack recording. But if you just need smething quick and easy for mixing or monitoring purposes, then AirPods in GarageBand could be exactly what you need!
Recording with AirPods on GarageBand
No, you cannt record on GarageBand with AirPods. While you can select them as an input device, the gain control for the track is grayed out and they can only be used as a monitor. To record on GarageBand, you’ll need to use a compatible microphone or audio interface.
Delay of AirPods on GarageBand
The AirPods create latency because of their Bluetooth connection. This means that a measured amount of delay is added to the audio signal sent from the AirPods to the device, such as an iPad or computer. Unfortunately, GarageBand does not have a feature to compensate for this latency, which can cause a noticeable lag between the sound coming from the AirPods and what is being recorded in GarageBand. To avoid this, we suggest using a wired connection when recording with GarageBand in order to ensure that there is no delay between playback and recording.
Troubleshooting Headphones Not Working on GarageBand
If your headphones aren’t working in GarageBand, it could be due to a few different issues. First, make sure that the headphones are fully plugged into the correct audio port on your Mac or PC. If they are, check the Input/Output settings in GarageBand’s Preferences to see if they have been configured properly. Also, make sure that the Monitoring button has been turned on in the Smart Controls or on the track header. If none of these steps work, try using anoter pair of headphones to see if they work better.
The Quality of AirPods for Voice Recording
AirPods can be a good option for voice recording, depending on what you need. For phone calls, or recording audio with the Voice Memos app, the AirPods microphone works well and can capture clear audio. However, when it comes to recording video with Apple’s native iPhone camera app, the AirPods mic cannot be used as it is not compatible with this feature. If you need to record audio alongside video with your iPhone, you will need an external microphone.
Fixing Audio Delay in GarageBand
If you’re experiencing an audio delay in GarageBand, tere are a few steps you can take to try and fix it.
1) Start by disconnecting all of your external audio gear from your computer and restarting it. Once the computer has booted up again, reconnect all of your external audio gear and open GarageBand.
2) Then, go to the GarageBand Preferences menu and open the Audio/MIDI tab. Here you’ll find the ‘Audio Output’ option. Select this option and then check the ‘Hardware Input Latency’ box. This shuld help to reduce any audio delay that you may be experiencing.
3) If this doesn’t resolve the issue, then try adjusting the buffer size for both input and output witin GarageBand’s Audio/MIDI tab as well. Increasing the buffer size should help reduce any latency issues related to sound processing time.
4) Lastly, if none of thee steps have resolved your issue, then you may need to look into updating your drivers or switching over to a better quality audio interface device if possible.
Hopefully one of these steps will help fix any audio delays that you’re experiencing when using GarageBand!
Fixing Sound Delay on AirPods
If you’re experiencing a sound delay with your AirPods, the frst thing to try is putting them back in the charging case, waiting for around 30 seconds, and then popping them back out. This can help reset the connection and solve any temporary issues. If that doesn’t work, try turning Bluetooth on and off on your device. To do this, open up the Settings app on your phone or tablet, select Bluetooth, and toggle it off and then back on again. After that, repeat step one and check if this has solved the issue. If not, there may be additional steps to take such as checking for firmware updates or resetting your AirPods.
Hearing Yourself While Recording in GarageBand
To hear youself while recording in GarageBand, you will need to enable monitoring for the track you are recording on. To do this, select the track in question and click the “Monitor” button located at the top of the track display. This will enable input monitoring, so you will be able to hear yourself while recording. You can also adjust the level of monitoring using the input monitor slider at the bottom of your screen. When finished, click “Stop” to finish your recording.
Hearing Yourself Sing in GarageBand
In order to hear yurself singing in GarageBand, you’ll need to enable input monitoring on the audio track. To do this, click the Monitoring button in the track header. This will allow you to hear the sound of your voice as it is being recorded. You can also adjust the volume of the input monitoring by using the Recording Level slider located in the track’s settings window. Once you’ve enabled input monitoring and adjusted your recording level, you’ll be able to hear yourself singing as you record in GarageBand.
Conclusion
In conclusion, AirPods can be used as a monitor in GarageBand but cannot be used as an input. This is due to the Bluetooth nature of AirPods and the latency it causes. Additionally, if Monitoring is not turned on in Smart Controls or on the track header, or if Input/Output settings are not setup properly in GarageBand’s Preferences, then you will not be able to hear while recording. Therefore, it is important to make sure that these settings are all correct before attempting to use AirPods with GarageBand.


